Using Whiteboard Content Generation with AI Companion
Users can leverage Whiteboard Content Generation with AI Companion to unlock visual ideation for an improved Whiteboard experience. Users can generate ideas, refine and extend existing content, and add objects to a canvas with just one click.
Learn more about other Zoom AI Companion features and how Zoom AI Companion features handle your data.
For language availability, review the supported languages for Zoom AI Companion features.
Requirements for using Whiteboard Content Generation with AI Companion
- A Zoom Workplace Pro, Zoom Workplace Pro Plus, Zoom Workplace Business, Zoom Workplace Business Plus, Zoom Workplace Enterprise, Zoom Workplace Enterprise Plus, or Enterprise Bundle account
- Assigned a Whiteboard or Whiteboard Plus add-on
- Whiteboard Content Generation enabled
- Zoom desktop app for Windows, macOS, or Linux: Global minimum version or higher
- Zoom mobile app for Android or iOS: Global minimum version or higher
Note: AI Companion may not be available for select verticals and select regional customers.
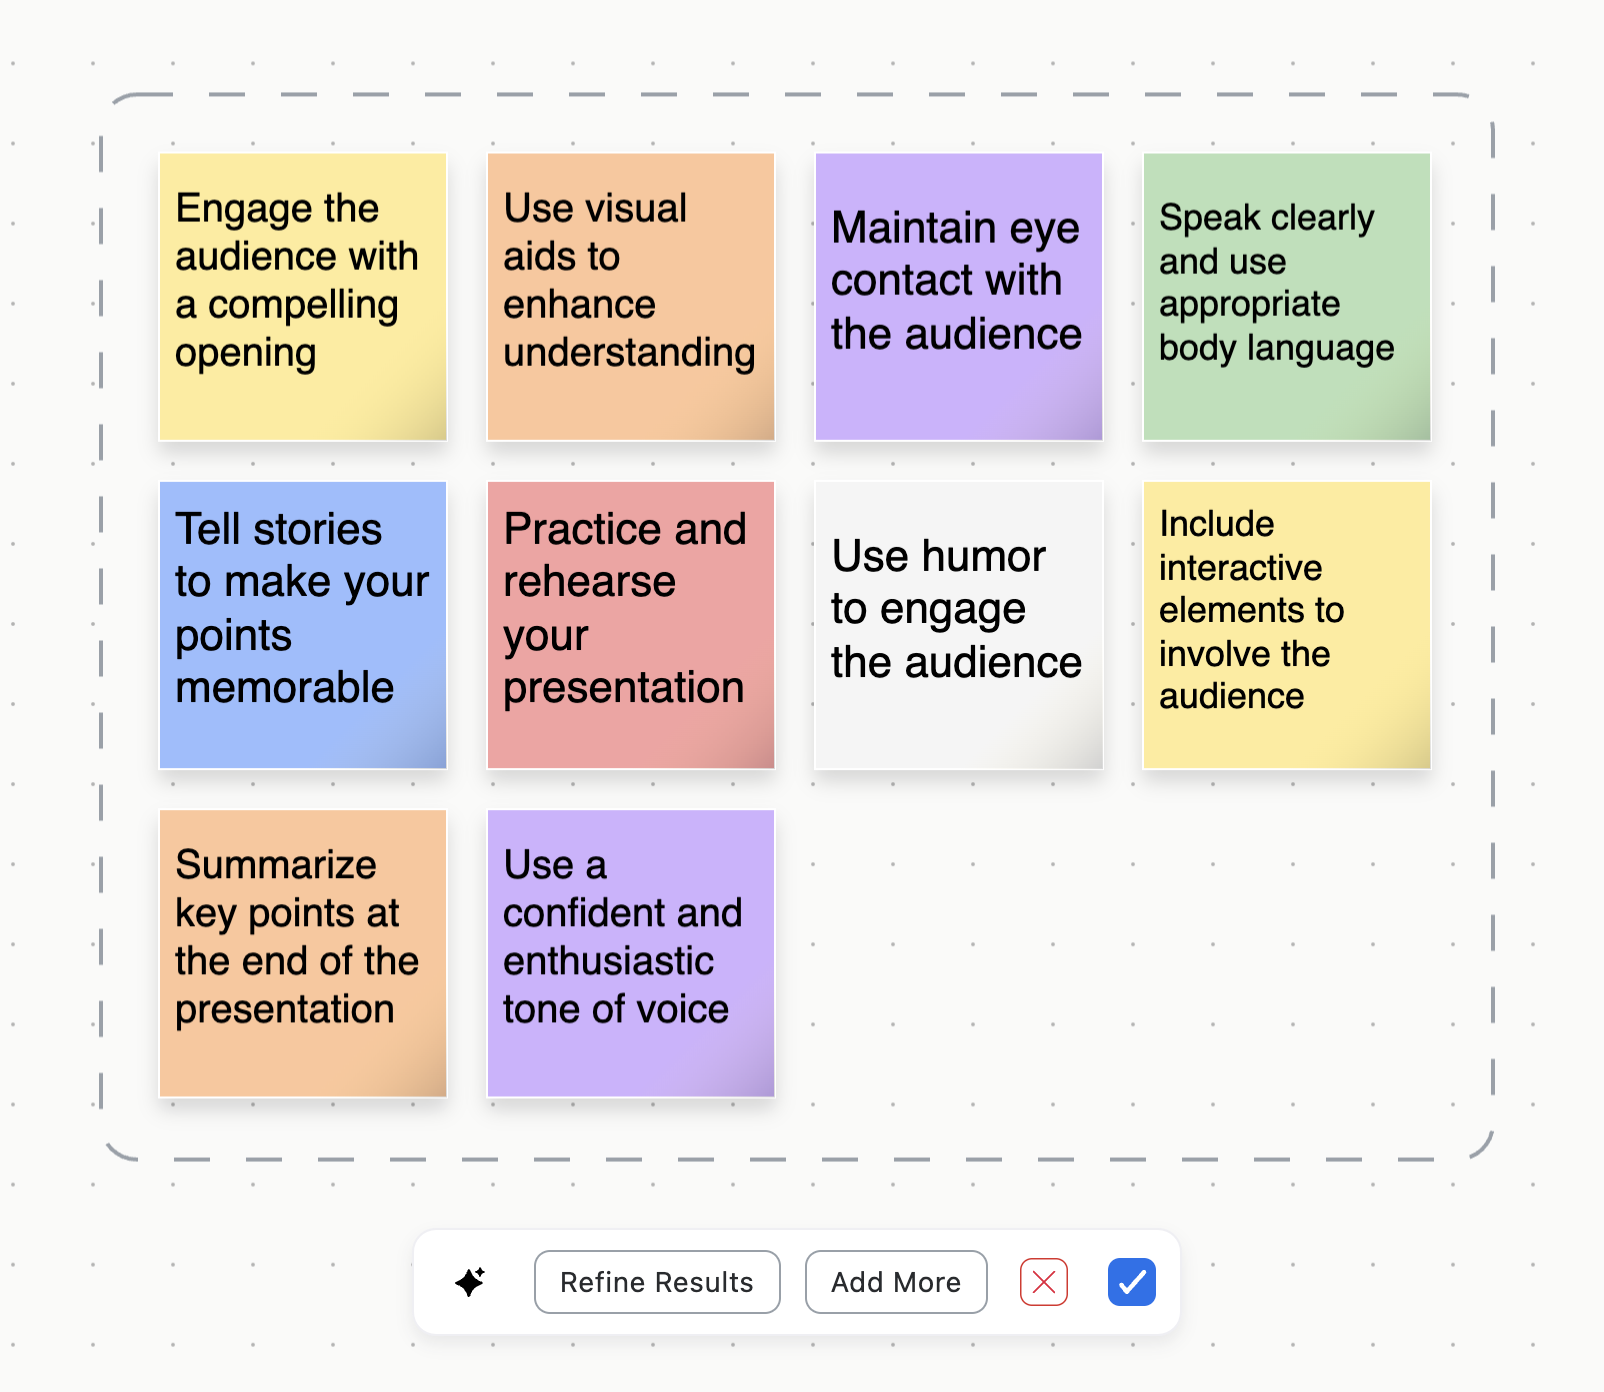
How to generate sticky notes using Whiteboard Content Generation
- Create or open an existing whiteboard.
- In the left toolbar, click the AI Companion icon
 .
.
The Whiteboard Content Generation prompt will appear. - Enter a command in the prompt field or select from the list of suggested ideas.
- Right next to the prompt field, expand the drop-down list and select Generate Stickies.
- Click the send icon
 .
.
Your generated content will appear. - (Optional) Click Refine Results to narrow down your search criteria, apply filters, and obtain more precise and relevant information. You can enter a more detailed command into the prompt field or select from the list of suggested ideas.
- (Optional) Click Add More to add more relevant content in sticky notes.
- (Optional) Click the close icon
 to cancel the sticky notes generation.
 - When you are satisfied with the generated content, click the checkmark icon
 .
.
How to generate a table using Whiteboard Content Generation
- Create or open an existing whiteboard.
- In the left toolbar, click the AI Companion icon .
The Whiteboard Content Generation prompt will appear. - Enter a command in the prompt field or select from the list of suggested ideas.
- Right next to the prompt field, expand the drop-down list and select Generate Table.
- Click the send icon .
Your generated content will appear. A notification bar will also appear on the right. - Click Preview.
- (Optional) Click Refine Results to narrow down your search criteria, apply filters, and obtain more precise and relevant information. You can enter a more detailed command into the prompt field or select from the list of suggested ideas.
- (Optional) Format the table using the following options:
- Click Fill to complete or populate a table with relevant data or information. .
- Click Add row to insert a new row into the table.
- Click Add column insert a new column into the table.
- (Optional) Click the close icon to cancel the table content generation.
- When you are satisfied with the generated content, click the checkmark icon .
How to generate texts using Whiteboard Content Generation
- Create or open an existing whiteboard.
- In the left toolbar, click the AI Companion icon .
The Whiteboard Content Generation prompt will appear. - Enter a command in the prompt field or select from the list of suggested ideas.
- Right next to the prompt field, expand the drop-down list and select Generate Text.
- Click the send icon .
- (Optional) Click Refine Results to narrow down your search criteria, apply filters, and obtain more precise and relevant information. You can enter a more detailed command into the prompt field or select from the list of suggested ideas.
- (Optional) Expand the Length drop-down menu to adjust the length of your generated text. You have the option to shorten or lengthen the text, summarize in a single sentence, or rewrite it in bullet points.
- (Optional) Expand the Tone drop-down menu to change the tone of your generated text. You can choose from Professional, Casual, Formal or Forceful.
- (Optional) Click the close icon to cancel the text generation.
- When you are satisfied with the generated content, click the checkmark icon .
How to generate Mindmap using Whiteboard Content Generation
- Create or open an existing whiteboard.
- In the left toolbar, click the AI Companion icon .
The Whiteboard Content Generation prompt will appear. - Enter a command in the prompt field or select from the list of suggested ideas.
- Right next to the prompt field, expand the drop-down list and select Generate Mindmap.
- Click the send icon .
- (Optional) Click Refine Results to narrow down your search criteria, apply filters, and obtain more precise and relevant information. You can enter a more detailed command into the prompt field or select from the list of suggested ideas.
- (Optional) Click Simplify to generate a simpler flowchart.
- (Optional) Click Expand to generate a more complex flowchart.
- (Optional) Click the close icon to cancel the Mindmap generation.
- When you are satisfied with the generated content, click the checkmark icon .
How to edit existing whiteboard content using Whiteboard Content Generation
Organize sticky notes
- Create or open an existing whiteboard.
- Select one or multiple sticky notes that you want to organize using Whiteboard Content Generation.
A pop-up menu will appear. - Click the AI Companion icon .
- Select an option that allows you to enhance the selected content.
- If you select a single sticky note, you can create additional similar stickies.
- If you choose multiple sticky notes, you have the option to create similar stickies or identify and group related ones together for better organization and management.
Format table
- Create or open an existing whiteboard.
- Select the table that you want to format using Whiteboard Content Generation.
A pop-up menu will appear. - Click the AI Companion icon .
- Format the table using the following options:
- Fill: Allows you to populate the cells of a table with data or content.
- Add row: Allows you to insert a new row into a table.
- Add column: Allows you to insert a new column into a table.
Edit text
- Create or open an existing whiteboard.
- Select the text that you want to edit using Whiteboard Content Generation.
A pop-up menu will appear. - Click the AI Companion icon .
- Edit the text using the following options:
- Length: Allows you to shorten or lengthen the text, summarize in a single sentence, or rewrite it in bullet points.
- Tone: Allows you to modify the tone of the text to match your preference, selecting from options such as Professional, Casual, Formal, or Forceful.