Migrating Zoom Meetings from Salesforce to Zoom for Salesforce Lightning app
Admins can use the following article to migrate data from the old Zoom for Salesforce app to the new Zoom for Salesforce Lightning app, which adds support for Zoom Meetings, Zoom Webinars, and Zoom Phone to the existing support for Zoom Contact Center.
There are 2 migration options:
- Choose not to migrate data from the old app to the new one and retain old objects.
- Choose to migrate the data from the old app to the new app.
Requirements for migrating Zoom Meetings data to the Zoom for Salesforce Lightning app
- Salesforce admin permissions
- Installed and configured integration with the Zoom for Salesforce app
- Newly installed and configured integration with the Zoom for Salesforce Lightning app, version 2.0.0 or higher
- Salesforce Data Loader (Learn more about installing the Data Loader)
Note: Admins can also use the dataloader.io tool instead of the main Salesforce Data Loader, but instructions will vary slightly compared to what is provided below. - Access to Microsoft Excel or other spreadsheet editor
Note: Other spreadsheet editors can be used, but for the purpose of uniformity, the instructions below will be using Excel.
Limitations of migrating Zoom Meetings data to the Zoom for Salesforce Lightning app
- This guide does not require following instructions on how to migrate the CreatedByID, CreatedDate, LastModifiedbyID, and LastModifiedDate fields for each record, but the optional sections below can walk an admin through the required permission to migrate these fields.
- This guide does not provide instructions on how to migrate data from currently inactive users. It is possible to successfully migrate this data, with possible methods including re-activating those users temporarily or reassigning the records during the data migration to one or more currently active users. For additional assistance, please contact Salesforce Support.
- The Activities with Zoom Events (Zoom) custom report type, which was supported in the Zoom for Salesforce app, is not supported on the Zoom for Salesforce Lightning. If you intend to continue using this custom report type after migration, you will need to create a replacement manually.
How to migrate data to the new app
Zoom highly recommends testing this migration within a
sandbox environment, preferably a full copy sandbox, to ensure the migration preserves your environment’s desired functionality. Customizations, such as Flows, will likely break, as the Zoom objects within Flows will change. Ensure that such customizations are verified as functional before continuing on to migrating your production environment.
(Optional) Enable the Create Audit Fields permissions
Before migrating data, admins may want to consider enabling the ability to insert audit fields, which allows them to maintain full data integrity for the migrated data. Doing so allows the following fields to be migrated as well, ensuring the original dates associated with the data are migrated, rather than replaced with generic information associated with the migration date: CreatedByID, CreatedDate, LastModifiedbyID, LastModifiedDate.
If these permissions are enabled, additional steps will be required throughout the migration to retain these fields properly. These additional steps are mentioned, but not fully outlined below.
- Open Salesforce in a web browser and sign in to your account as an admin.
- In the top-right corner, click the gear icon
 .
. - In the drop-down menu, click Setup.
- In the Quick find search bar, search for and select User Interface.
- Under the User Interface section, find and select the User Interface option, located at the bottom of the list.
- Under the Setup section, click the checkbox for Enable “Set Audit Fields upon Record Creation” and “Update Records with Inactive Owners” User Permissions.
- At the bottom of the page, click Save to confirm the changes.
- In the Quick find search bar, search for and select Permission Sets.
- At the top of the list of permission sets, click New.
- For the Label field, enter a name for this permission set.
We recommend Zoom Audit Field Editor. - (Optional) Enter a description for this permission set.
- Click Save.
- Under the System section of this permission set, click System Permissions.
- At the top of the list of System Permissions, click Edit.
- Find and select the checkbox for the Set Audit Fields upon Record Creation.
- Scroll to the top of the page and click Save.
A confirmation window will appear. - Click Save to confirm the changes.
- At the top of the page, click Manage Assignments.
- In the top right corner, click Add Assignment.
- Select the user that will be performing the migration to add this permission set to, and then click Next to save the changes.
- (Optional) Configure the expiration date for this user to retain this permission set. Otherwise, click Assign to set the permission set indefinitely.
Note: Zoom recommends either setting an expiration date for when you expect migration to be complete OR removing this permission set after migration is complete, as these permissions can be used, either accidentally or maliciously, to alter these fields and misrepresent their associated records. - Click Assign to save the changes.
Disable meeting and events triggers
Before we begin migrating the Zoom meeting objects, we will want to disable email notifications to avoid sending unnecessary emails that would be triggered when the migration updates these objects. This should be reenabled after migration is complete.
- Open Salesforce in a web browser and sign in to your account as an admin.
- In the top-right corner, click the gear icon .
- In the drop-down menu, click Setup.
- In the Quick find search bar, search for and select Custom Metadata Types.
- Next to Avoid Trigger Setting, click Manage Records.
- Next to Avoid Trigger for Data Migration, click Edit.
- Select the checkbox for both Avoid Event Trigger and Avoid Meeting Trigger items.
- Click Save.
Migrate Zoom Meeting objects
With email triggers disabled for Meetings and Events triggers, we can proceed to the meeting migration.
- Open the Salesforce Data Loader.
Note: You may encounter the following macOS permissions error: macOS cannot verify the developer of ‘dataloader-58.0.3.jar’. To resolve this, follow Apple’s guide for overriding your security settings for this app. - Click Export.
- Select the environment you want to export data from and click Login.
If this is your first time launching the Data Loader, you will be prompted to sign in to your Salesforce account as an admin. - In the list of Salesforce objects exportable from your account, find and select Zoom Event (zoom_app__Zoom_Event__c).
- Next to Choose a target for extraction, click Browse to select a location and name for the file to be exported.
For the purpose of this guide, this file will be referred to as MeetingExport.
Note: It is recommended that you select a specific location for your extractions, as you will need to find and select these files again in later steps for importing this data. - Click Next.
- Click Select all fields.
- Click Finish to export all fields as MeetingExport.csv.
The export process will be performed and the file saved to your chosen location. A confirmation window will appear when the export is complete. - Click Ok to close these windows.
- Open the exported CallLogExport CSV file with Excel.
- Find and rename the ID column to ID_V1.
Note: Depending on if/how you are migrating inactive users’ data, here is where you would potentially want to map the OWNERID field for the various records from inactive users to currently active users in your organization. For additional assistance, please contact Salesforce Support. - For each row (each meeting record)...
- If a URL is present under the ZOOM_APP__START_URL__C column, no additional steps are required.
- If no URL is present under the ZOOM_APP__START_URL__C column, combine any URLs found in that record’s corresponding ZOOM_APP__START_URL_1__C, ZOOM_APP__START_URL_2__C, and ZOOM_APP__START_URL_3__C columns, each separated by a +.
- For example: https://zoom.us/j/12345678+https://zoom.us/j/123456789+https://zoom.us/j/1234567890
- Save the changes to the MeetingExport CSV file.
- In the Salesforce Data Loader, click Insert.
- In the list of Salesforce objects, select Zoom Meeting (ZVC__Zoom_Meeting__c).
- Next to the Choose CSV file, click Browse.
- Find and select the exported and edited MeetingExport file.
- Click Next.
The data will be read by the data loader. - Click Ok to close the confirmation window.
- Click Choose an Existing Map and select the ZoomMeetingMapping.sdl, which can be downloaded here: ZoomMeetingMapping.sdl
Note: For accounts with additional custom mapping, or accounts choosing to migrate the audit fields, after uploading the file above admins would select Create or Edit a Map to then drag-and-drop their additional fields to the old fields listed below that they want to map to. These custom fields must already exist in the new app’s object in order to properly import the custom field(s) from the old app. - Click Next.
- Select a directory for storing generated import logs.
Two files will be exported, one for any errors and the other for successful imports. Only the file generated for successful imports is needed and used in later steps.
For the purpose of this guide, this file will be referred to as MeetingSuccess.
Note: It is recommended that you select a specific location for your extractions, as you will need to find and select these files again in later steps for importing this data. - Click Finish to start the import.
- Click Yes to confirm inserting records.
The import will take place and a confirmation window will appear when complete.
Note: If you intend on validating the imported data, Zoom recommends noting how many records were successfully imported, so that this can be compared to the call logs. - Click Ok to close the confirmation window.
Update Meeting Event objects
After migrating the Zoom Meetings logs, we will now also update the Events associated with those meetings.
- In the Salesforce Data Loader, click Export All.
- In the list of Salesforce objects exportable from your account, find and select Event (Event).
- Next to Choose a target for extraction, click Browse to select a location and name for the file to be exported.
For the purpose of this guide, this file will be referred to as MeetingEventExport.
Note: It is recommended that you select a specific location for your extractions, as you will need to find and select these files again in later steps for importing this data. - Click Next.
- Copy and paste the following information into the large text field at the bottom of the export window:
SELECT AccountId, ActivityDate, ActivityDateTime, CreatedById, CreatedDate, Description, DurationInMinutes, EndDate,
EndDateTime, EventSubtype, GroupEventType, Id, IsAllDayEvent, IsArchived, IsChild, IsDeleted, IsGroupEvent, IsPrivate,
IsRecurrence, IsRecurrence2, IsRecurrence2Exception, IsRecurrence2Exclusion, IsReminderSet, LastModifiedById,
LastModifiedDate, Location, OwnerId, Recurrence2PatternStartDate, Recurrence2PatternText, Recurrence2PatternTimeZone,
Recurrence2PatternVersion, RecurrenceActivityId, RecurrenceDayOfMonth, RecurrenceDayOfWeekMask, RecurrenceEndDateOnly,
RecurrenceInstance, RecurrenceInterval, RecurrenceMonthOfYear, RecurrenceStartDateTime, RecurrenceTimeZoneSidKey,
RecurrenceType, ReminderDateTime, ShowAs, StartDateTime, Subject, SystemModstamp, WhatId, WhoId,
ZVC__Schedule_a_Zoom_Meeting__c, ZVC__Session_History__c, ZVC__Zoom_Call_Log__c, ZVC__Zoom_Meeting__c, ZVC__Zoom_Task_Type__c,
zoom_app__Additional_Emails__c, zoom_app__Customer_Duration_of_Meeting__c, zoom_app__Customer_Start_Time__c,
zoom_app__Customer_Time_Zone__c, zoom_app__ICS_Sequence__c, zoom_app__Join_before_host__c, zoom_app__Make_it_Zoom_Meeting__c,
zoom_app__Use_personal_Zoom_meeting_Id__c, zoom_app__Zoom_Call_Log__c, zoom_app__Zoom_Event__c
FROM Event
WHERE
zoom_app__Zoom_Event__c !=''
- Click Finish to export the selected fields as MeetingEventExport.csv.
The export process will be performed and the file saved to your chosen location. A confirmation window will appear when the export is complete. - Click Ok to close these windows.
- In Excel, open the MeetingEventExport CSV file from Step 6.
Note: If you are not following the instructions for enabling the Create Audit Fields permission, here is where admins would potentially want to map the OWNERID field for the various records from inactive users to currently active users in their organization. If your migration is following those instructions, no additional steps are necessary. For additional assistance, please contact Salesforce Support. - Find the ZVC__SCHEDULE_A_ZOOM_MEETING__C column and change all cells below from FALSE to TRUE.
- In the Excel ribbon toolbar, click Data.
- Click Get Data (Power Query).
A window to select the source of the new data will appear. - Click the Text/CSV option.
- Click Browse.
- Find and select the MeetingSuccess CSV file generated in step 24.
- Click Get Data to confirm the file selection.
- Click Next to open the selected file.
- Click Load to import the previewed data.
This data will be imported as a new sheet. - In the MeetingSuccess sheet, find the ID_V1 column and sort in ascending order.
Note: This can be easily done by clicking the drop-down option at the top of the column and selecting Ascending. - At the bottom of the Excel window, switch to the MeetingEventExport sheet.
Next, we will use the IFNA and LOOKUP functions to match ID_V1 to the new ID of each object that was created on import. These functions will be placed in the ZVC__ZOOM_MEETING__C column.
Note: LOOKUP finds and matches the two values, while the IFNA function allows us to set the field as a blank value if LOOKUP does not find a matching ID, preventing errors when importing. - In the first empty cell of the ZVC__ZOOM_MEETING__C column in the MeetingEventExport sheet, enter the following formula:
=IFNA(LOOKUP(CELL1, COLUMN1, COLUMN2),"") where the following values are defined below:
- CELL1: The corresponding row value under the ZOOM_APP__ZOOM_EVENT__C column in the MeetingEventExport sheet.
- COLUMN1: The ID_V1 column in the newly imported MeetingSuccess sheet.
- COLUMN2: The ID column in the newly imported MeetingSuccess sheet.
Once the formula is set, this should appear in the formula editor similar to this: =IFNA(LOOKUP(BK2,success072723014916185!D:D,success072723014916185!A:A),””)
- Select the cell with the formula and double-click the small square in the bottom-right corner to automatically populate the function in the rest of the column.
- Save the changes to the MeetingEventExport file.
Note: Ensure you have the MeetingEventExport sheet selected before saving changes. Otherwise, the incorrect data sheet will be saved as the MeetingEventExport CSV file and you must restart this section. - In the Salesforce Data Loader, click Update.
- In the list of Salesforce objects, select Event (Event).
- Next to the Choose CSV file, click Browse.
- Find and select the recently edited MeetingEventExport file.
- Click Next.
The data will be read by the data loader. - Click Ok to close the confirmation window.
- Click Create or Edit a Map.
- Select Auto-Match Fields to Columns.
This will automatically match all fields. - In the Salesforce Object Field Name column, find and then click-and-drag the ActivityDate field back to the table above to unmatch this field.
Note: Keeping this field matched will result in unsuccessful updates. - Click Ok.
- Click Next.
- Select a directory for storing generated import logs.
Two files will be exported, one for any errors and the other for successful imports. Only the file generated for successful imports is needed and used in later steps.
For the purpose of this guide, this file will be referred to as MeetingSuccess.
Note: It is recommended that you select a specific location for your extractions, as you will need to find and select these files again in later steps for importing this data.
- Click Finish to start the import.
- Click Yes to confirm inserting records.
The import will take place and a confirmation window will appear when complete.
Note: If you intend on validating the imported data, Zoom recommends noting how many records were successfully imported, so that this can be compared to the meeting logs. - Click Ok to close the confirmation window.
Update the new Zoom Meeting objects to house the Event fields that have moved
With the Zoom for Salesforce app, the Join Before Host, Additional Emails, and Use personal meeting ID fields were contained by the Event object, whereas the Zoom for Salesforce Lightning app now has these fields contained in the Zoom Meeting object. Because of this, the steps below will guide admins through migrating these fields to the new object.
- In the Salesforce Data Loader, click Export.
- In the list of Salesforce objects exportable from your account, find and select Zoom Meeting (ZVC__Zoom_Meeting__c).
- Next to Choose a target for extraction, click Browse to select a location and name for the file to be exported.
For the purpose of this guide, this file will be referred to as MeetingExport2.
Note: It is recommended that you select a specific location for your extractions, as you will need to find and select these files again in later steps for importing this data. - Click Next.
- Click Select all fields.
- Click Finish to export the selected fields as MeetingExport2.csv.
The export process will be performed and the file saved to your chosen location. A confirmation window will appear when the export is complete. - Click Ok to close these windows.
- In Excel, open the MeetingExport2 CSV file from step 6.
- In the Excel ribbon toolbar, click Data.
- Click Get Data (Power Query).
A window to select the source of the new data will appear. - Click the Text/CSV option.
- Click Browse.
- Find and select the MeetingEventExport CSV file, last edited in step 22.
- Click Get Data to confirm the file selection.
- Click Next to open the selected file.
- Click Load to import the previewed data.
This data will be imported as a new sheet. - In the MeetingEventExport sheet, find the ZVC__ZOOM_MEETING__C column and sort in ascending order.
Note: This can be easily done by clicking the drop-down option at the top of the column and selecting Ascending. - In the first empty cell of the ZVC__JOIN_BEFORE_HOST__C column in the MeetingExport2 sheet, enter the following formula:
=IFNA(LOOKUP(CELL1, COLUMN1, COLUMN2,),"") where the following values are defined below:
- CELL1: The corresponding row value under the ID column in the MeetingExport2 sheet.
- COLUMN1: The ZVC__ZOOM_MEETING__C column in the newly imported MeetingEventExport sheet.
- COLUMN2: The ZOOM_APP__JOIN_BEFORE_HOST__C column in the newly imported MeetingEventExport sheet.
Once the formula is set, this should appear in the formula editor similar to this: =IFNA(LOOKUP(C2,MeetingEventExport!AZ:AZ,MeetingEventExport!BG:BG),””)
- Select the cell with the formula and double-click the small square in the bottom-right to automatically populate the function in the rest of the column.
- In the first empty cell of the ZVC__ADDITIONAL_EMAILS__C column in the MeetingExport2 sheet, enter the following formula:
=IFNA(LOOKUP(CELL1, COLUMN1, COLUMN2,),"") where the following values are defined below:
- CELL1: The corresponding row value under the ID column in the MeetingExport2 sheet.
- COLUMN1: The ZVC__ZOOM_MEETING__C column in the newly imported MeetingEventExport sheet.
- COLUMN2: The ZOOM_APP__ADDITIONAL_EMAILS__C column in the newly imported MeetingEventExport sheet.
Once the formula is set, this should appear in the formula editor similar to this: =IFNA(LOOKUP(C2,MeetingEventExport!AZ:AZ,MeetingEventExport!BB:BB),””)
- Select the cell with the formula and double-click the small square in the bottom-right corner to automatically populate the function in the rest of the column.
- In the first empty cell of the ZVC__USE_PERSONAL_MEETING_ID__C column in the MeetingExport2 sheet, enter the following formula:
=IFNA(LOOKUP(CELL1, COLUMN1, COLUMN2,),"") where the following values are defined below:
- CELL1: The corresponding row value under the ID column in the MeetingExport2 sheet.
- COLUMN1: The ZVC__ZOOM_MEETING__C column in the newly imported MeetingEventExport sheet.
- COLUMN2: The ZOOM_APP__USE_PERSONAL_ZOOM_MEETING_ID__C column in the newly imported MeetingEventExport sheet.
Once the formula is set, this should appear in the formula editor similar to this: =IFNA(LOOKUP(C2,MeetingEventExport!AZ:AZ,MeetingEventExport!BI:BI),””)
- Select the cell with the formula and double-click the small square in the bottom-right corner to automatically populate the function in the rest of the column.
- Save the changes to the MeetingExport2 file.
Note: Ensure you have the MeetingExport2 sheet selected before saving changes. Otherwise, the incorrect data sheet will be saved as the MeetingExport2 CSV file and you must restart this section. - In the Salesforce Data Loader, click Update.
- In the list of Salesforce objects, select Zoom Meeting (ZVC__Zoom_Meeting__c).
- Next to the Choose CSV file, click Browse.
- Find and select the recently edited MeetingExport2 file.
- Click Next.
The data will be read by the data loader. - Click Ok to close the confirmation window.
- Click Create or Edit a Map.
- Select Auto-Match Fields to Columns.
This will automatically match all fields. - In the Salesforce Object Field Name column, find and then click and drag the Name field back to the table above to unmatch this field.
Note: Keeping this field matched will result in unsuccessful updates. - Click Ok.
- Click Next.
- Select a directory for storing generated import logs.
- Click Finish to start the import.
- Click Yes to confirm inserting records.
The update will take place and a confirmation window will appear when complete. - Click Ok to close the confirmation window.
(Optional) Validate the imported meeting data
After data has been migrated for the new app, admins can validate that the migrated data is imported properly.
- Open Salesforce in a web browser and sign in to your account as an admin.
- In the top-right corner, click the gear icon .
- In the drop-down menu, click Developer Console.
The developer console will open in a new browser tab or window. - At the bottom of the page in the Query Editor, paste the following query:
SELECT Id, createdDate, lastModifiedDate, ZVC__UUID__c, ZVC__join_before_host__c,
ZVC__Additional_Emails__c, ZVC__Use_personal_meeting_ID__c FROM ZVC__Zoom_Meeting__c
ORDER BY createdDate DESC
- At the bottom-left corner of the page, click Execute.
A list with Id, createdDate, lastModifiedDate, ZVC__UUID__c, ZVC__join_before_host__c, ZVC__Additional_Emails__c, and ZVC__Use_personal_meeting_ID__c columns will appear.
- If the cells beneath the ZVC__UUID__c column have values and the cells beneath the ZVC__join_before_host__c, ZVC__Additional_Emails__c, and ZVC__Use_personal_meeting_ID__c columns match your MeetingExport2 CSV file, the meeting details data migration was completed successfully.
- Another simple check is to compare the number of successfully imported items from step 24 of the Zoom Meeting objects migration section with the total rows from the query result. The total number of rows should be greater than or equal to the number of successful imports, depending on if your users are already using the integration.
Note: If you did enable audit fields permissions, the createdDate and lastModifiedDate columns should be the original dates for those logs. If you did not enable audit fields permissions, the createdDate and lastModifiedDate columns will be the date of the migration, rather than the original date.
(Optional) Validate the updated Event data
After data has been migrated for the new app, admins can validate that the migrated data is imported properly.
- Open Salesforce in a web browser and sign in to your account as an admin.
- In the top-right corner, click the gear icon .
- In the drop-down menu, click Developer Console.
The developer console will open in a new browser tab or window. - At the bottom of the page in the Query Editor, paste the following query:
SELECT Id, createdDate, lastModifiedDate, ZVC__Zoom_Meeting__c FROM Event WHERE
ZVC__Zoom_Meeting__c != '' ORDER BY createdDate DESC
- At the bottom-left corner of the page, click Execute.
A list with Id, createdDate, lastModifiedDate, and ZVC__Zoom_Meeting__c columns will appear.
- If the cells beneath the ZVC__Zoom_Meeting__c column have values, the meeting event data migration was completed successfully.
- Another simple check is to compare the number of successfully imported items from step 38 of the meeting Event objects migration section with the total rows from the query result. The total number of rows should be greater than or equal to the number of successful imports, depending on if your users are already using the integration.
Note: If you did enable audit fields permissions, the createdDate and lastModifiedDate columns should be the original dates for those logs. If you did not enable audit fields permissions, the createdDate and lastModifiedDate columns will be the date of the migration, rather than the original date.
Re-enabling the meeting and events triggers
Now that we’re finished with Zoom Meetings data migration, you will want to re-enable the meeting and events triggers.
- Open Salesforce in a web browser and sign in to your account as an admin.
- In the top-right corner, click the gear icon .
- In the drop-down menu, click Setup.
- In the Quick find search bar, search for and select Custom Metadata Types.
- Next to Avoid Trigger Settings, click Manage Records.
- Next to Avoid Trigger for Data Migration, click Edit.
- Deselect the checkbox for both Avoid Event Trigger and Avoid Meeting Trigger items.
- Click Save.
Removing the Zoom for Salesforce (v1) app
Once you have completed the data migration for Zoom Meetings, Zoom Phone, and Zoom Webinars (if applicable), you can remove the original Zoom for Salesforce app and continue using the Zoom for Salesforce Lightning app.
- Open the Zoom App Marketplace.
- Sign in as an account admin.
- Search for and select the Zoom for Salesforce app.
- Scroll to the bottom of the page and under the Manage section, click Remove.
- Click Remove to confirm removing the app.
- Open Salesforce and sign in to your account as an admin.
- In the top-left corner, click the 9-dots icon and search for and select Zoom config.
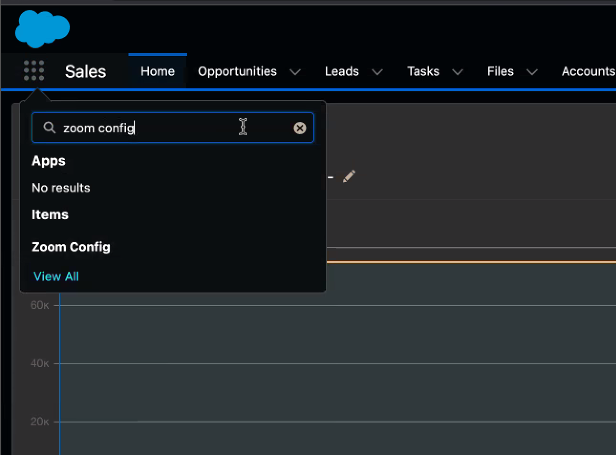
- Under the Zoom OAuth section, click Cancel authorization from Zoom App Marketplace.
- Click Confirm.
Note: If you need to roll back and reauthorize the Zoom for Salesforce app, click the Authorize from Zoom App Marketplace.
(Optional) Full removal of Zoom for Salesforce (v1) app package
These steps will fully remove the Zoom app package and all associated objects. If this is done, rolling back to Zoom for Salesforce (v1) will not be an option, as re-adding the app would result in a fresh install, with no previous data being recovered.
- In the top-right corner, click the gear icon .
- In the drop-down menu, click Setup.
- In the Quick find search bar, search for and select Installed Packages.
- To the left of the Zoom package, click Uninstall.
Note: Ensure you are uninstalling the Zoom package and not the Zoom For Lightning package, as uninstalling the new app will undo all migration work. - At the bottom of the page, check the Yes, I want to uninstall this package and permanently delete all associated components checkbox.
- Click Uninstall to proceed with the app package removal.
If you see the Unable to uninstall package error message, review the problems listed below to address those issues and repeat steps 3–6. These are typically associated with objects still in use or permission sets still assigned to users, so an admin will need to address this within Salesforce setup settings.
Before beginning any migration of data, ensure that you have completed the configuration guides for the Zoom products you want to migrate data for.