Configuring LTI Pro 1.3 for Blackboard


With the LTI Pro 1.3 app, organizations can integrate their Schoology instance with Zoom, allowing instructors to create, launch, and manage Zoom Meetings utilized for their virtual or hybrid classes from within the Blackboard LMS. 

Note: Please ensure that LTI Pro has been installed and you are signed in to configure LTI Pro.

This article covers:

Prerequisites for configuring LTI Pro 1.3 with Blackboard

How to create new credentials

  1. Create a new LTI credential.
  2. (Optional) Update a credential from LTI 1.1. to LTI 1.3. in the configuration page by choosing LTI 1.3 under Select which LTI version to use.
  3. Click Save.

    You will see an LTI Pro configuration page after clicking Save.

How to create a Client ID in BlackBoard

Register a new application

  1. Register your applications.zoom.us application at https://developer.blackboard.com/.
  2. Fill in the Application Name and Description fields. 

  3. In Domain(s) field, enter "zoom.us".

  4. Enable My Integration supports LTI 1.3.

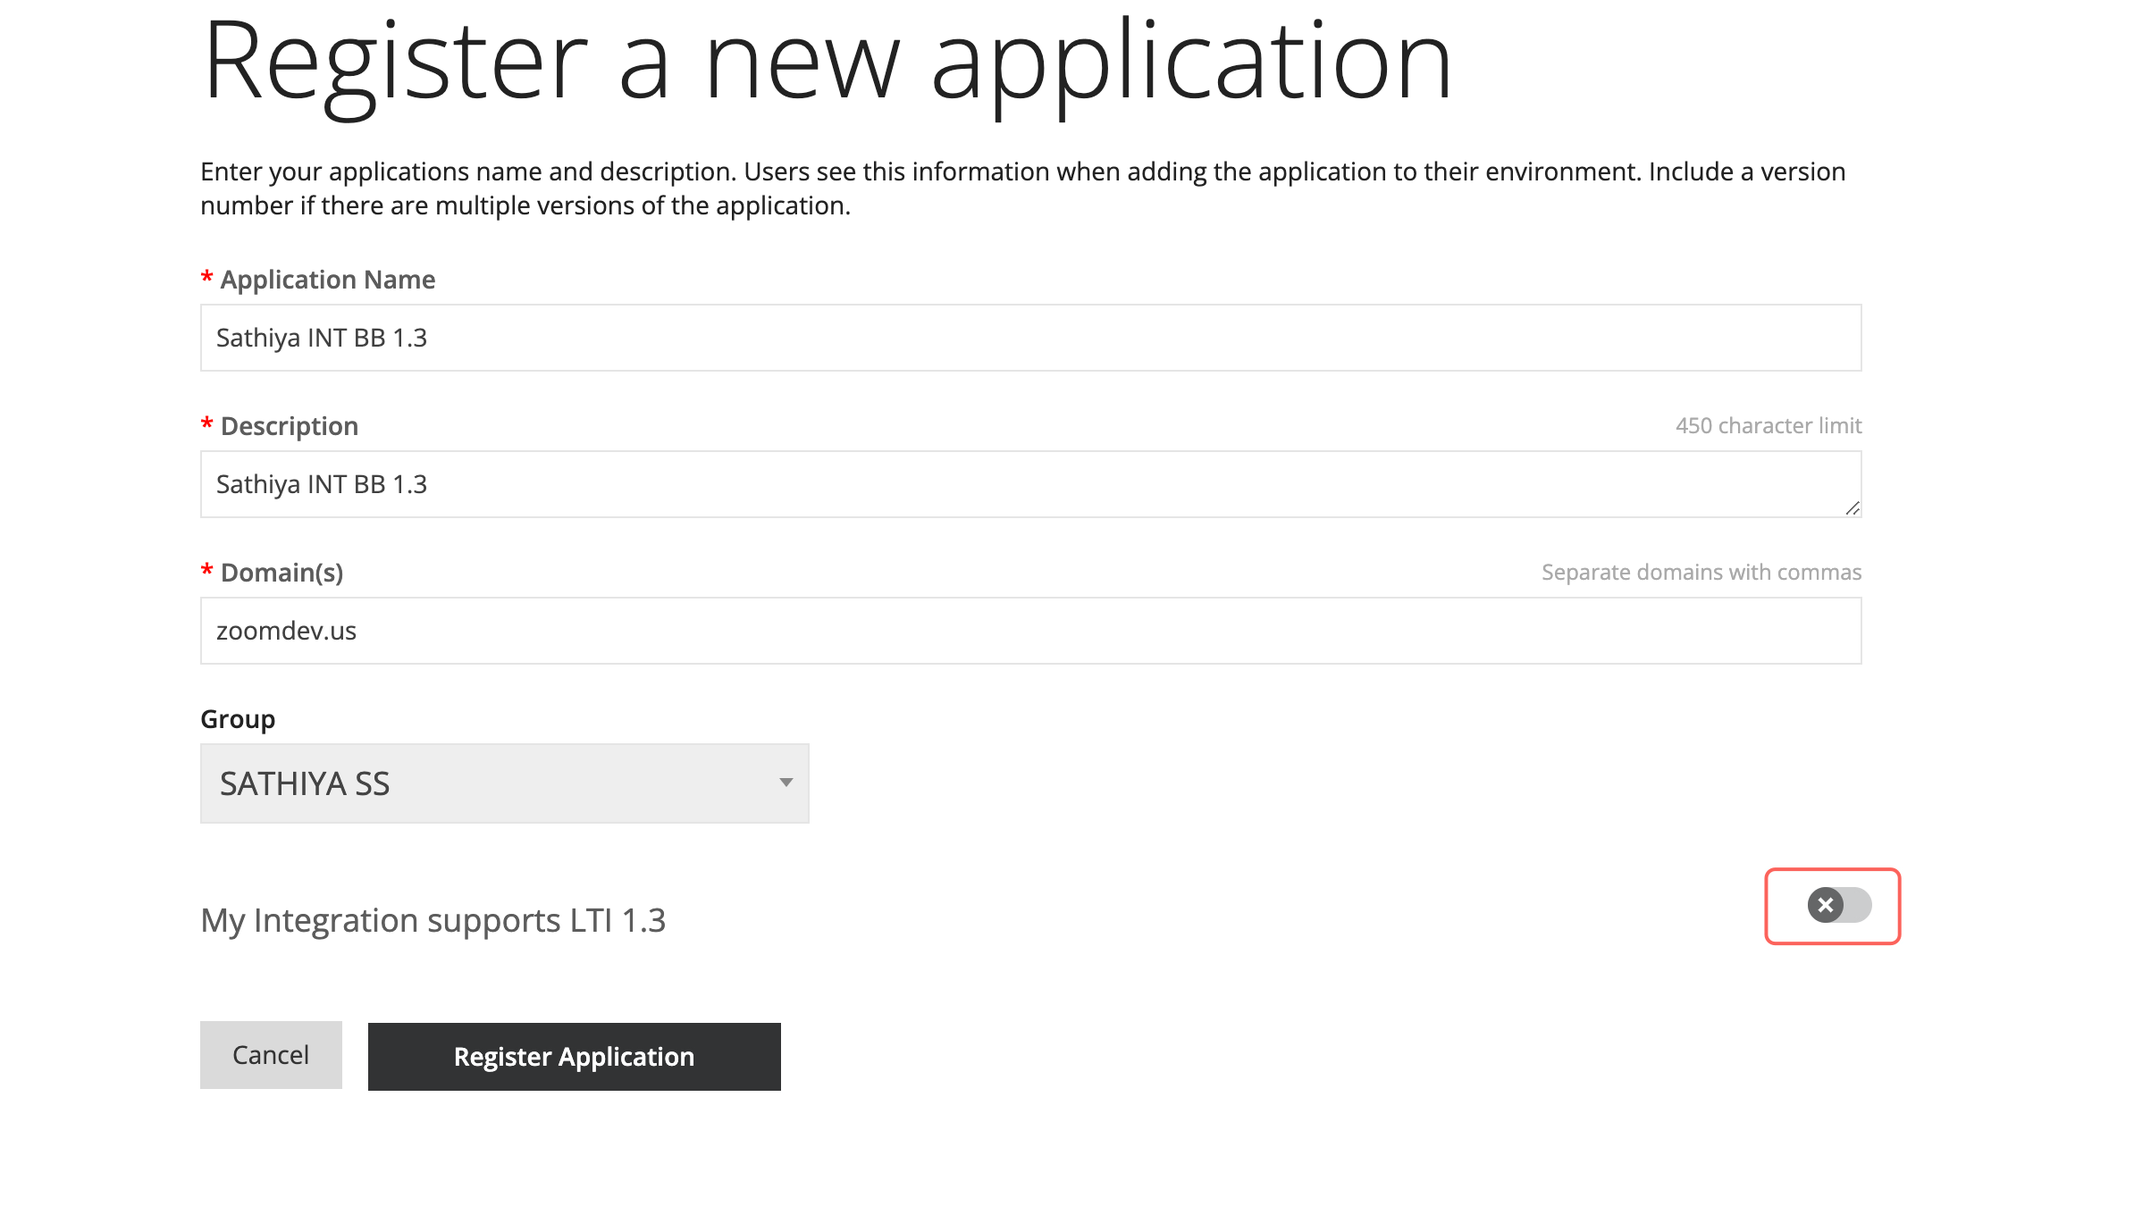
  5. In the Zoom LTI configuration page, copy the Login Initiation URL and paste the value in the Login Initiation URL in Blackboard.

  6. In the Zoom LTI configuration page, copy the Tool Redirect URL and paste the value in the Tool Redirect URL(s) in Blackboard.
  7. In the Zoom LTI configuration page, copy the Public JWK URL and paste the value in the Tool JWKS URL in Blackboard.
  8. For the signing Algorithm select RS256.

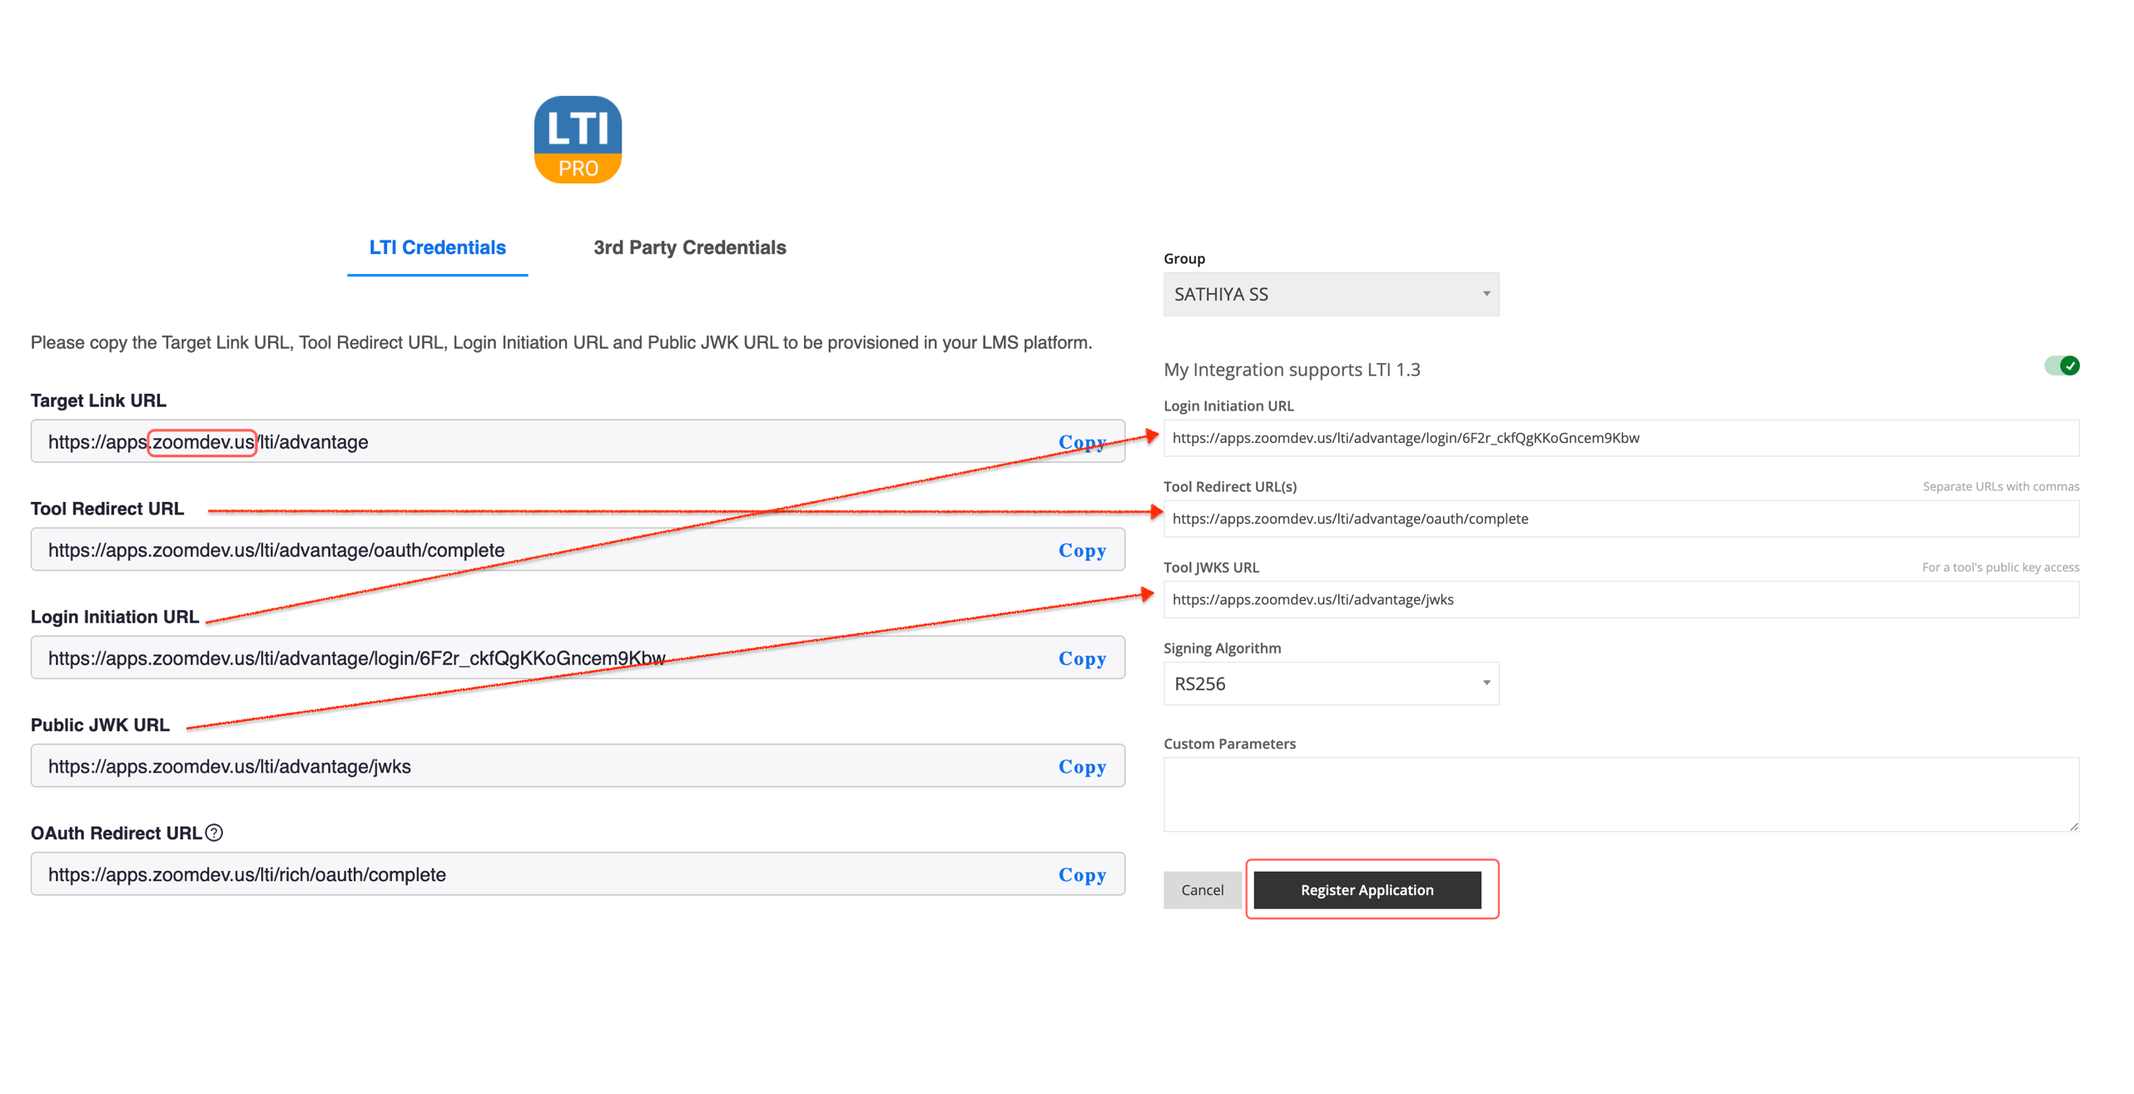
  9. Click Register Application.

Configure the Client ID

  1. In Blackboard, navigate to the newly registered application.
  2. Copy the Application ID.
  3. In the Zoom Marketplace, open the Zoom LTI Pro app.
  4. Click 3rd Party Credentials, then BlackBoard.
  5. Click Add Instance.
  6. Enter your BlackBoard Site Domain.
  7. Copy the Application ID under My Applications in BlackBoard.
  8. Paste the Application ID retrieved in the previous step, in the Client ID field in LTI Pro.
  9. Click Save.

Registering the LTI tool

  1. Log into BlackBoard as an Administrator.

  2. In the Administrator panel, click LTI Tool Providers.

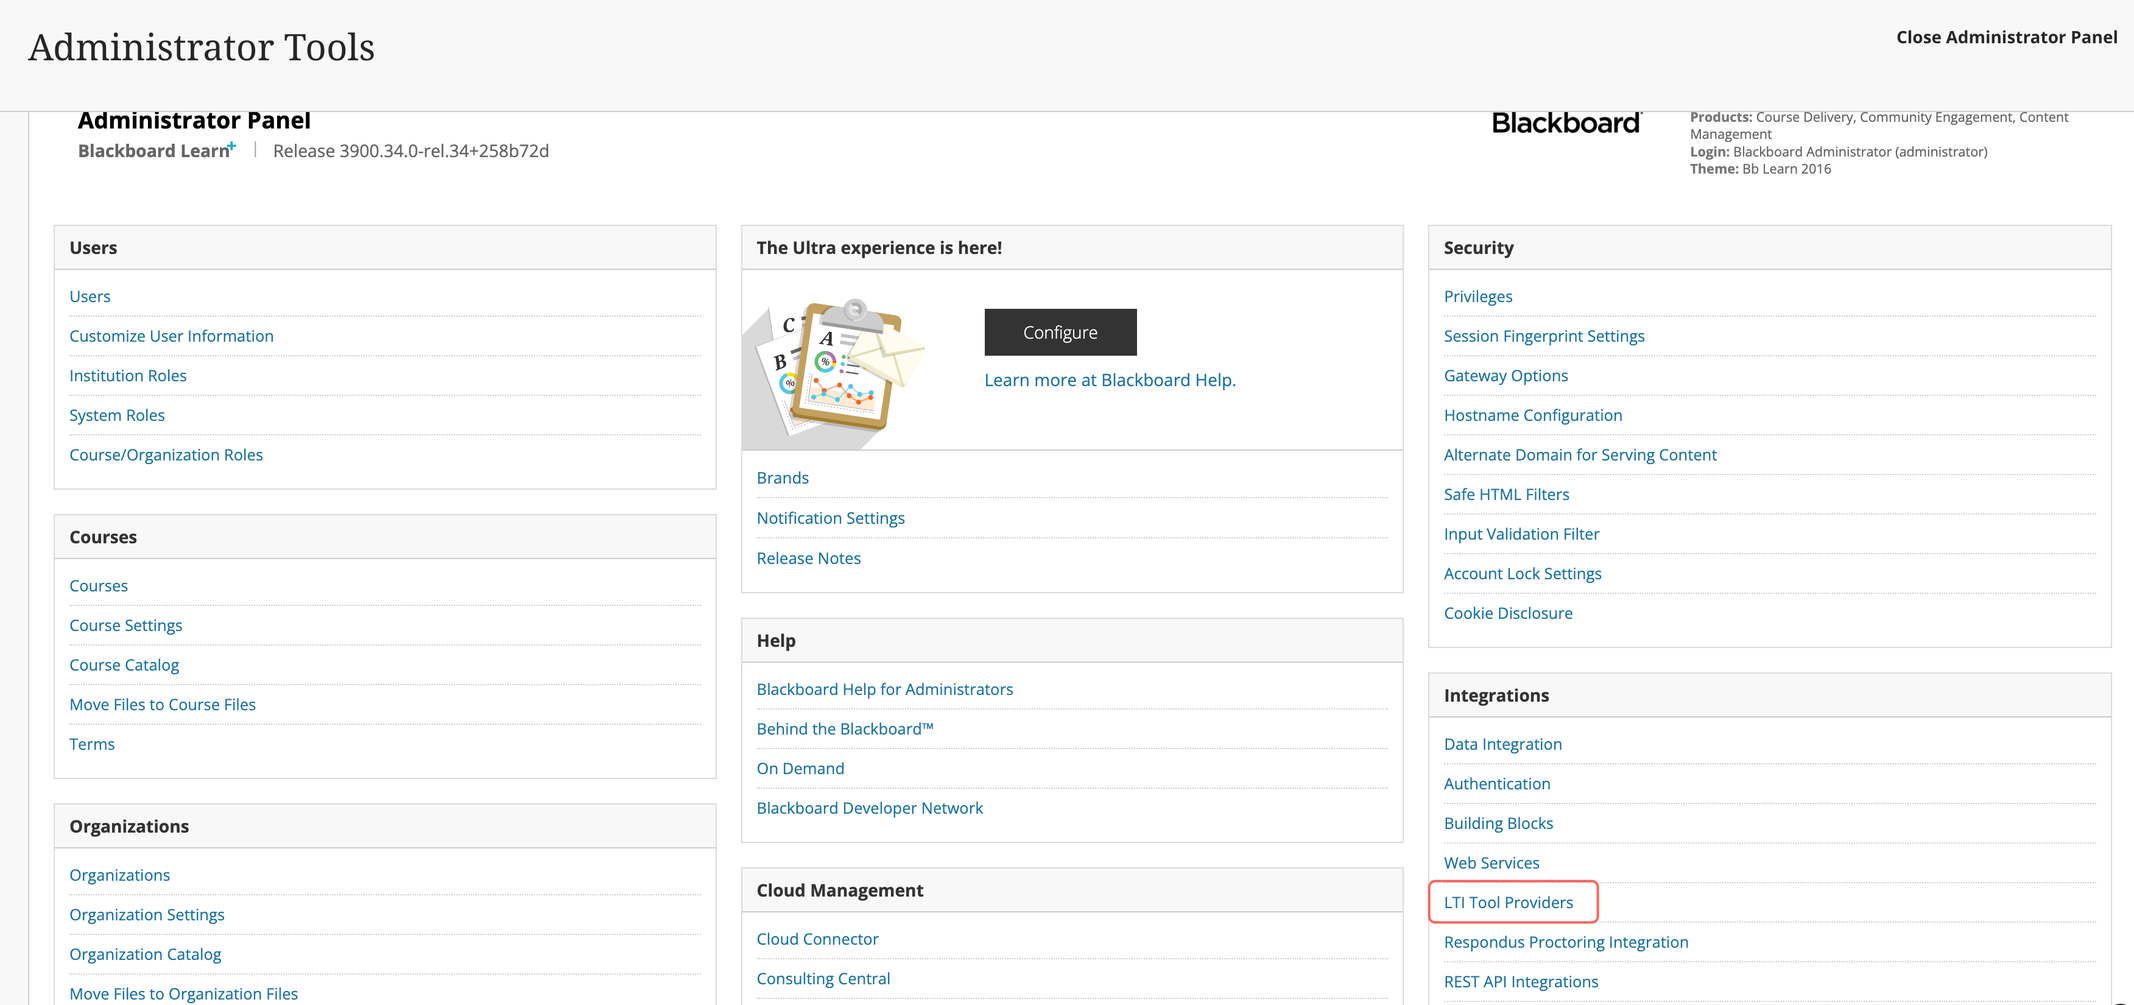
  3. Click Register LTI 1.3/Advantage Tool.

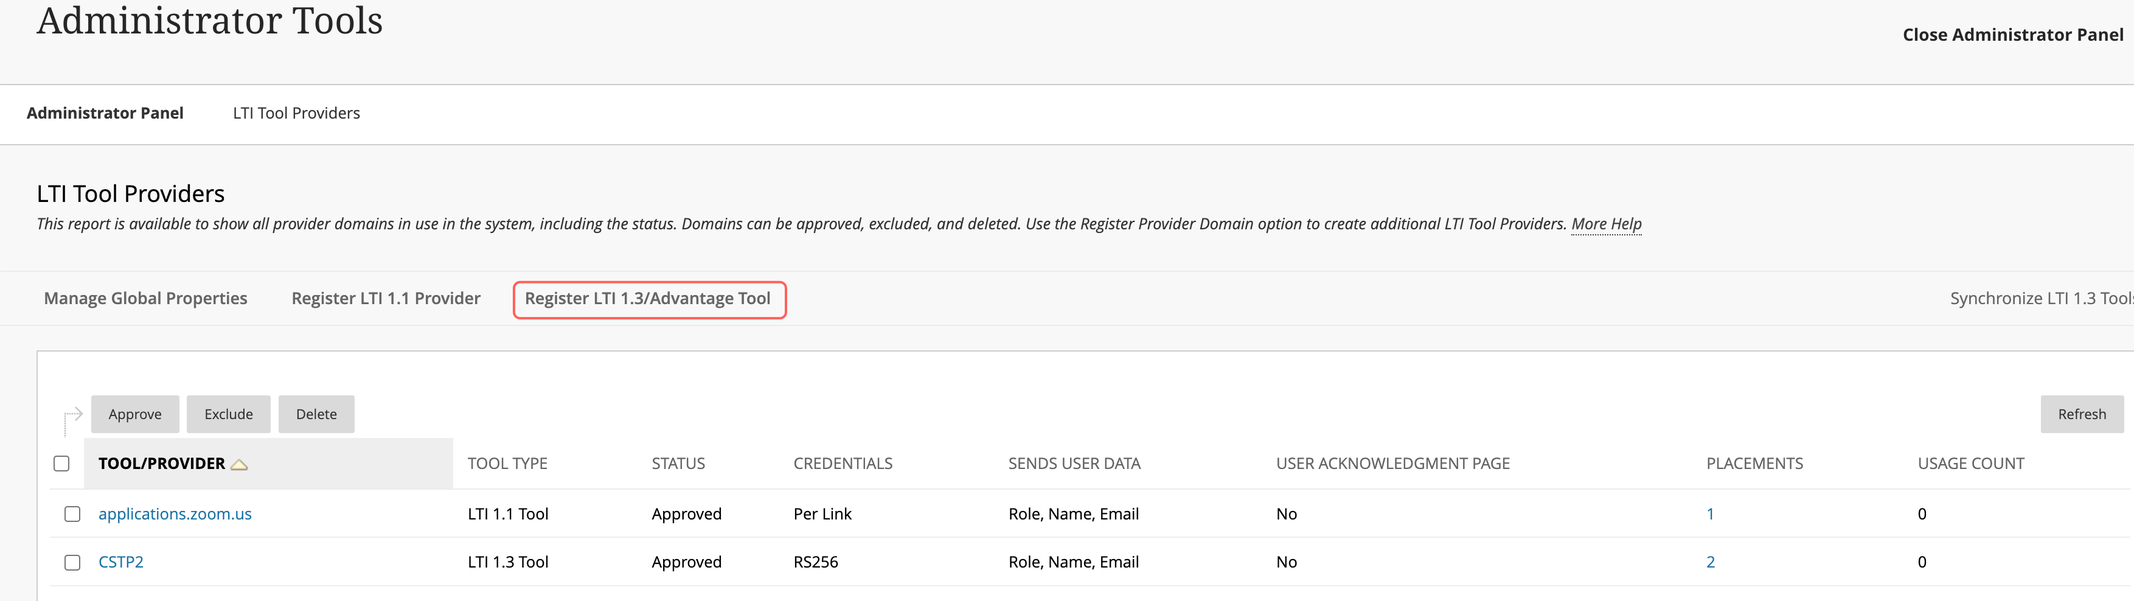
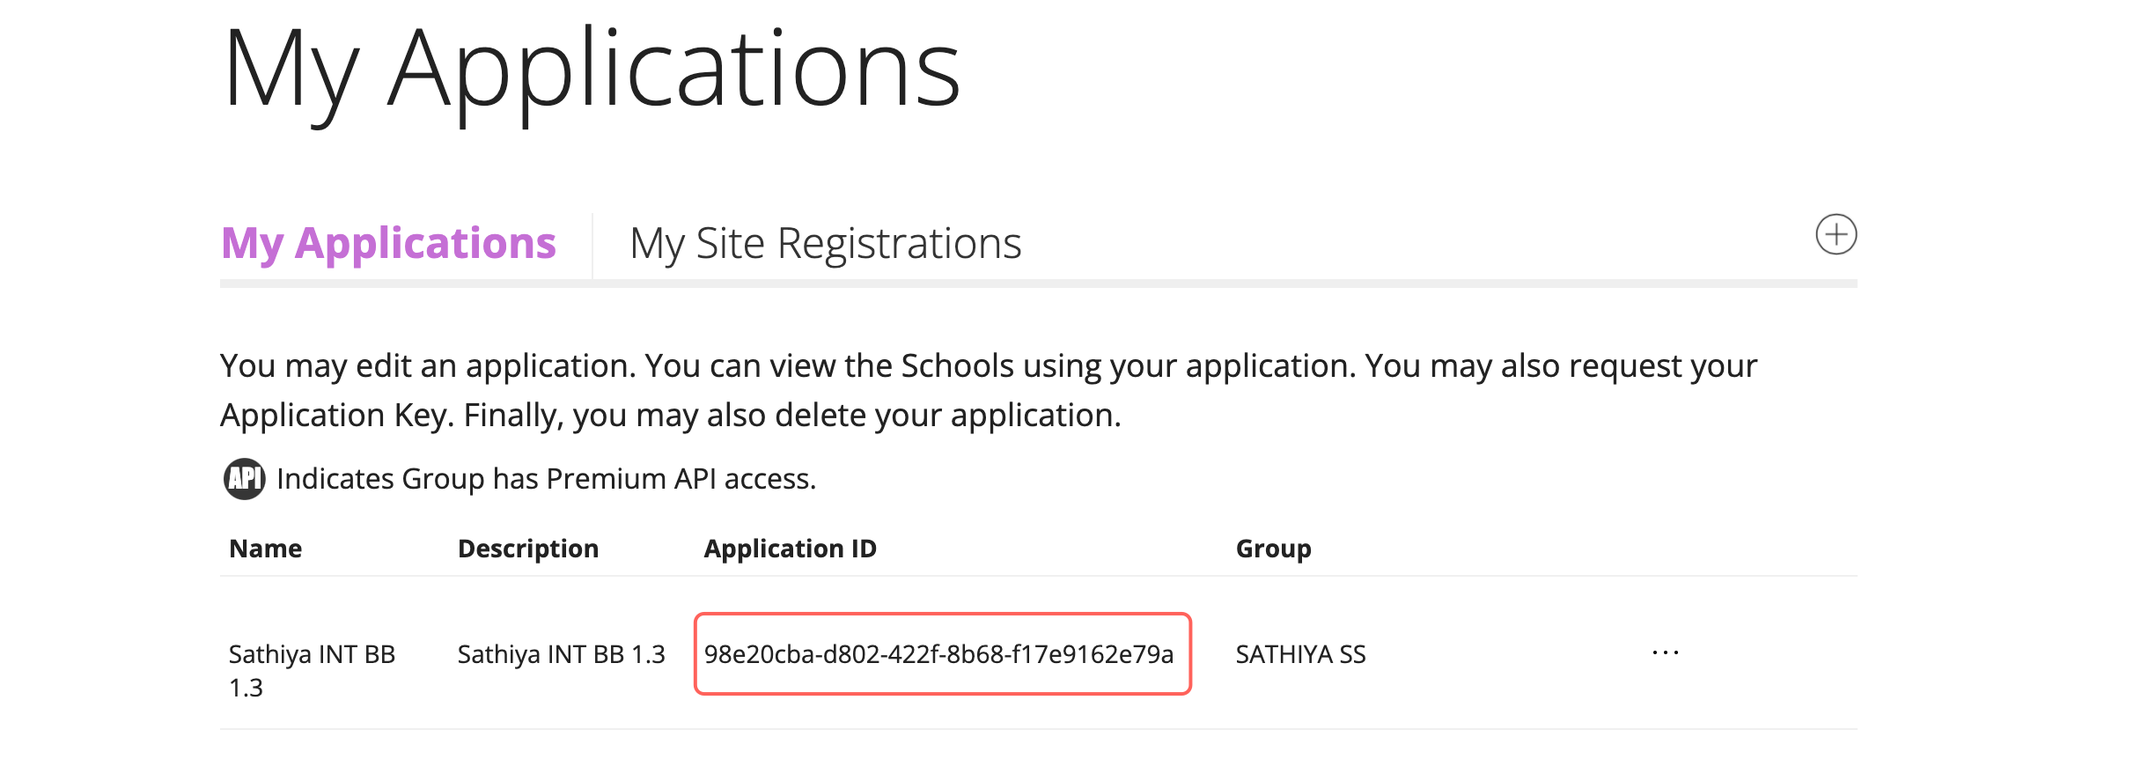
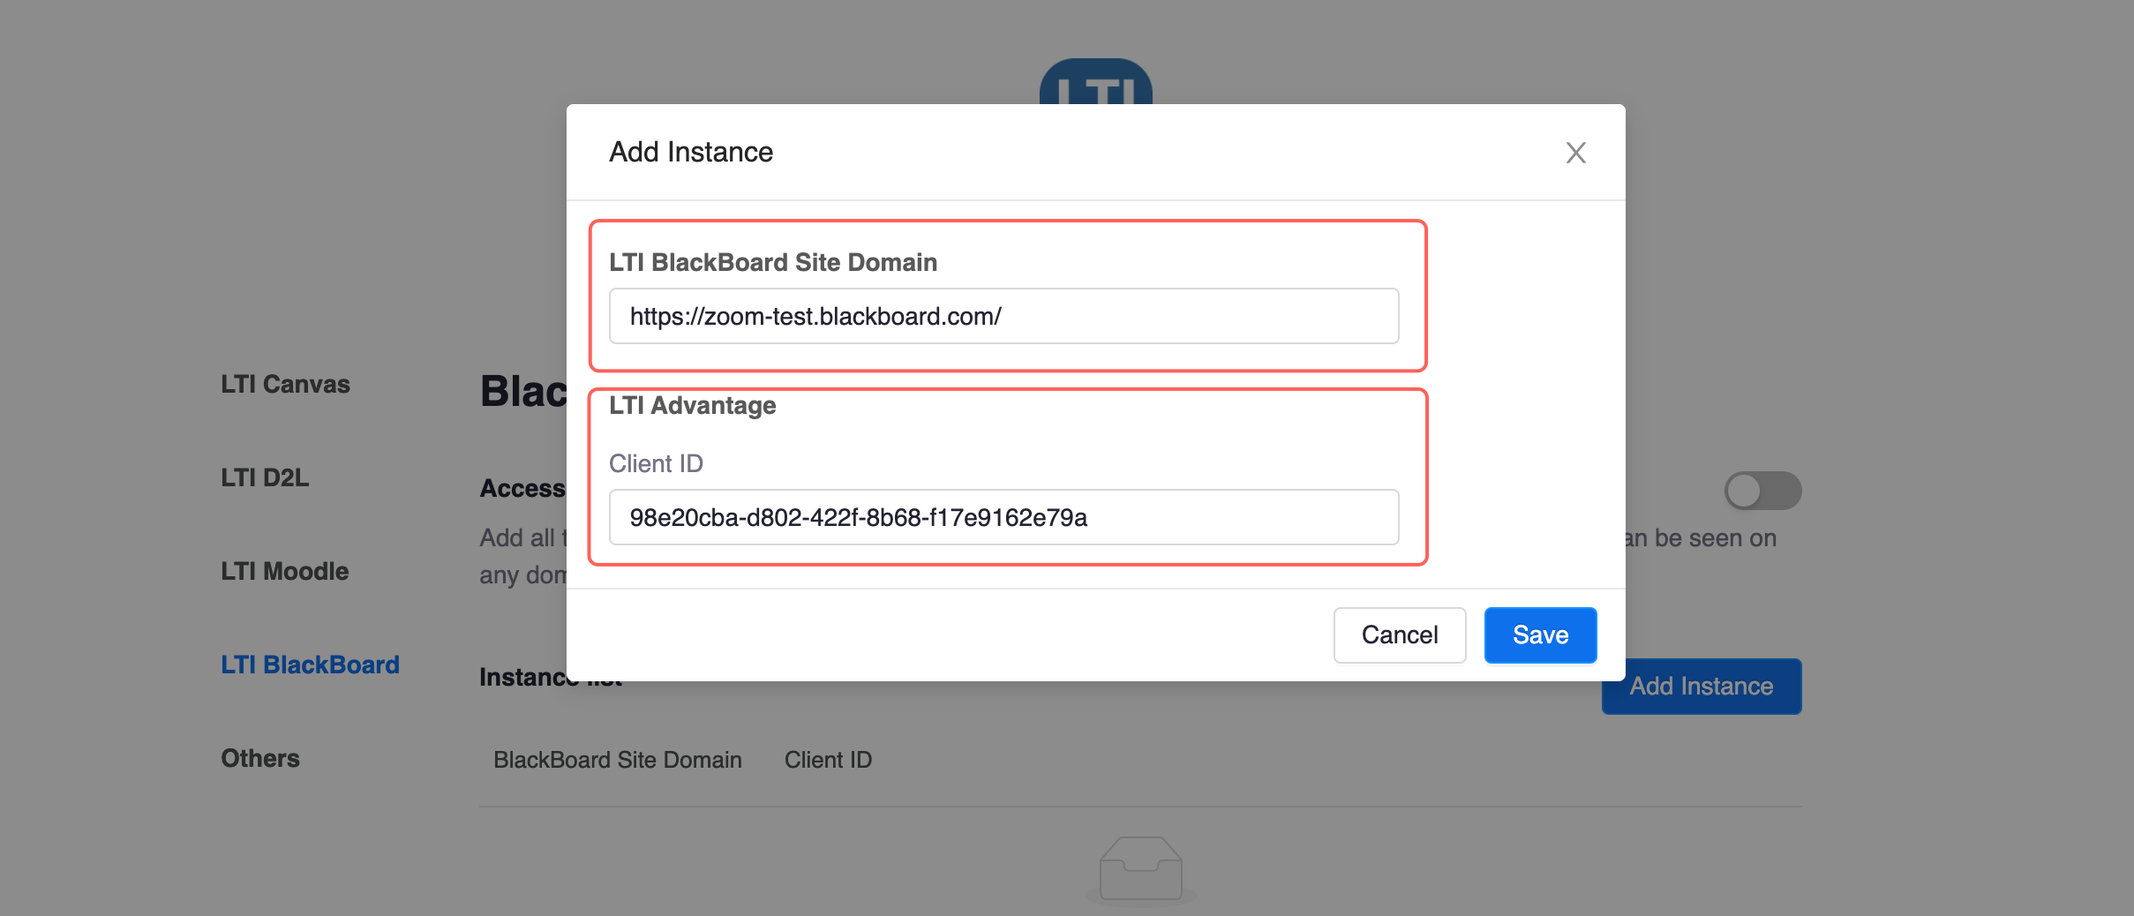
  4. Copy the Application ID in BlackBoard in developer.blackboard.com, and paste it into the Client ID field.
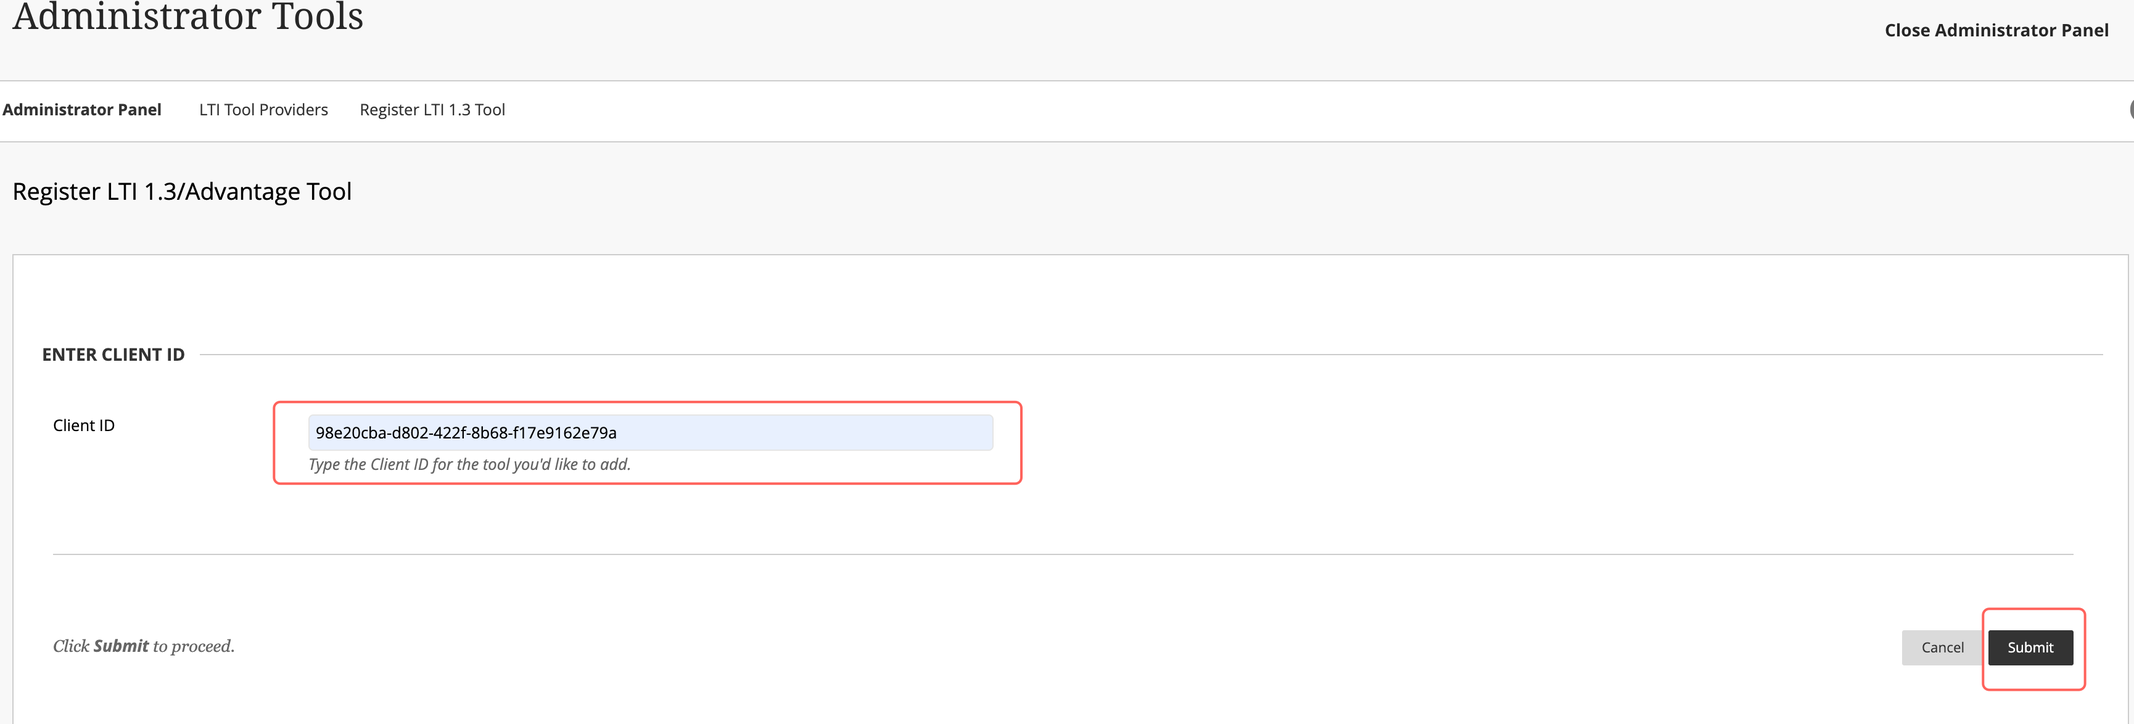
  5. Click Submit.

  6. Edit the tool and set the tool status to Approved.

  7. Under Institution Policies, enable Role in Course, Name, and Email Address.
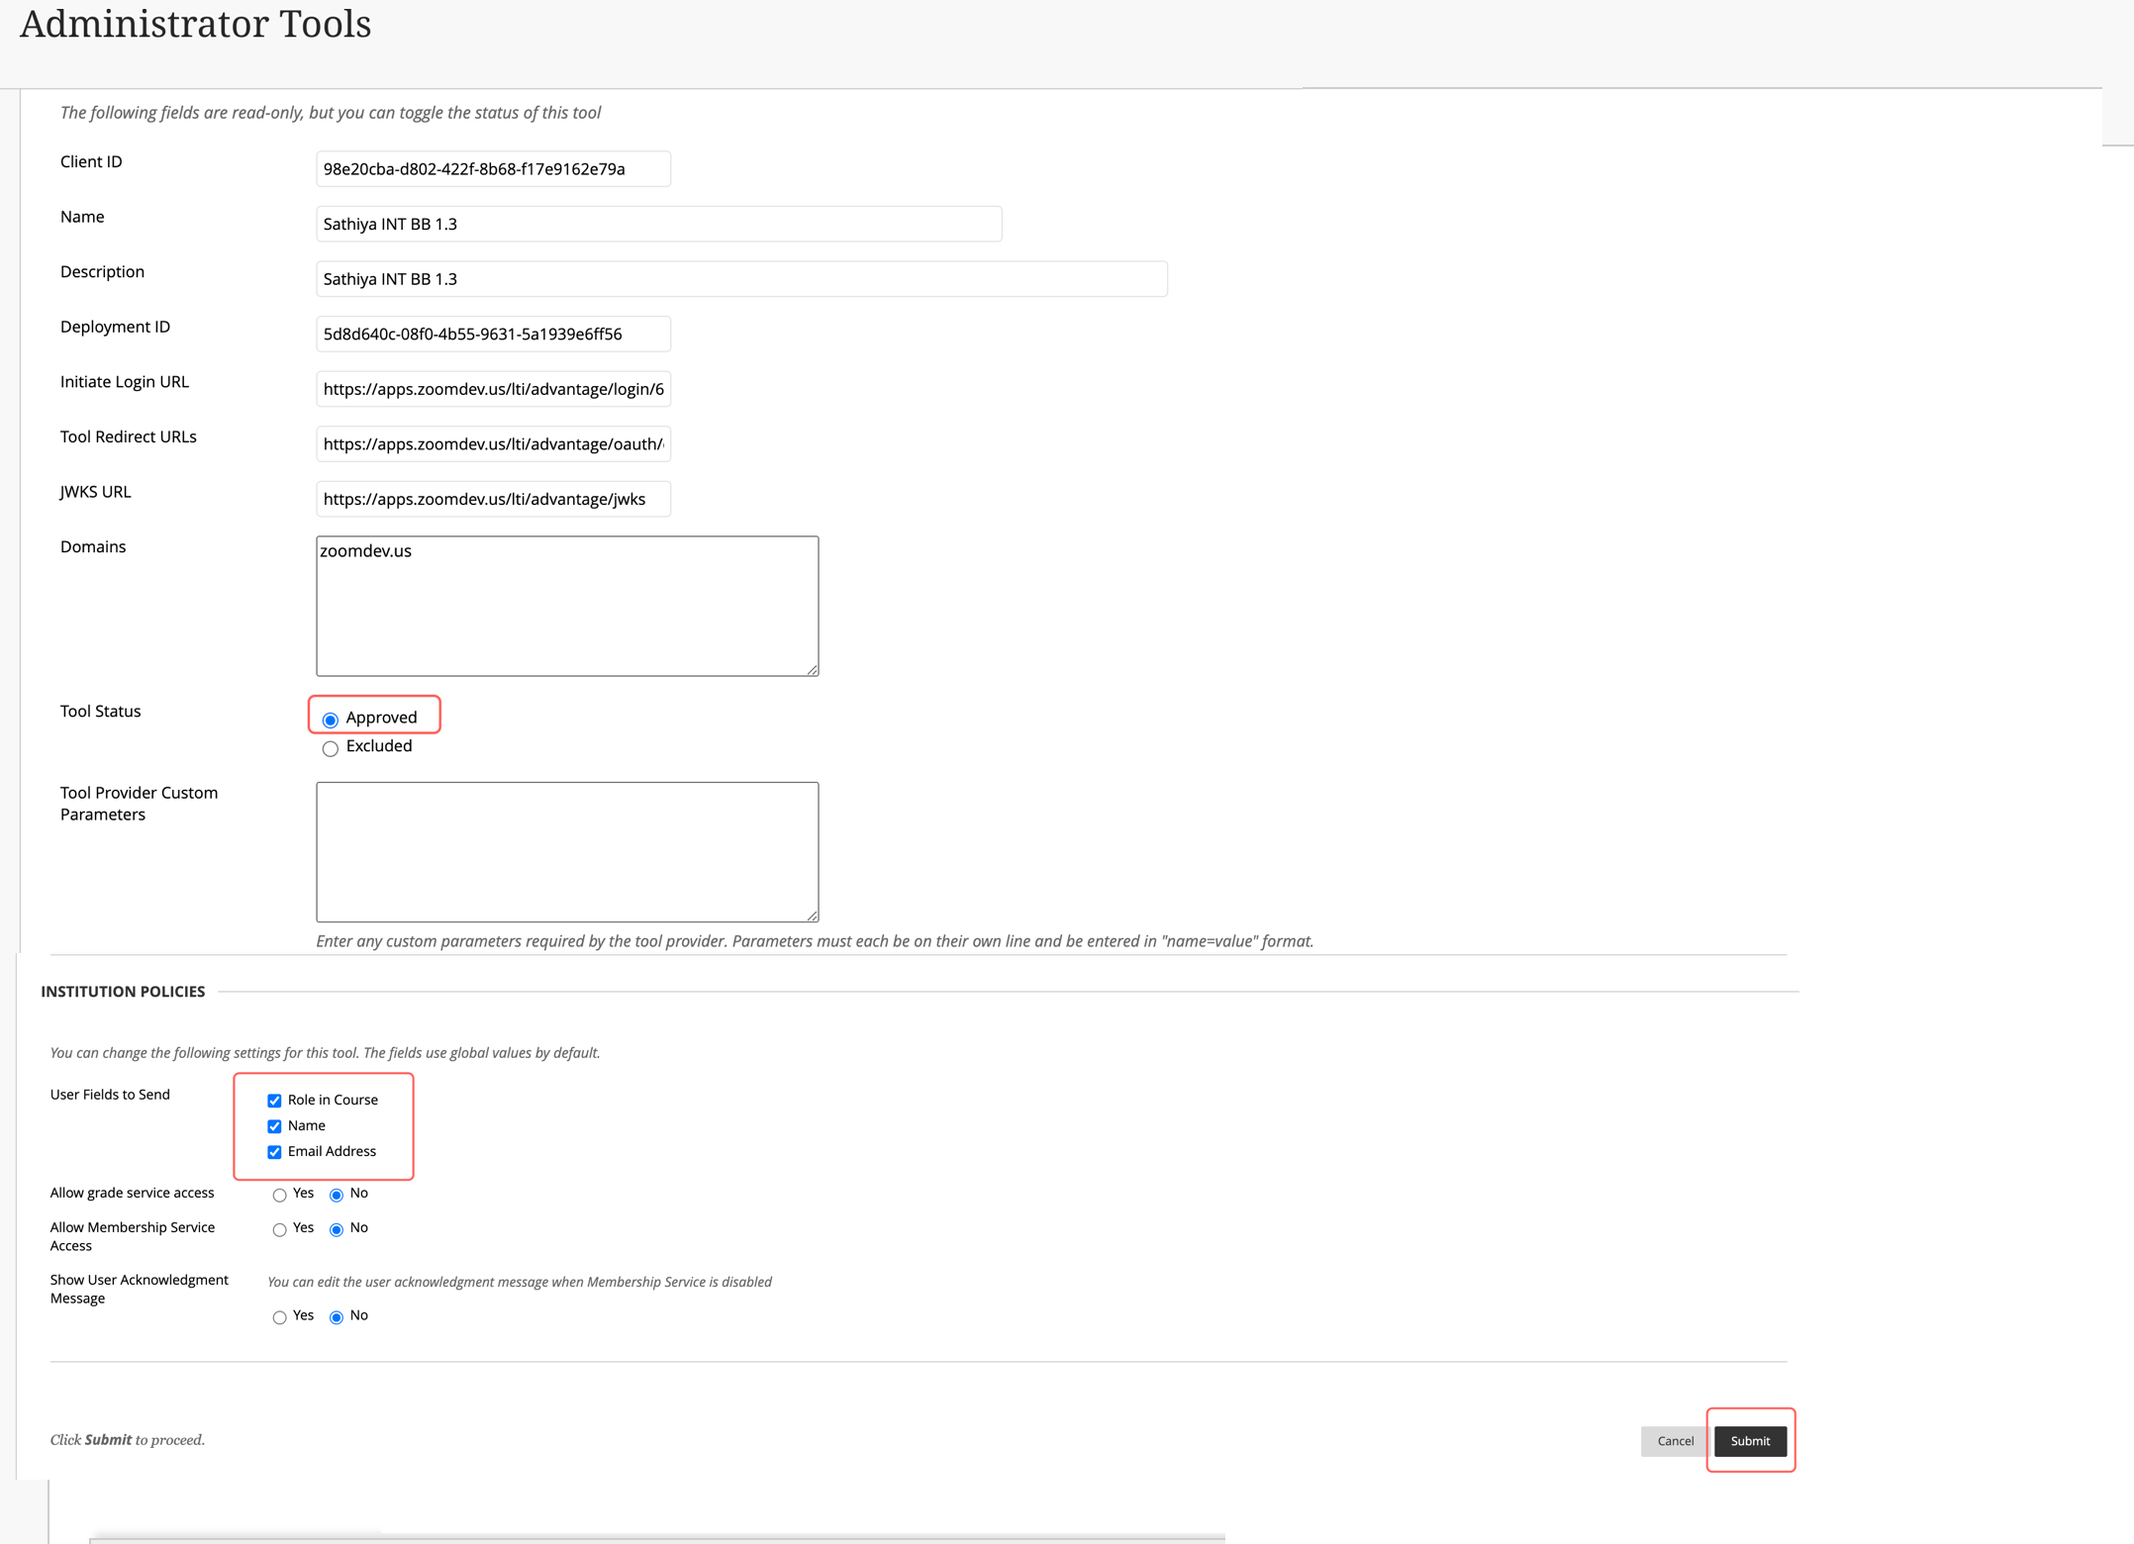
  8. Click Submit.

How to manage placements

  1. Hover over the tool just registered, and click the drop-down icon.

  2. Click Manage Placements.

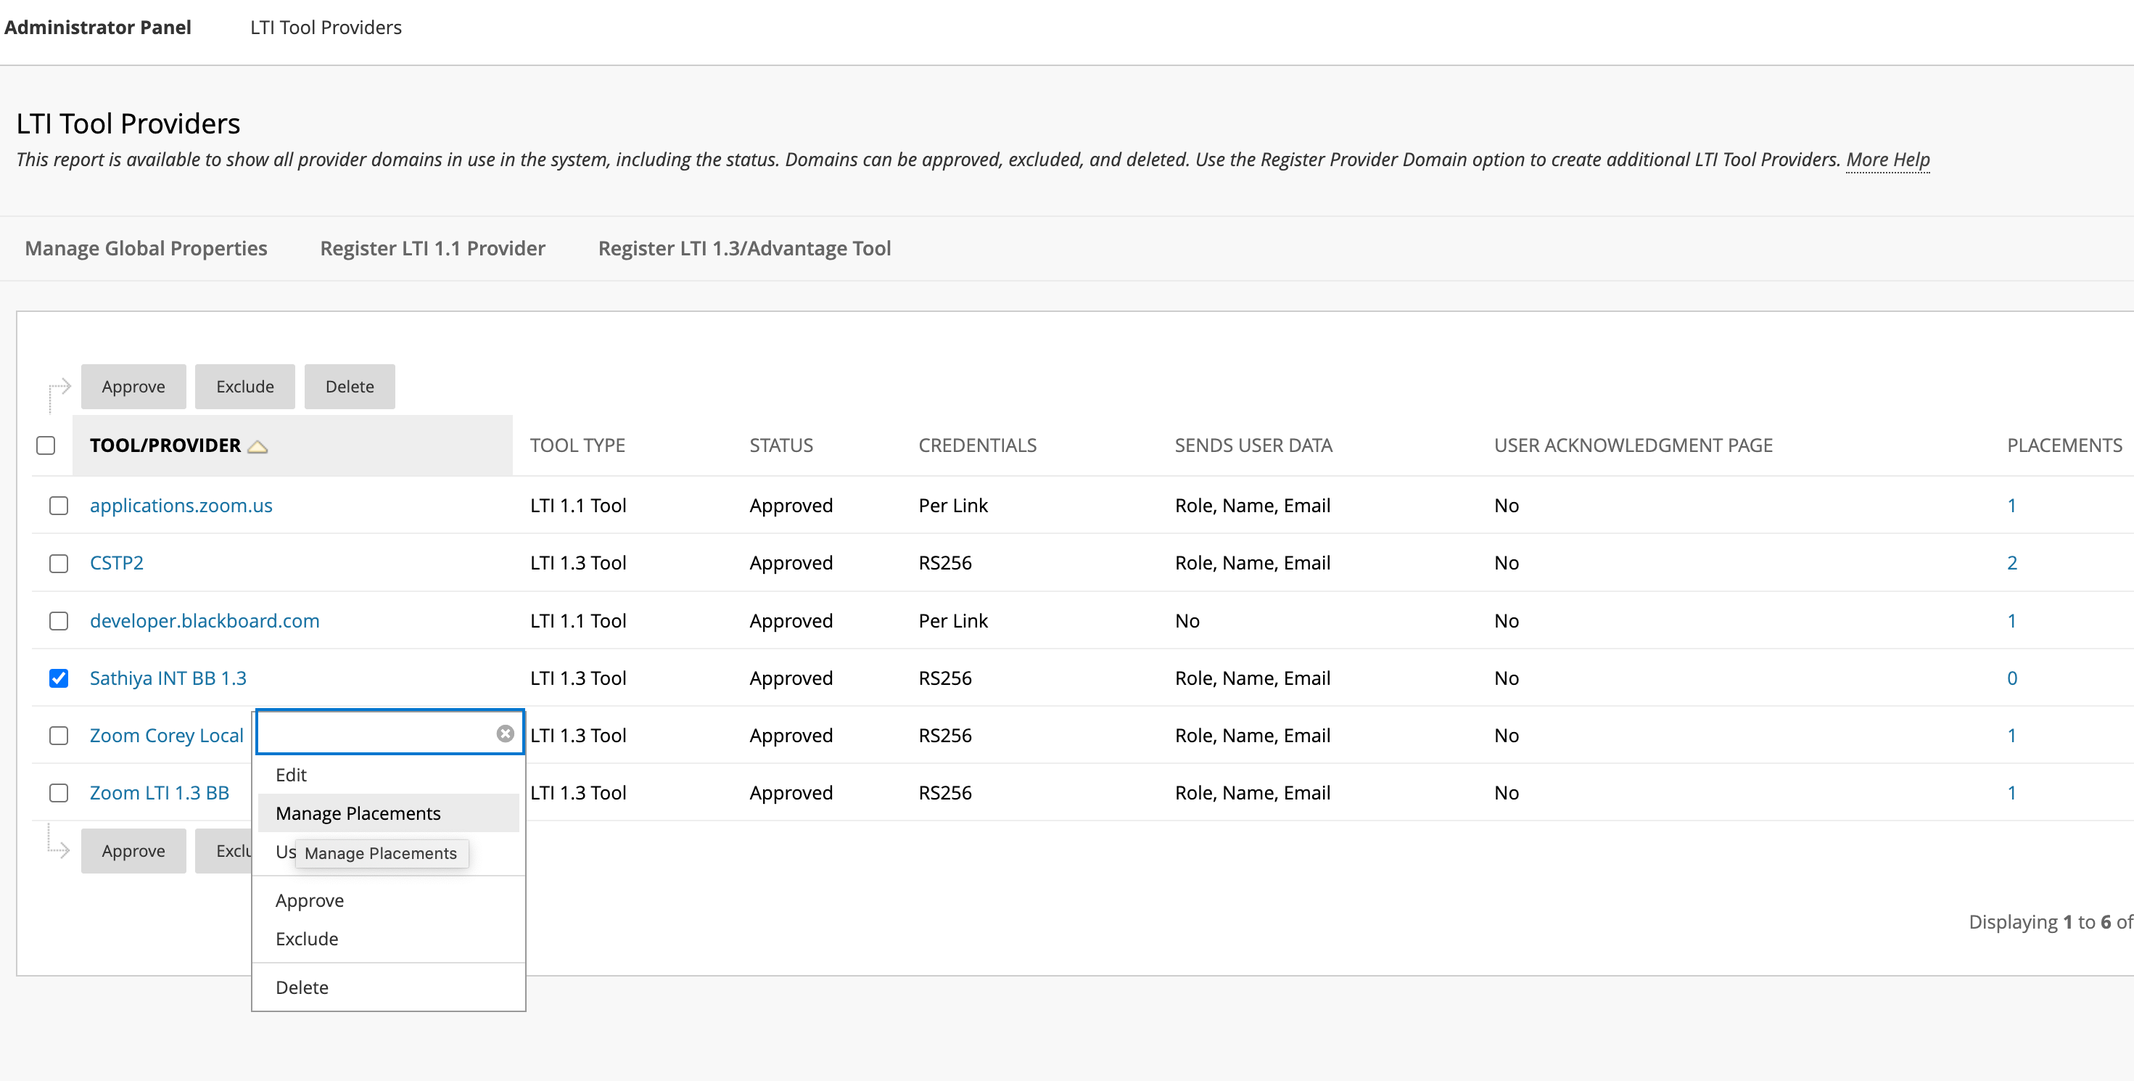
  3. Click Create Placement.

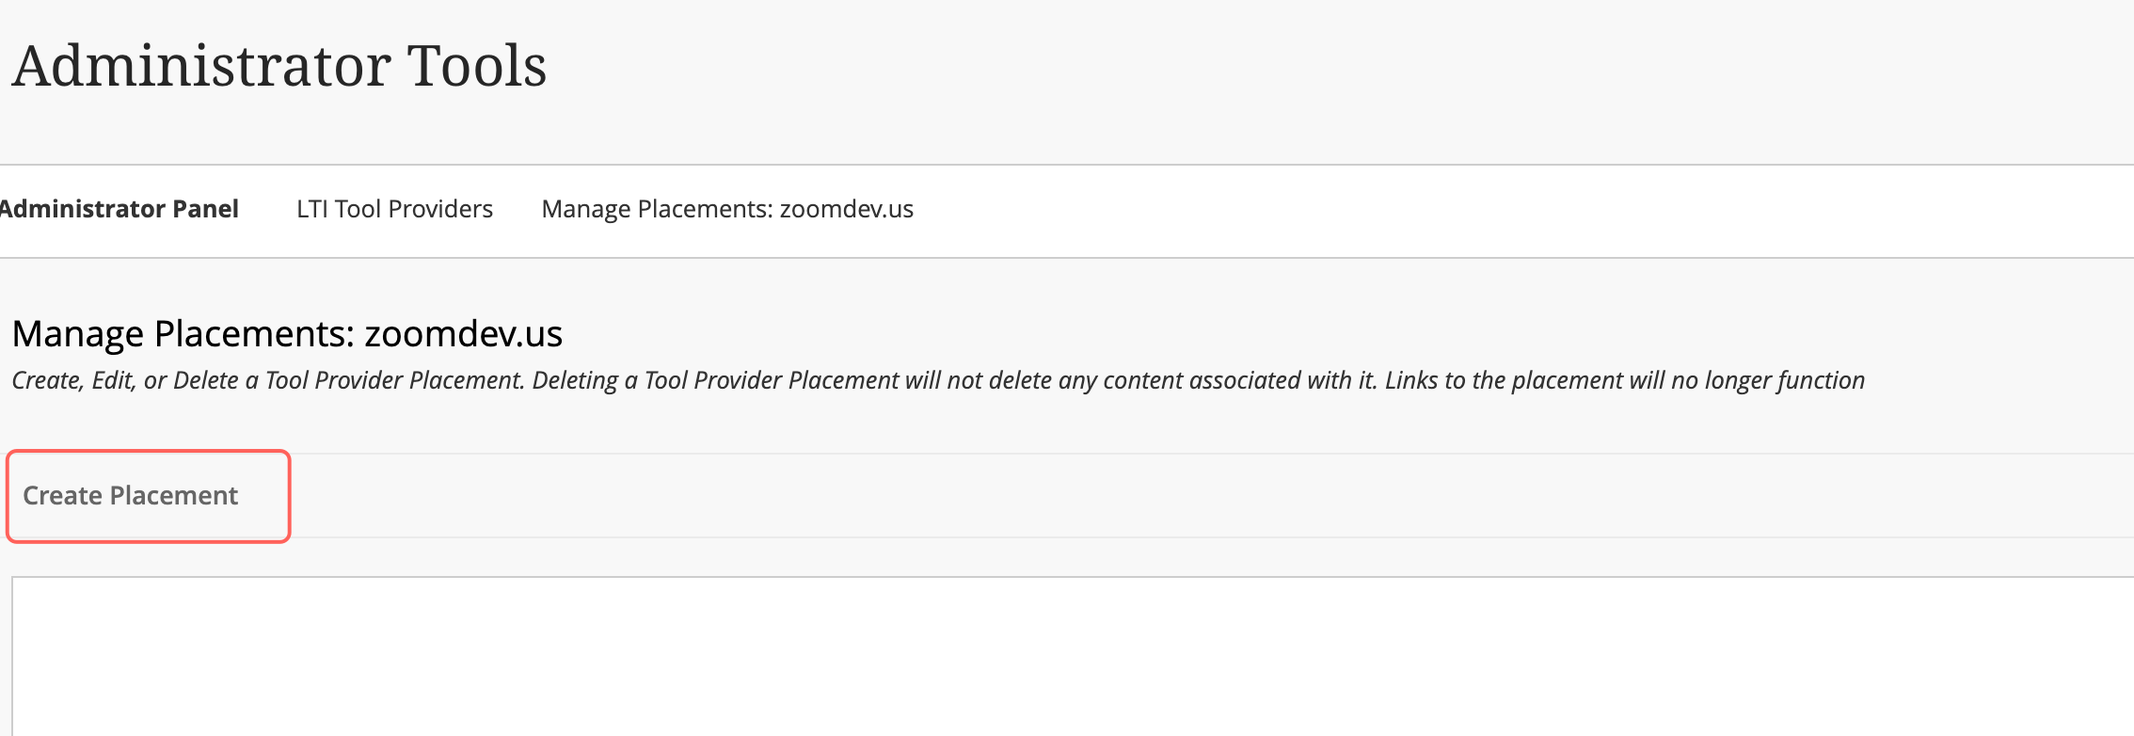
  4. Fill in the Label and Handle fields.

  5. Under Type select Course Tool, then select Allow student access.

  6. Copy the Target Link URL in the Zoom LTI configuration and paste it in the Target Link URI field.
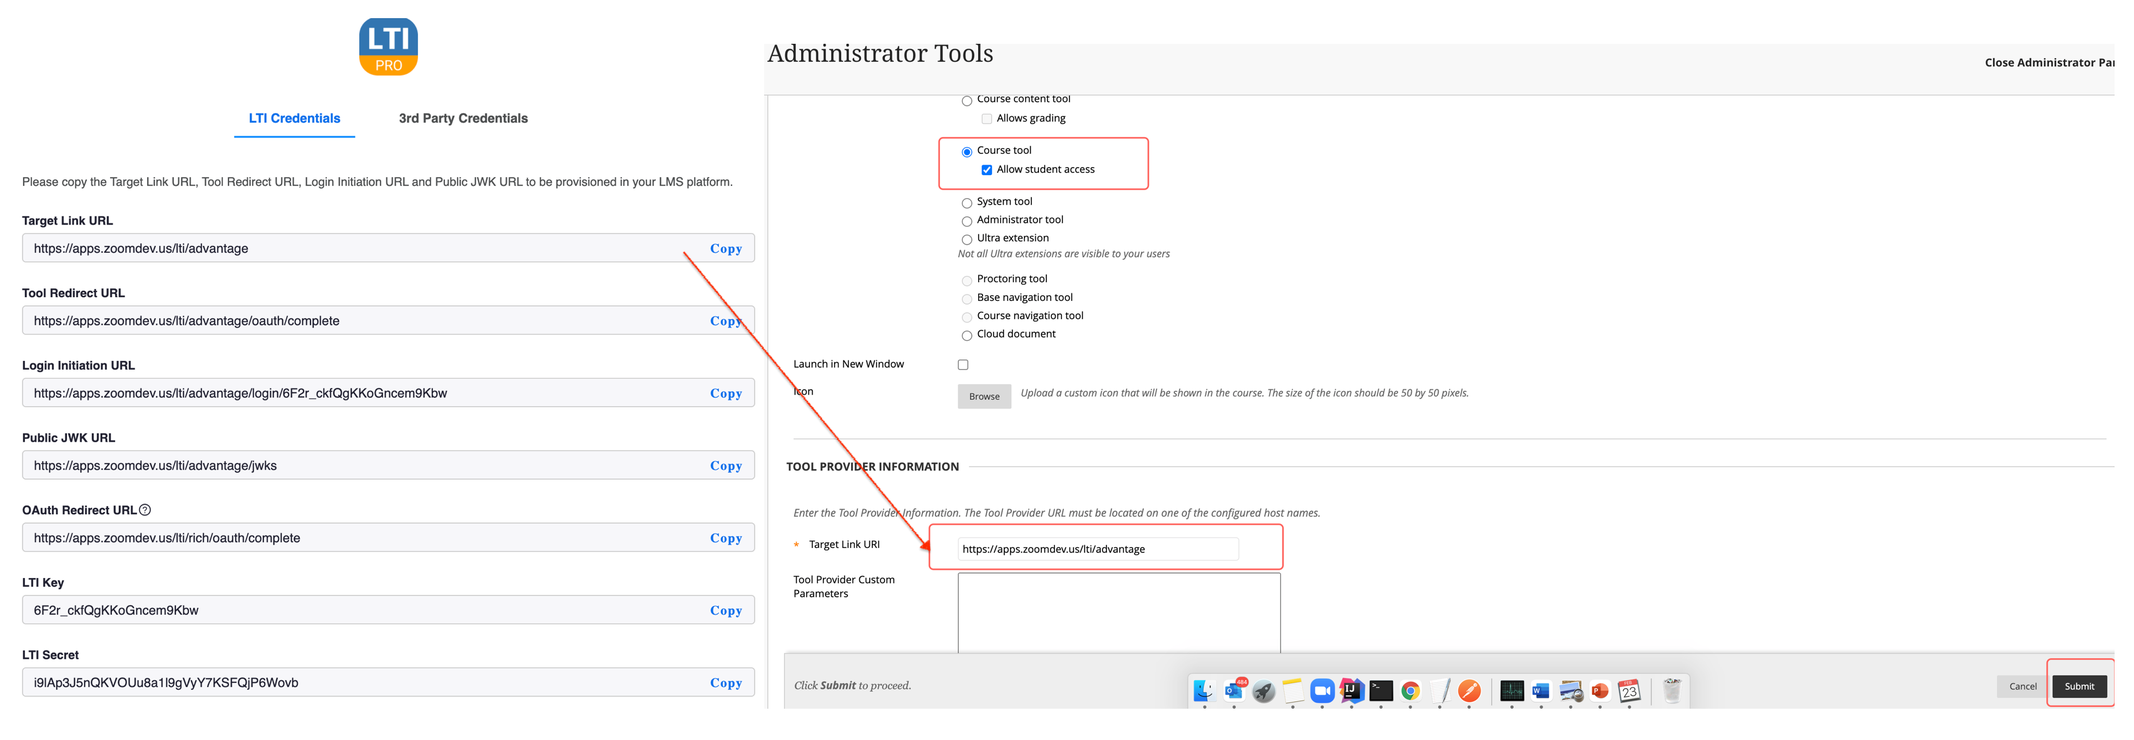
  7. Click Submit.

How to add and launch the LTI tool

Add the LTI tool to a course

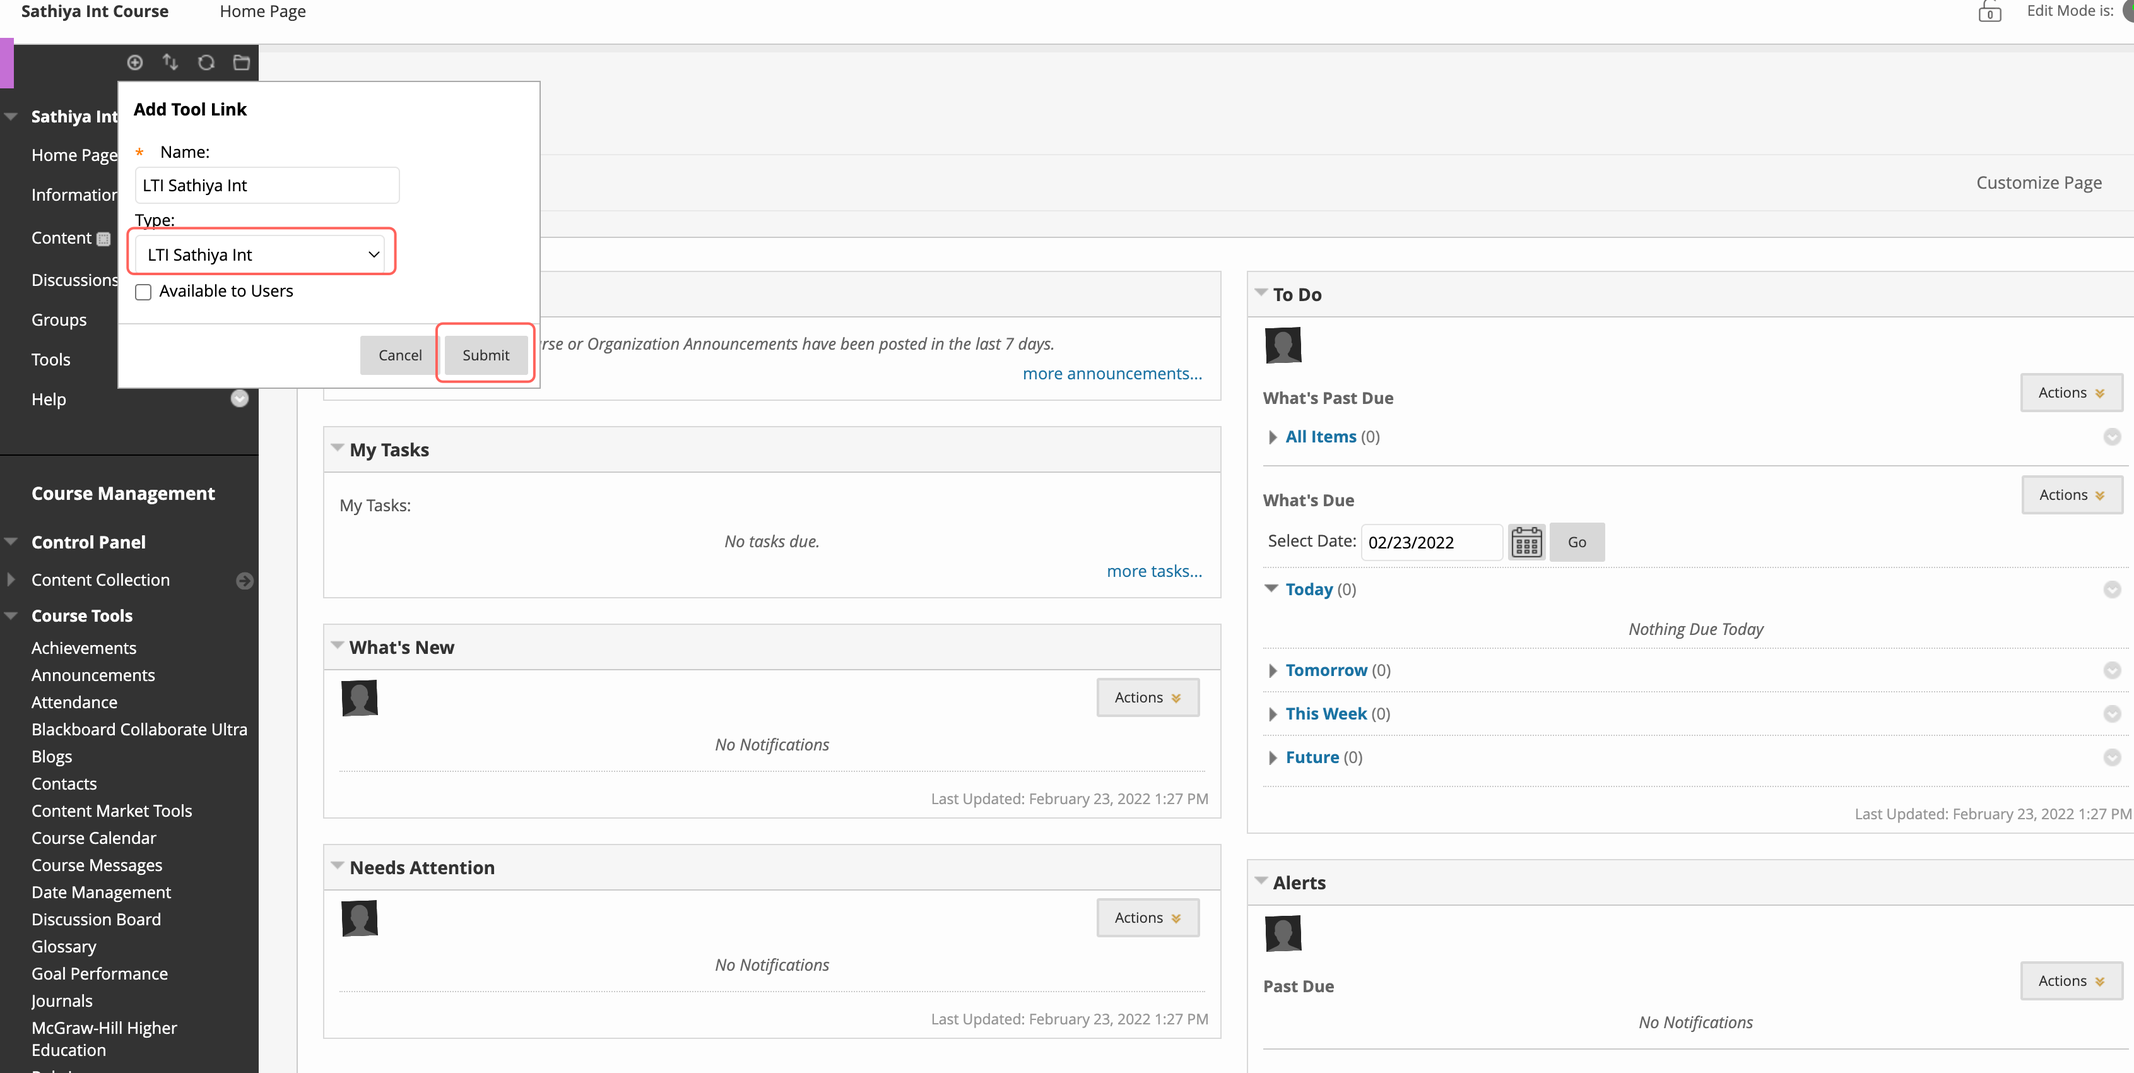
  1. Open the desired course and click the + icon.

  2. Click Tool Link
    .
  3. Choose the created LTI Pro tool that you created at step 4.

  4. Click Submit.

Launch the LTI Pro tool in a course

  1. Open your course in BlackBoard.
  2. In the course menu, click on the newly added tool to launch Zoom.