Configuring LTI Pro 1.3 for Moodle
This article provides specific instructions for configuring Zoom’s LTI Pro with Moodle.
Note: Please ensure that LTI Pro has been installed and you are signed in to configure LTI Pro.
Configuring LTI Pro on Moodle
Creating new credentials
-
- Create a new LTI credential.
- (Optional) Update a credential from LTI 1.1. to LTI 1.3. in the configuration page by choosing LTI 1.3 under Select which LTI version to use.
- Click Save.
Creating a Client ID in Moodle
-
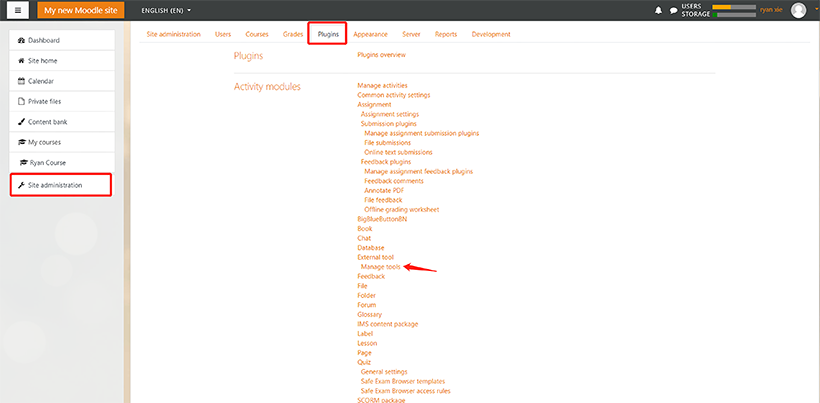
- Log in to Moodle as an Admin.
- Click Site administration, then Plugins.
- Click External tool, then Manage tools.
- Click configure a tool manually.
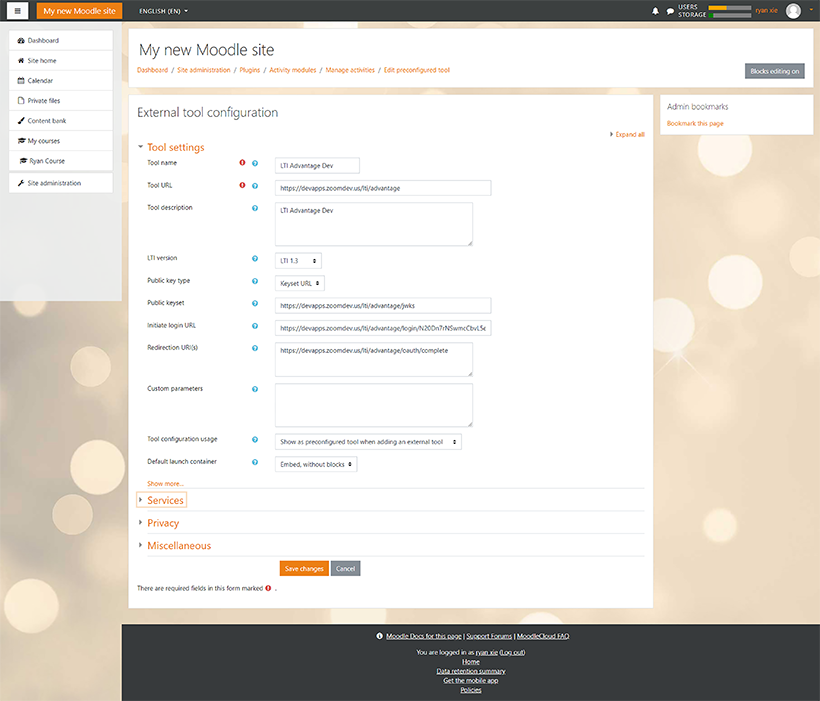
Configuring the external tool
-
-
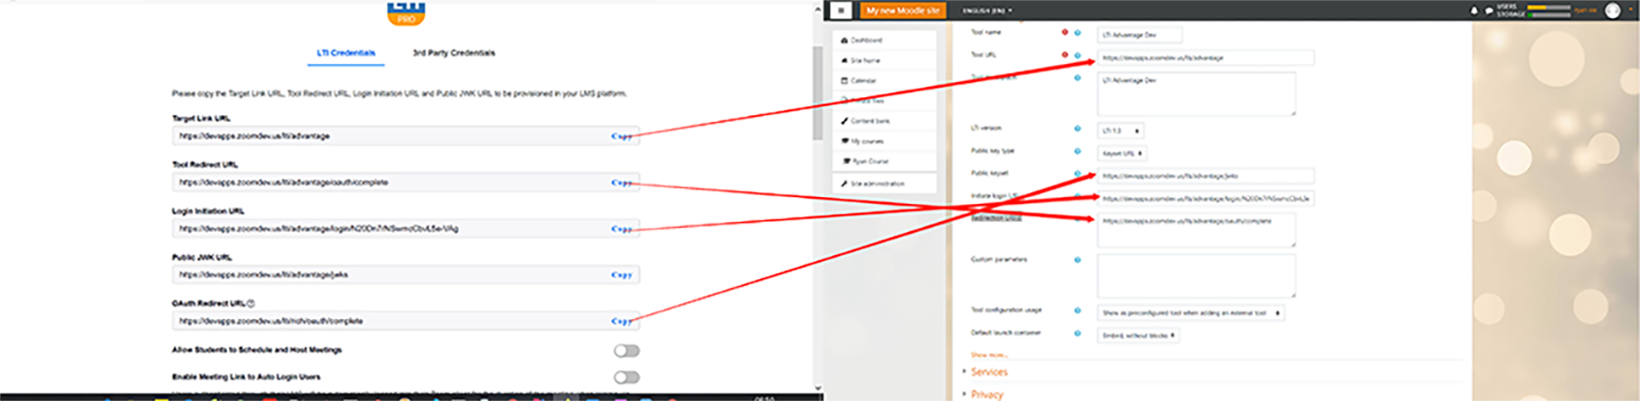
- Enter name of the tool in the Tool name field.
- Copy the Target Link URL in the LTI configuration page, and paste it in the Tool URL field.
- For LTI version, choose LTI 1.3.
- For Public key type, choose Keyset URL.
- Copy the Public JWK URL in the LTI configuration page, and paste it in the Public keyset field.
- Copy the Tool Redirect URL in the LTI configuration page, and paste it in the Redirection URI(s) field.
- Copy the Login Initiation URL in the LTI configuration page to, and paste it in the Initiate login URL field.
- In the Privacy section, configure the following:
Share launcher’s name with the tool: “Always”
Share launcher’s email with the tool: “Always” - Click Save Changes.
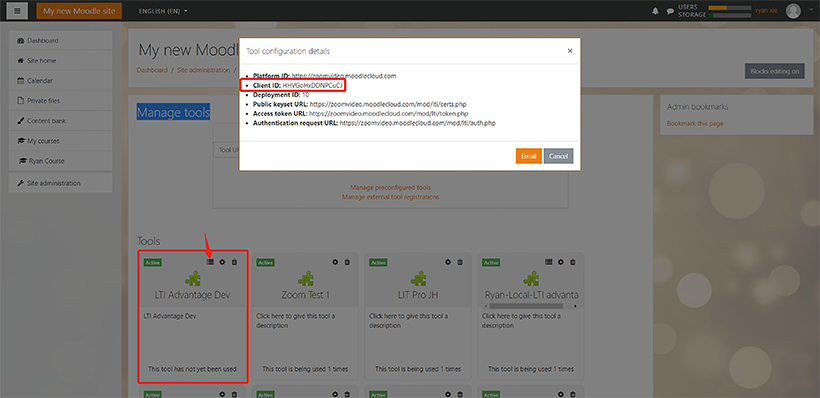
Adding the Client ID to LTI Pro Credentials
-
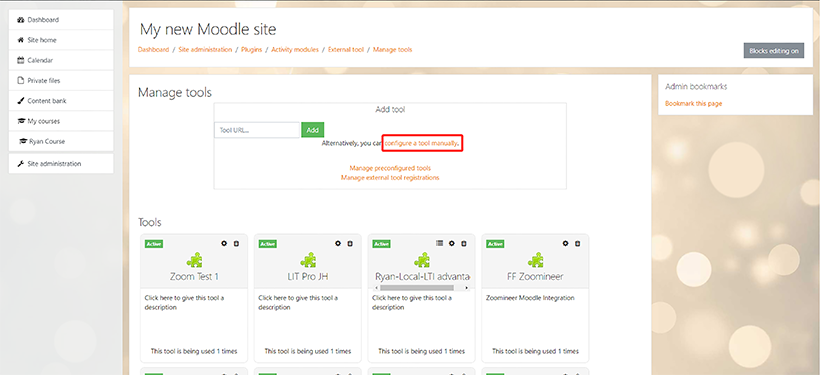
- Find the Tool that was created earlier in the Manage tools page of Moodle.
- Click View configuration details.
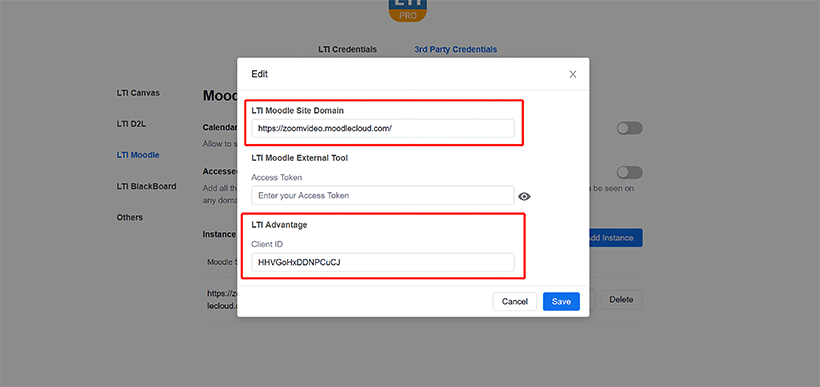
- On LTI Pro Configuration page, click 3rd Party Credentials.
- Click LTI Moodle, then click Add Instance.
- Add the domain used to access Moodle in the LTI Moodle Site Domain.
- Copy the Moodle tool Client ID, and paste it into the LTI Advantage Client ID field.
- Click Save.
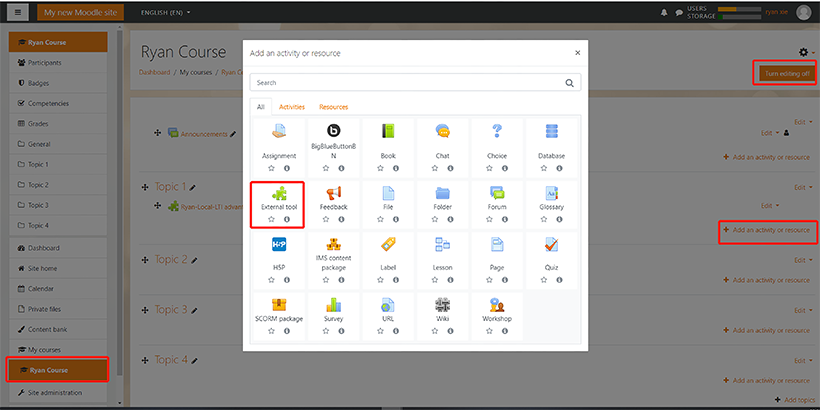
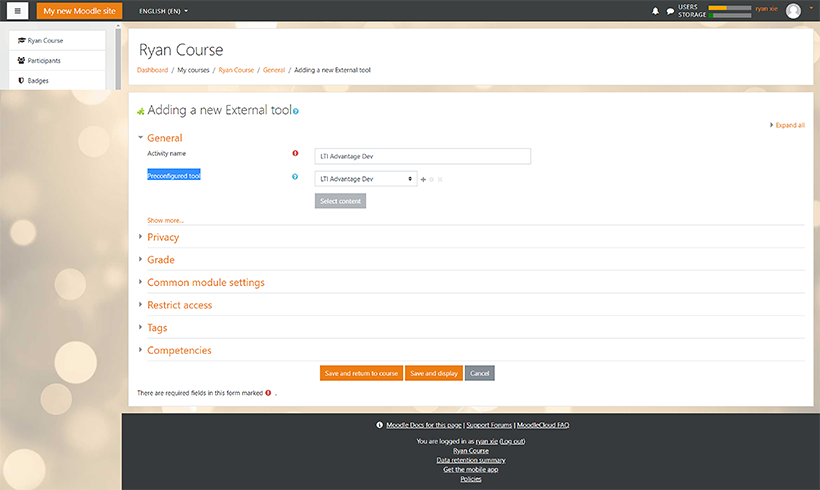
Adding the Tool to Moodle Course
-
- On Moodle go to the course that you want to add the Tool to.
- Click Turn editing on, then click Add an activity or resource.
- Click External tool.
- For Activity name, enter the name of the activity.
- For Preconfigured tool, choose the Tool created earlier.
- Click Save and return to course.
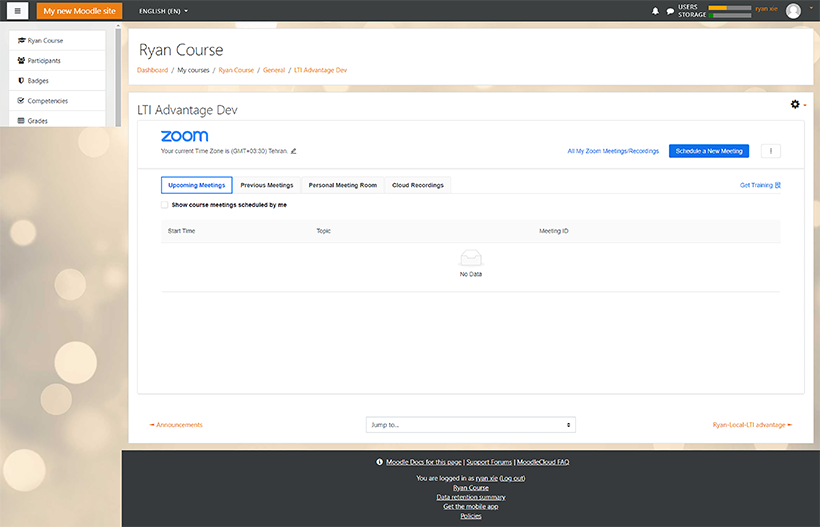
Launching the LTI 1.3 tool
-
- Click the link to the Tool that was just added earlier and the LTI Pro user interface should appear: