Configuring LTI Pro 1.3 for Brightspace
This article provides specific instructions for configuring Zoom’s LTI Pro for Brightspace by D2L.
Note: Please ensure that LTI Pro has been installed and you are signed in to configure LTI Pro.
Configuring LTI Pro on Brightspace by D2L
Creating new credentials
- Create a new LTI credential.
- (Optional) Update a credential from LTI 1.1. to LTI 1.3. in the configuration page by choosing LTI 1.3 under Select which LTI version to use.
- Click Save.
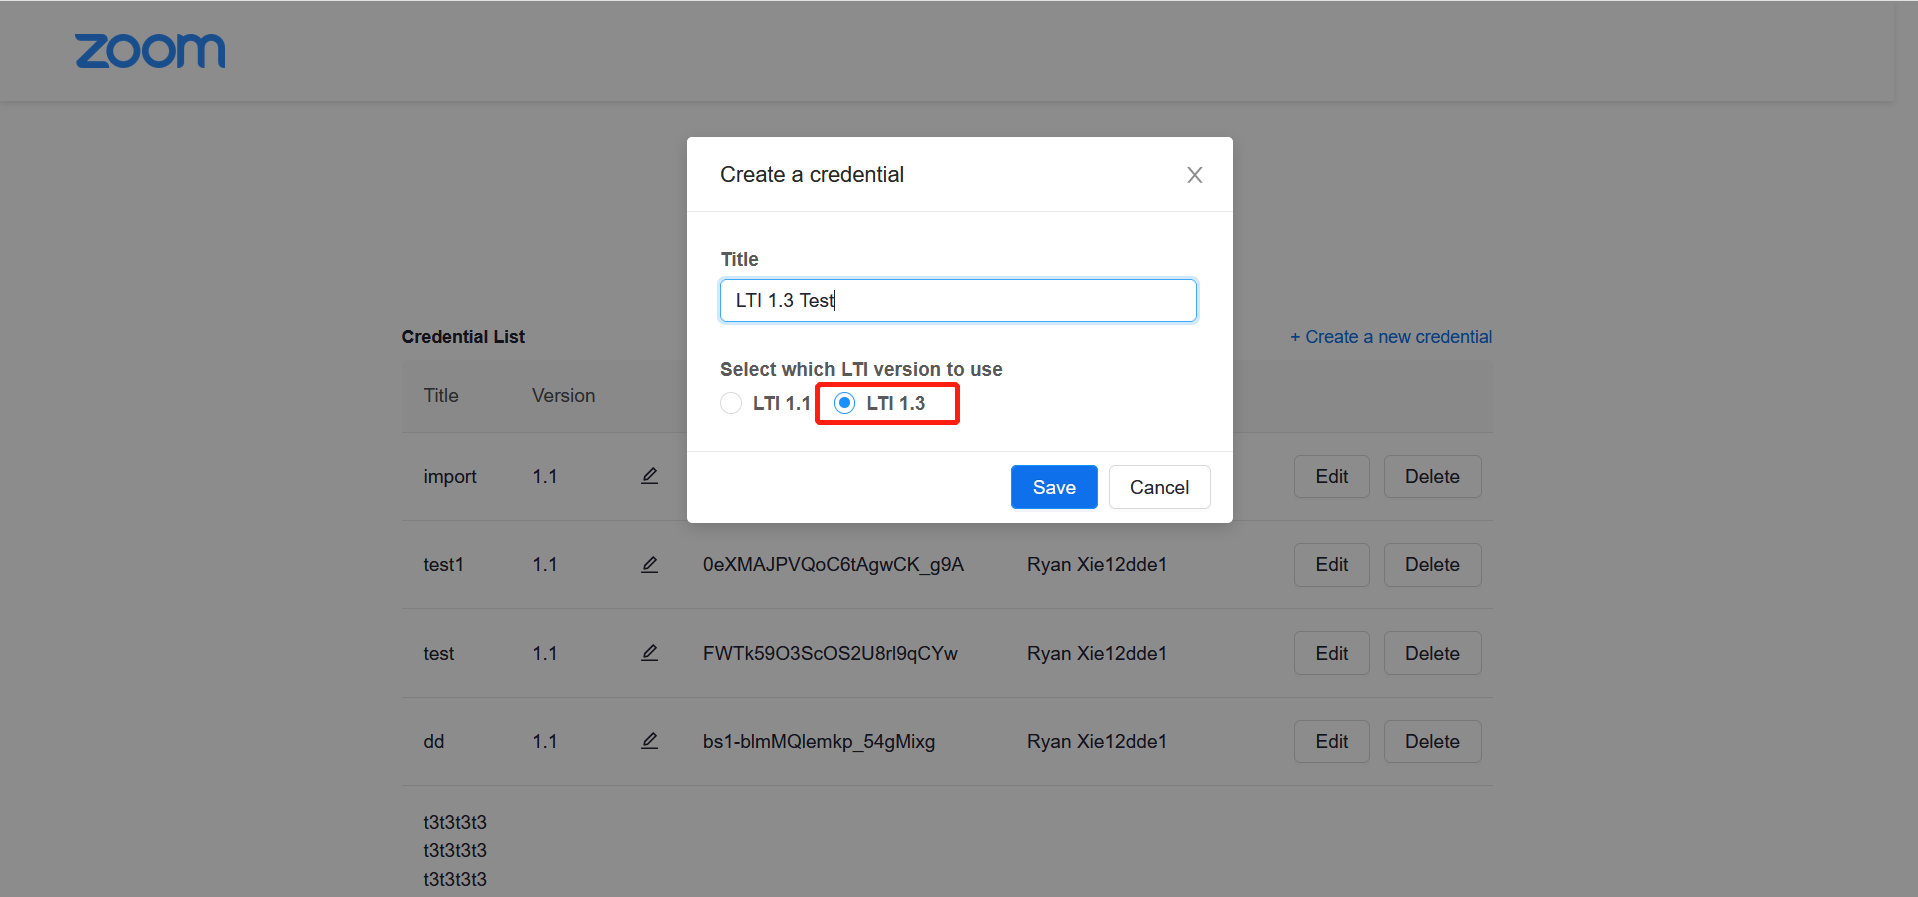
You will see an LTI Pro configuration page after clicking Save.
Creating a Client Id in D2L
-
- Login to D2L/Brightspace as an Admin
- Click the gear Icon to open the menu.
- Click Manage Extensilibity.
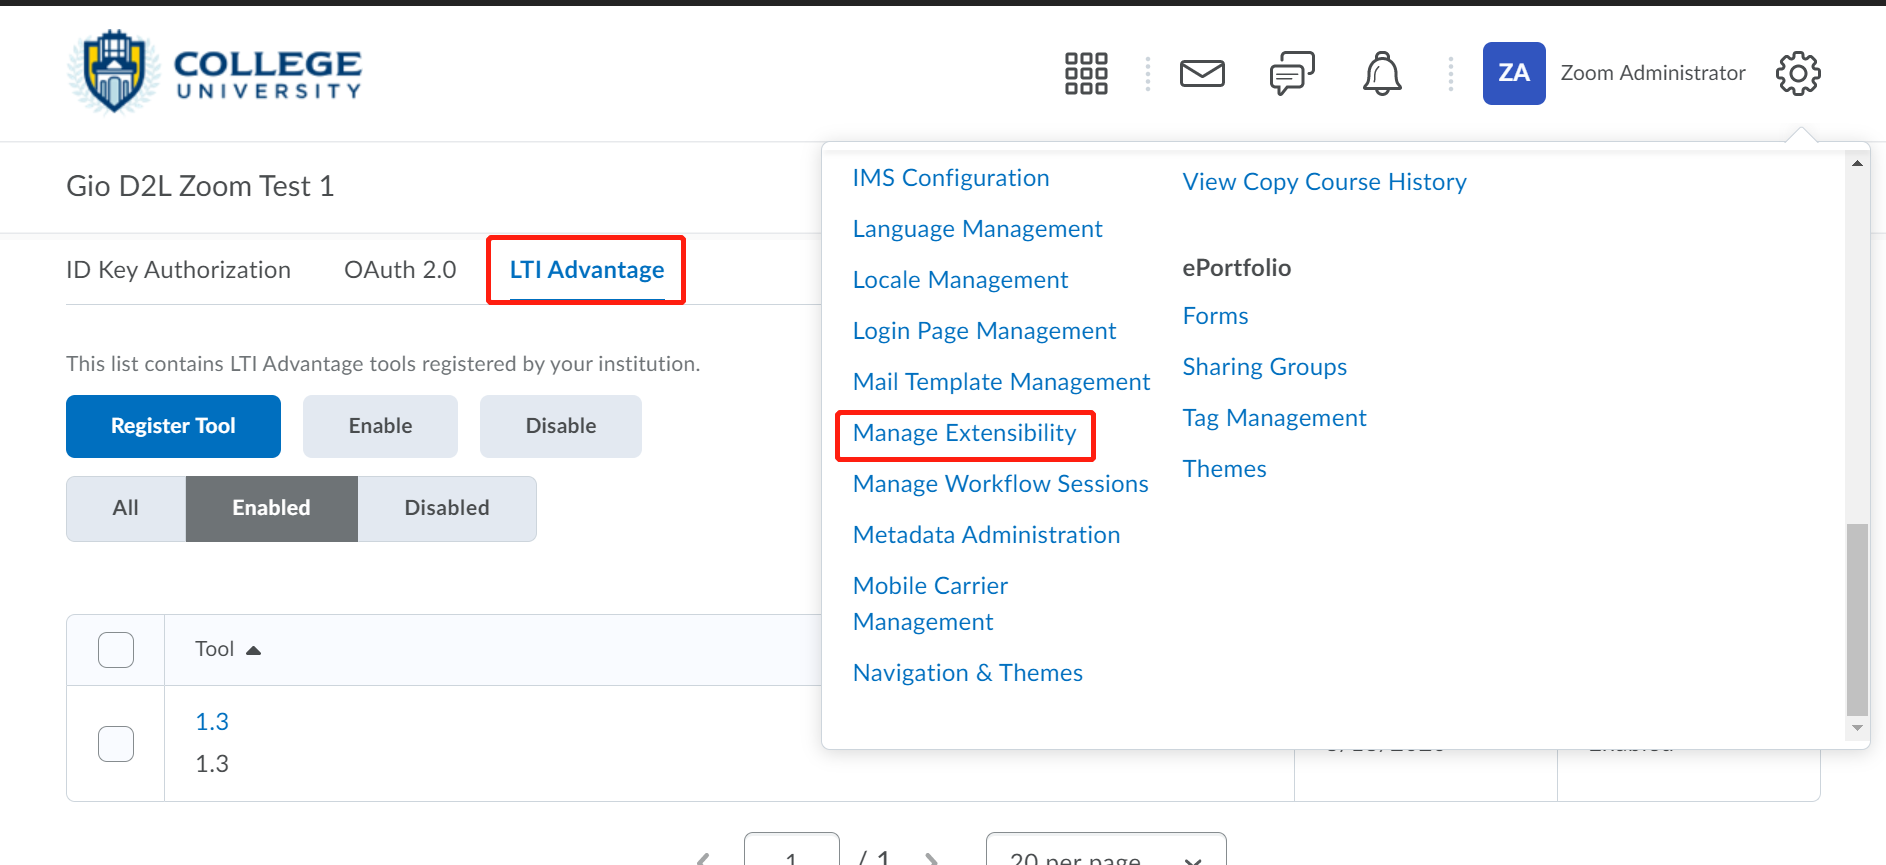
- Click LTI Advantage, then click Register Tool.
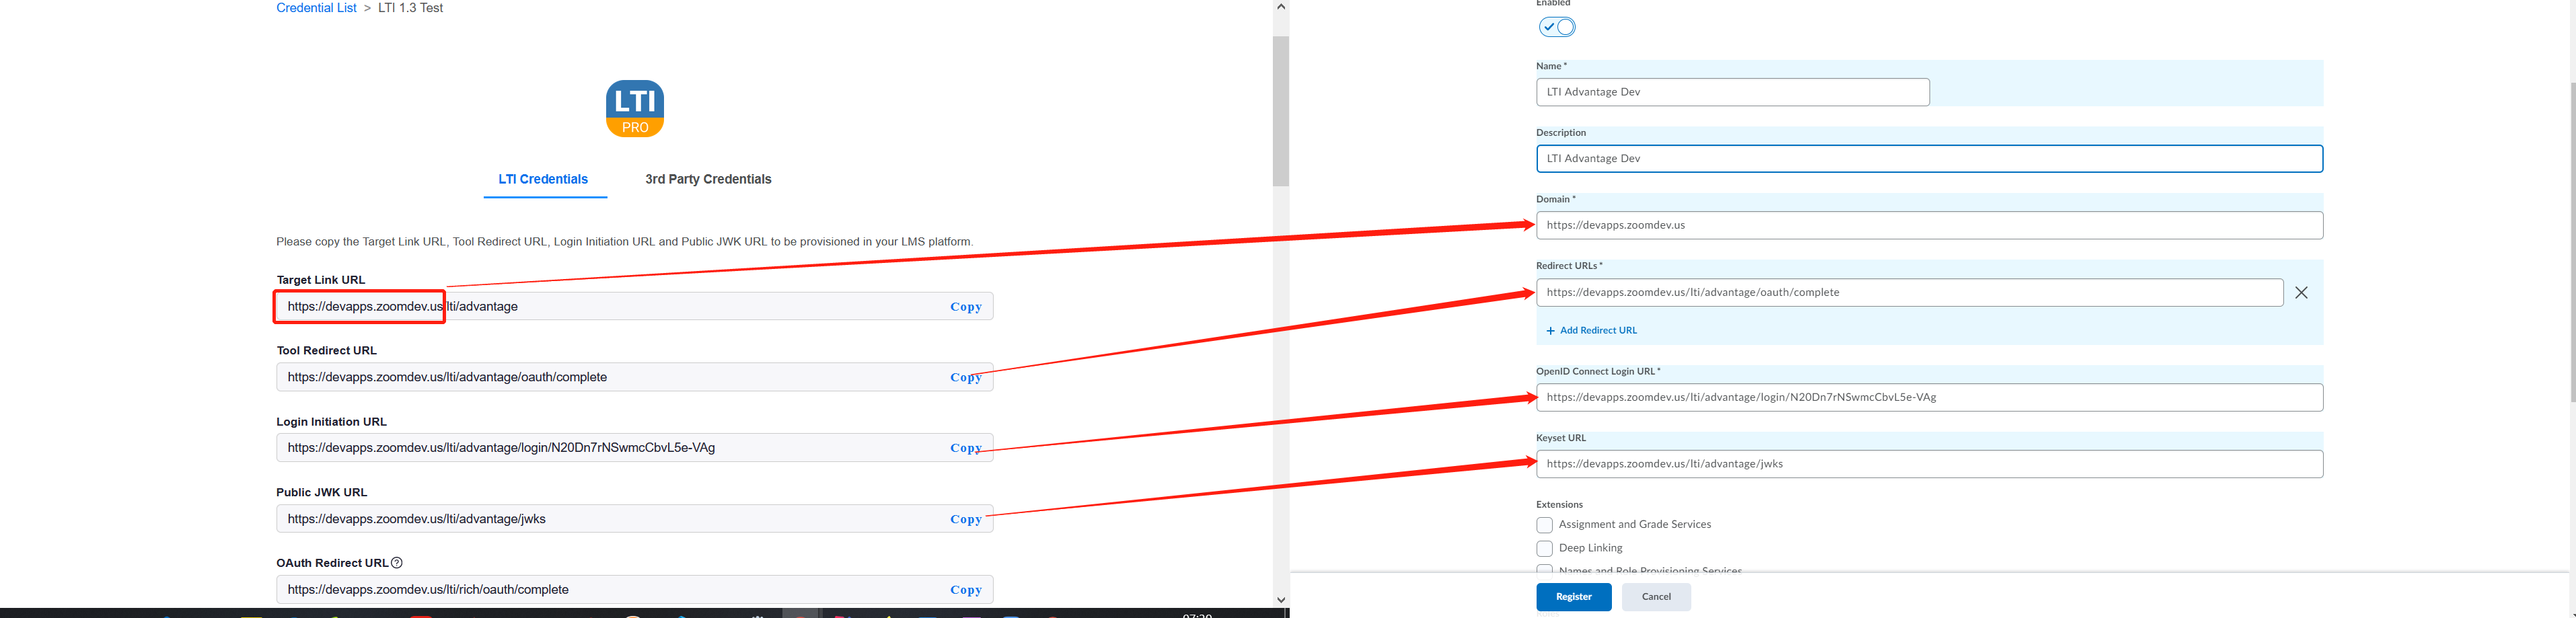
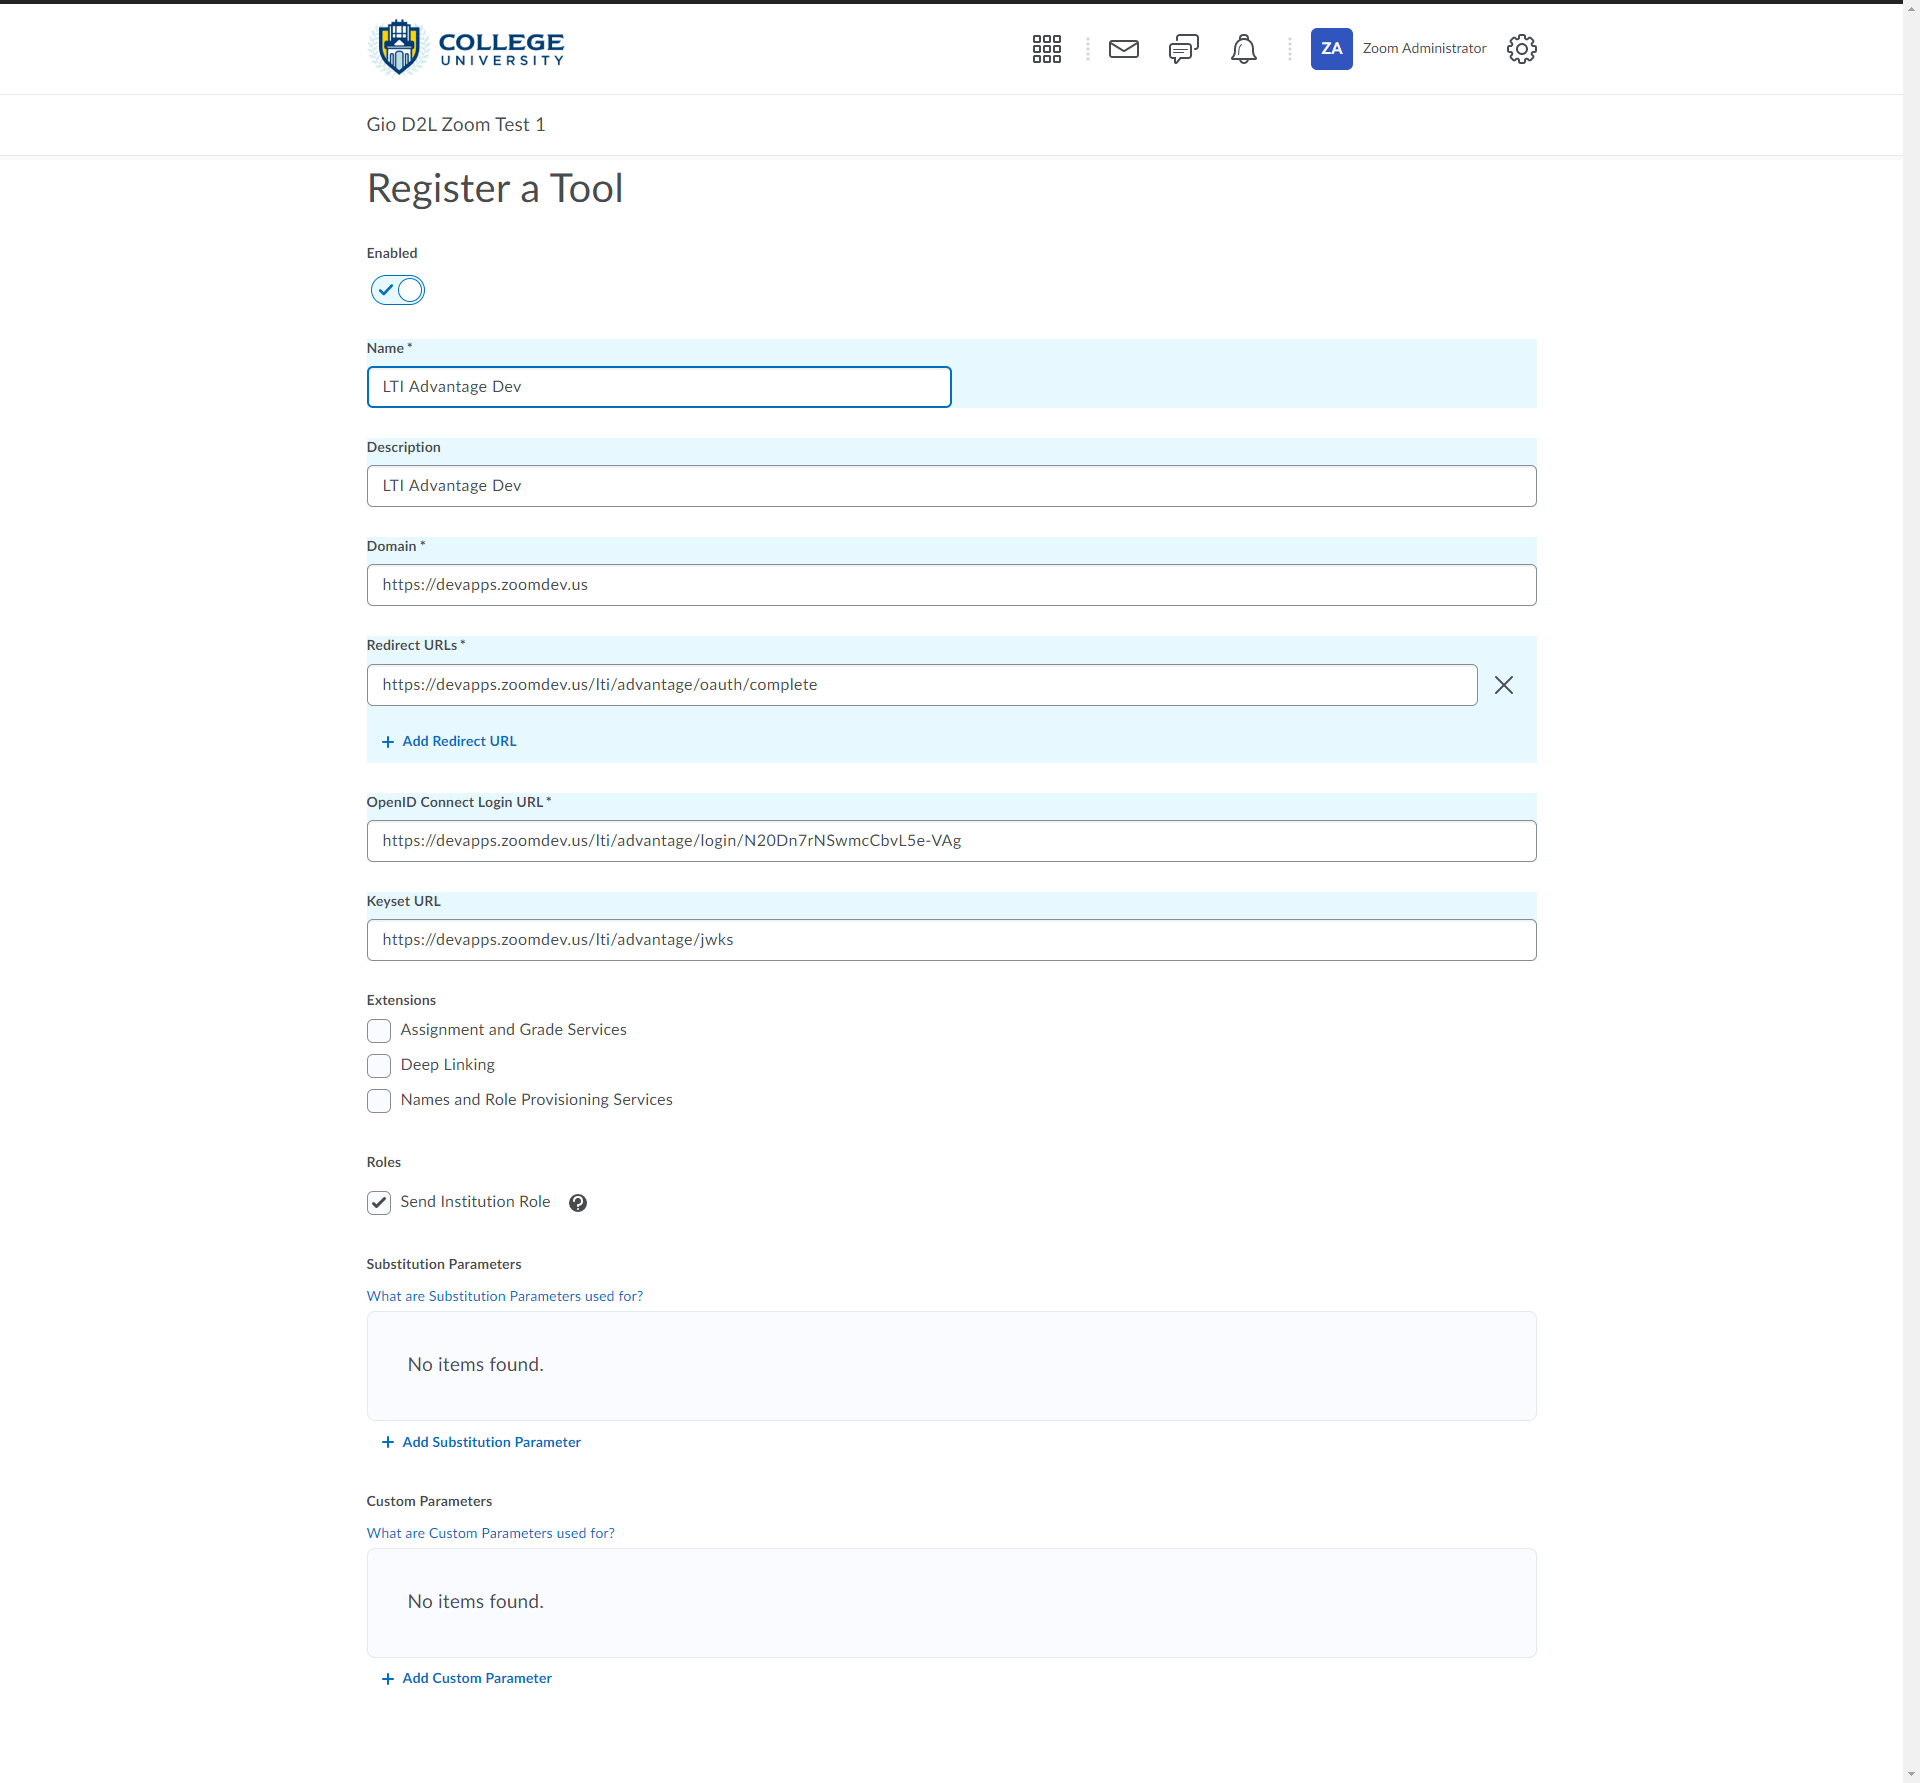
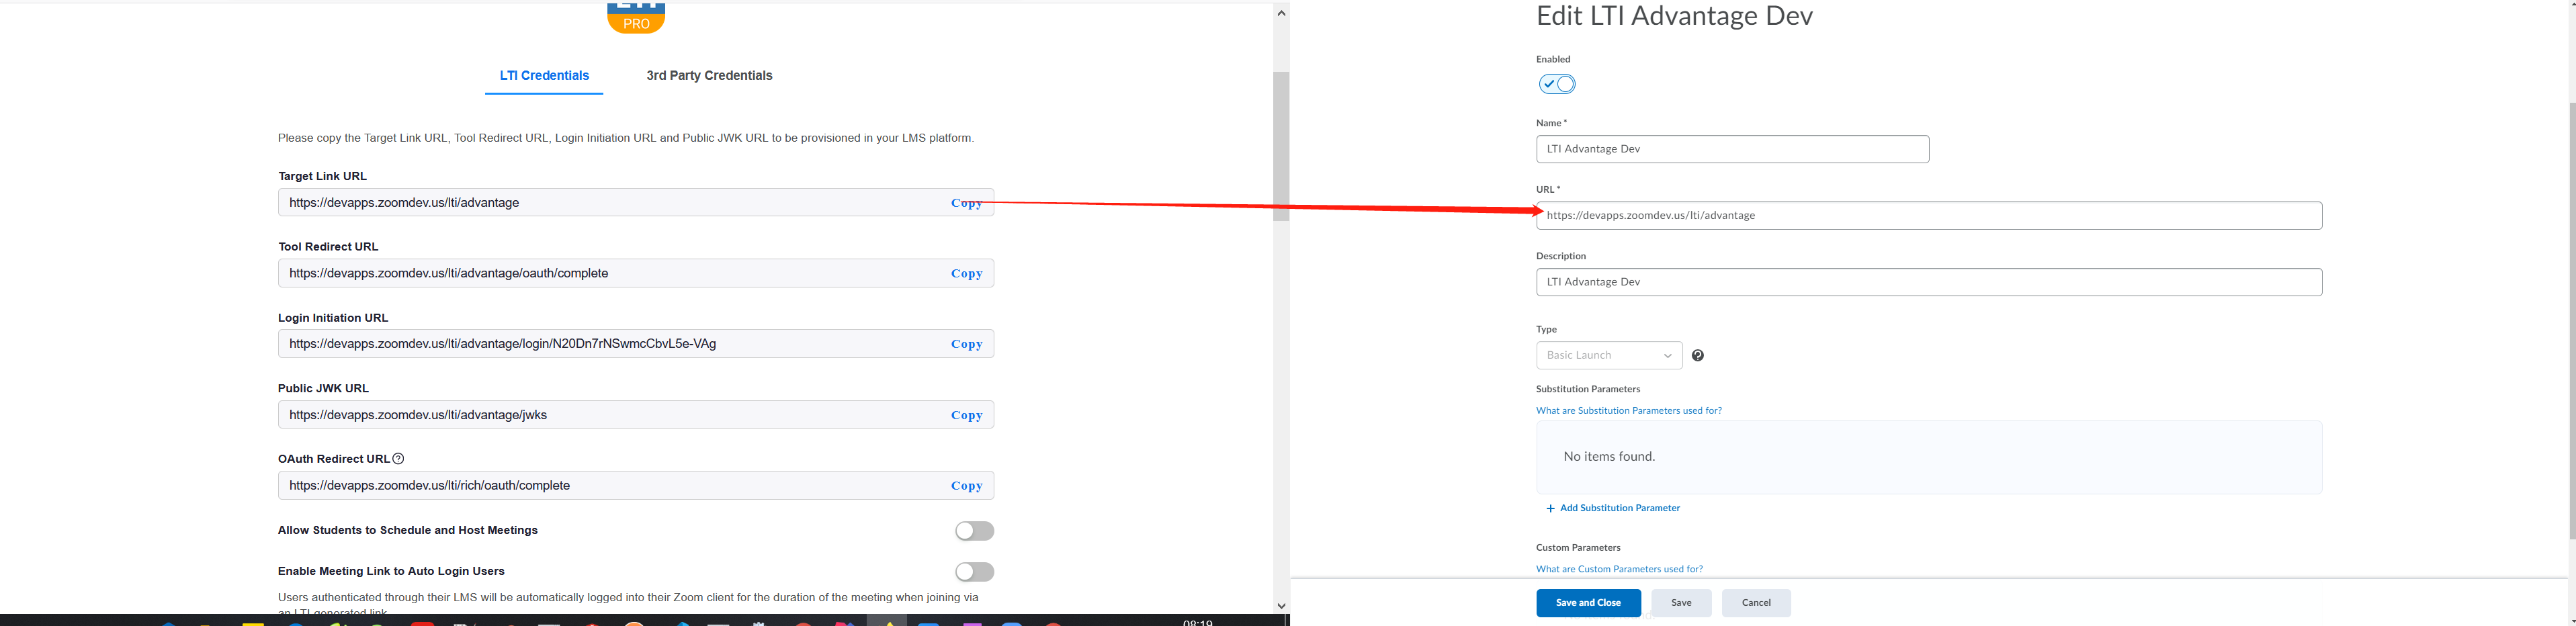
Registering a Tool using LTI Pro configuration data
Refer to Step 1. on how to get to the LTI Pro configuration page which will be needed for this section.
-
- Enter a name for the Name field.
- Copy the Tool Redirect URL in the LTI Pro configuration page, and paste it in the Redirect URLs field.
- Copy the domain in the Target Link URL in the LTI Pro configuration page, and paste it in the Domain field.
- Copy the Target Link URL in the configuration page, and paste it in the Target Link URL field.
- Copy Login Initiation URL in the LTI Pro configuration page, and paste it in the OpenID Connect Login URL field.
- Copy Public JWK URL in the LTI Pro configuration page, and paste it in the Keyset URL.
- Enable Send Institution Role.
- Click the Register button.
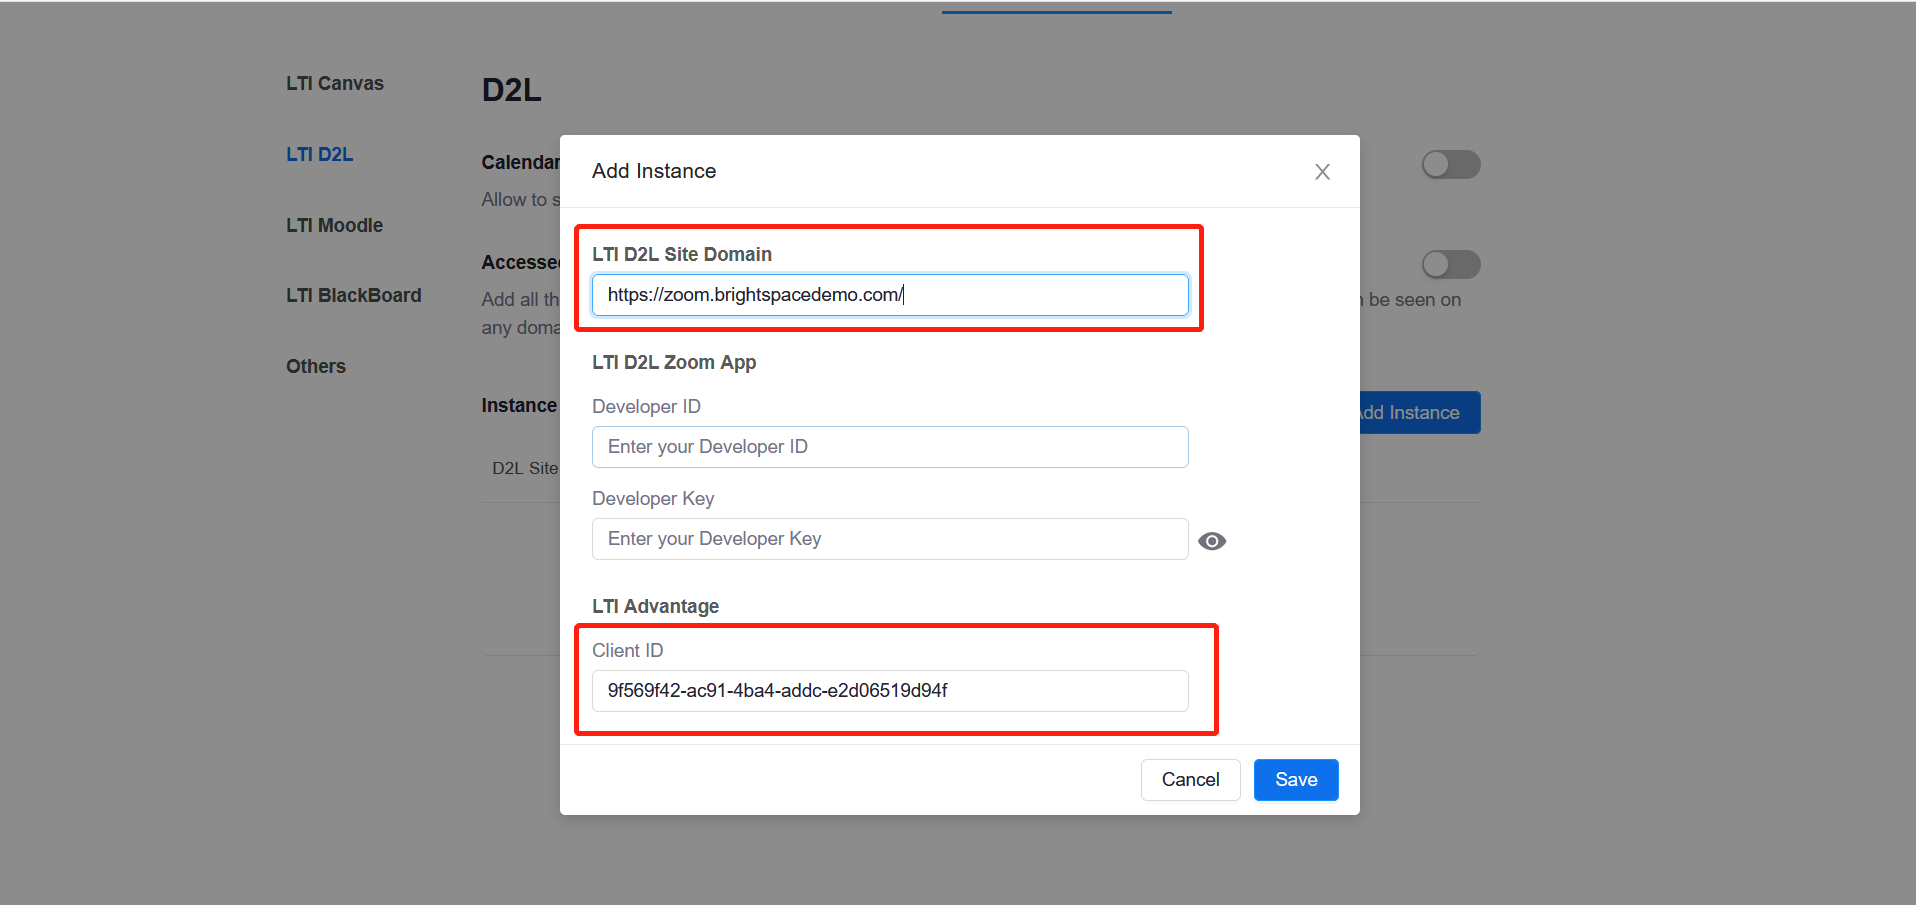
Adding D2L Client ID to the LTI Pro Configuration
-
- Copy the Client Id after the tool has been registered.
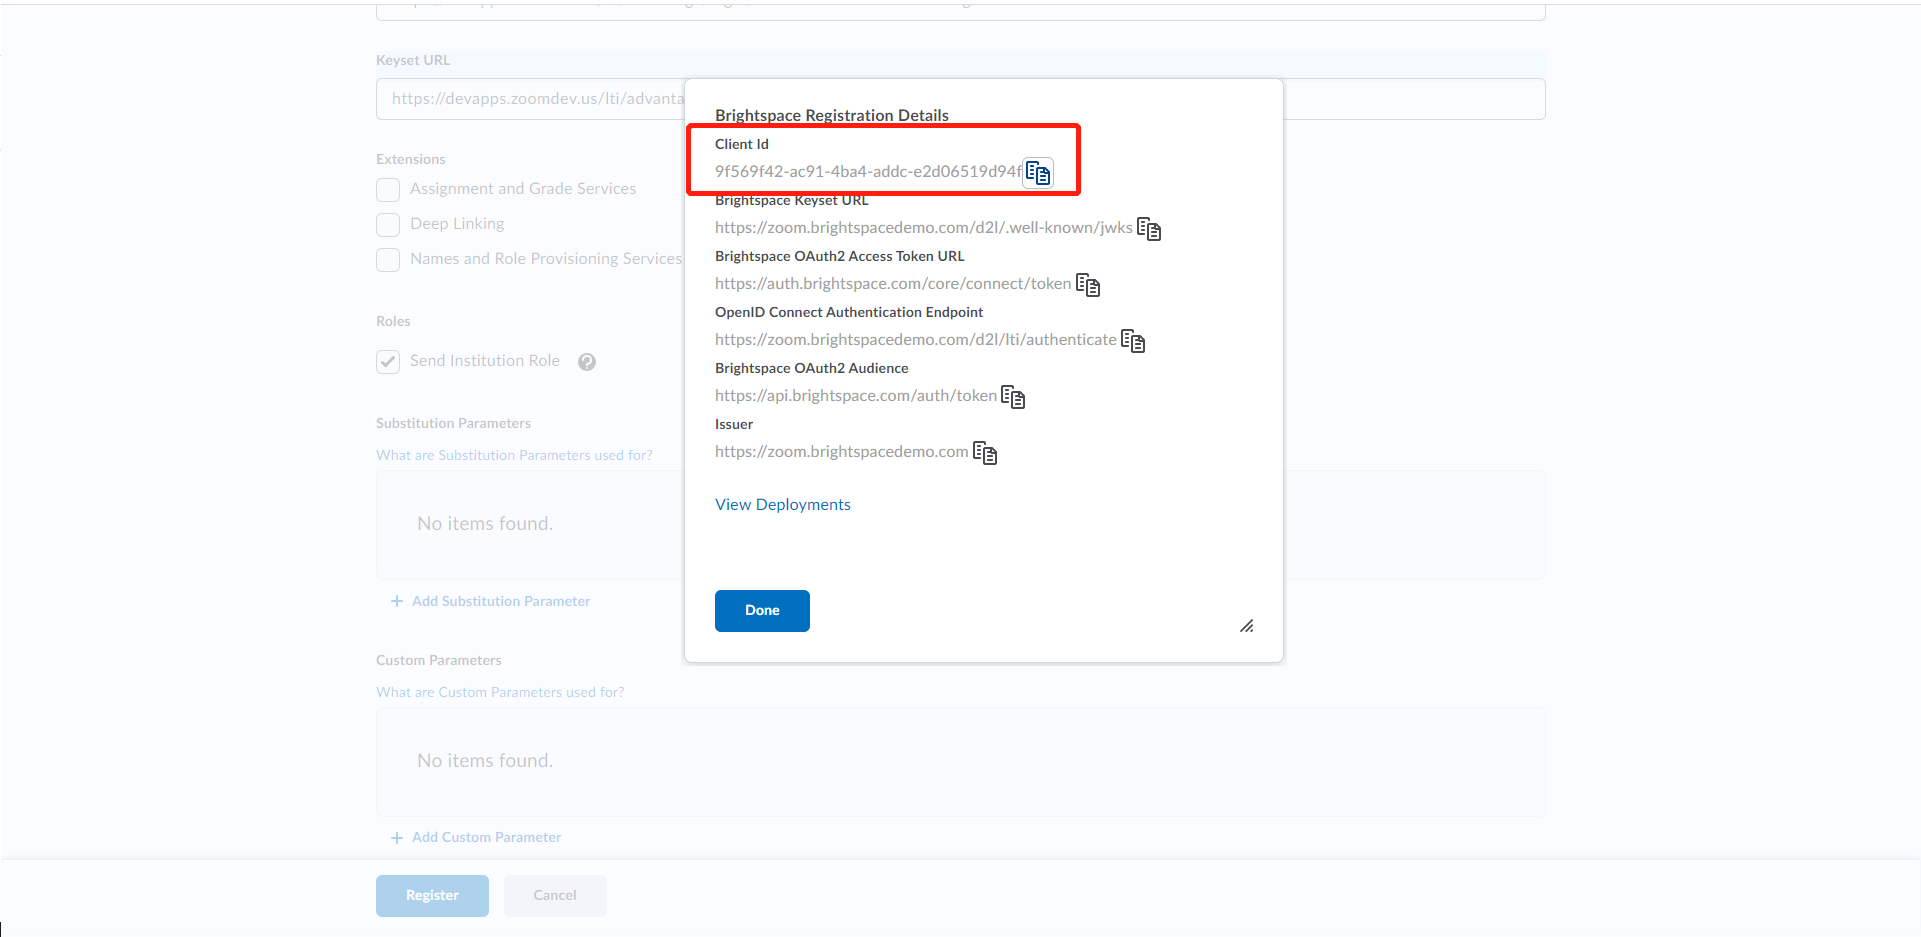
- Copy the Client Id to LTI Pro:
- On LTI Pro Configuration page, click 3rd Party Credentials, D2L, then Add Instance.
- Add the domain used to access D2L to the LTI D2l Site Domain field.
- Copy the D2L Client Id to the LTI Advantage Client Id field.
- Click Save
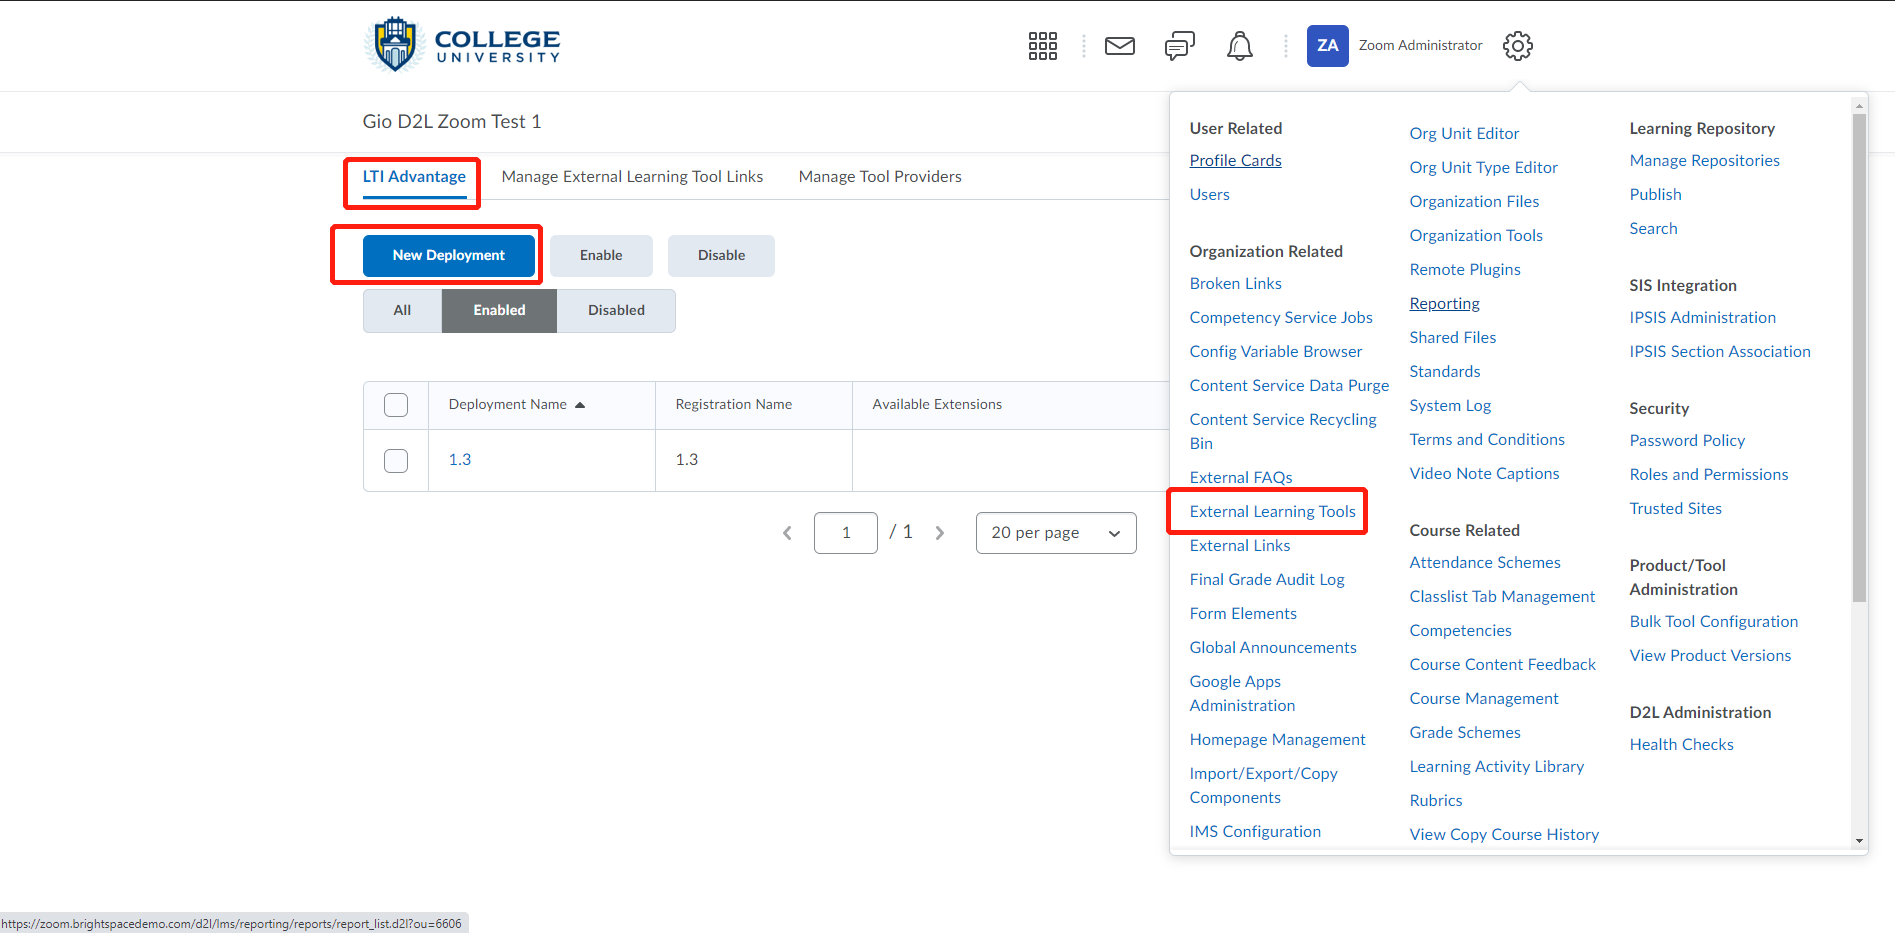
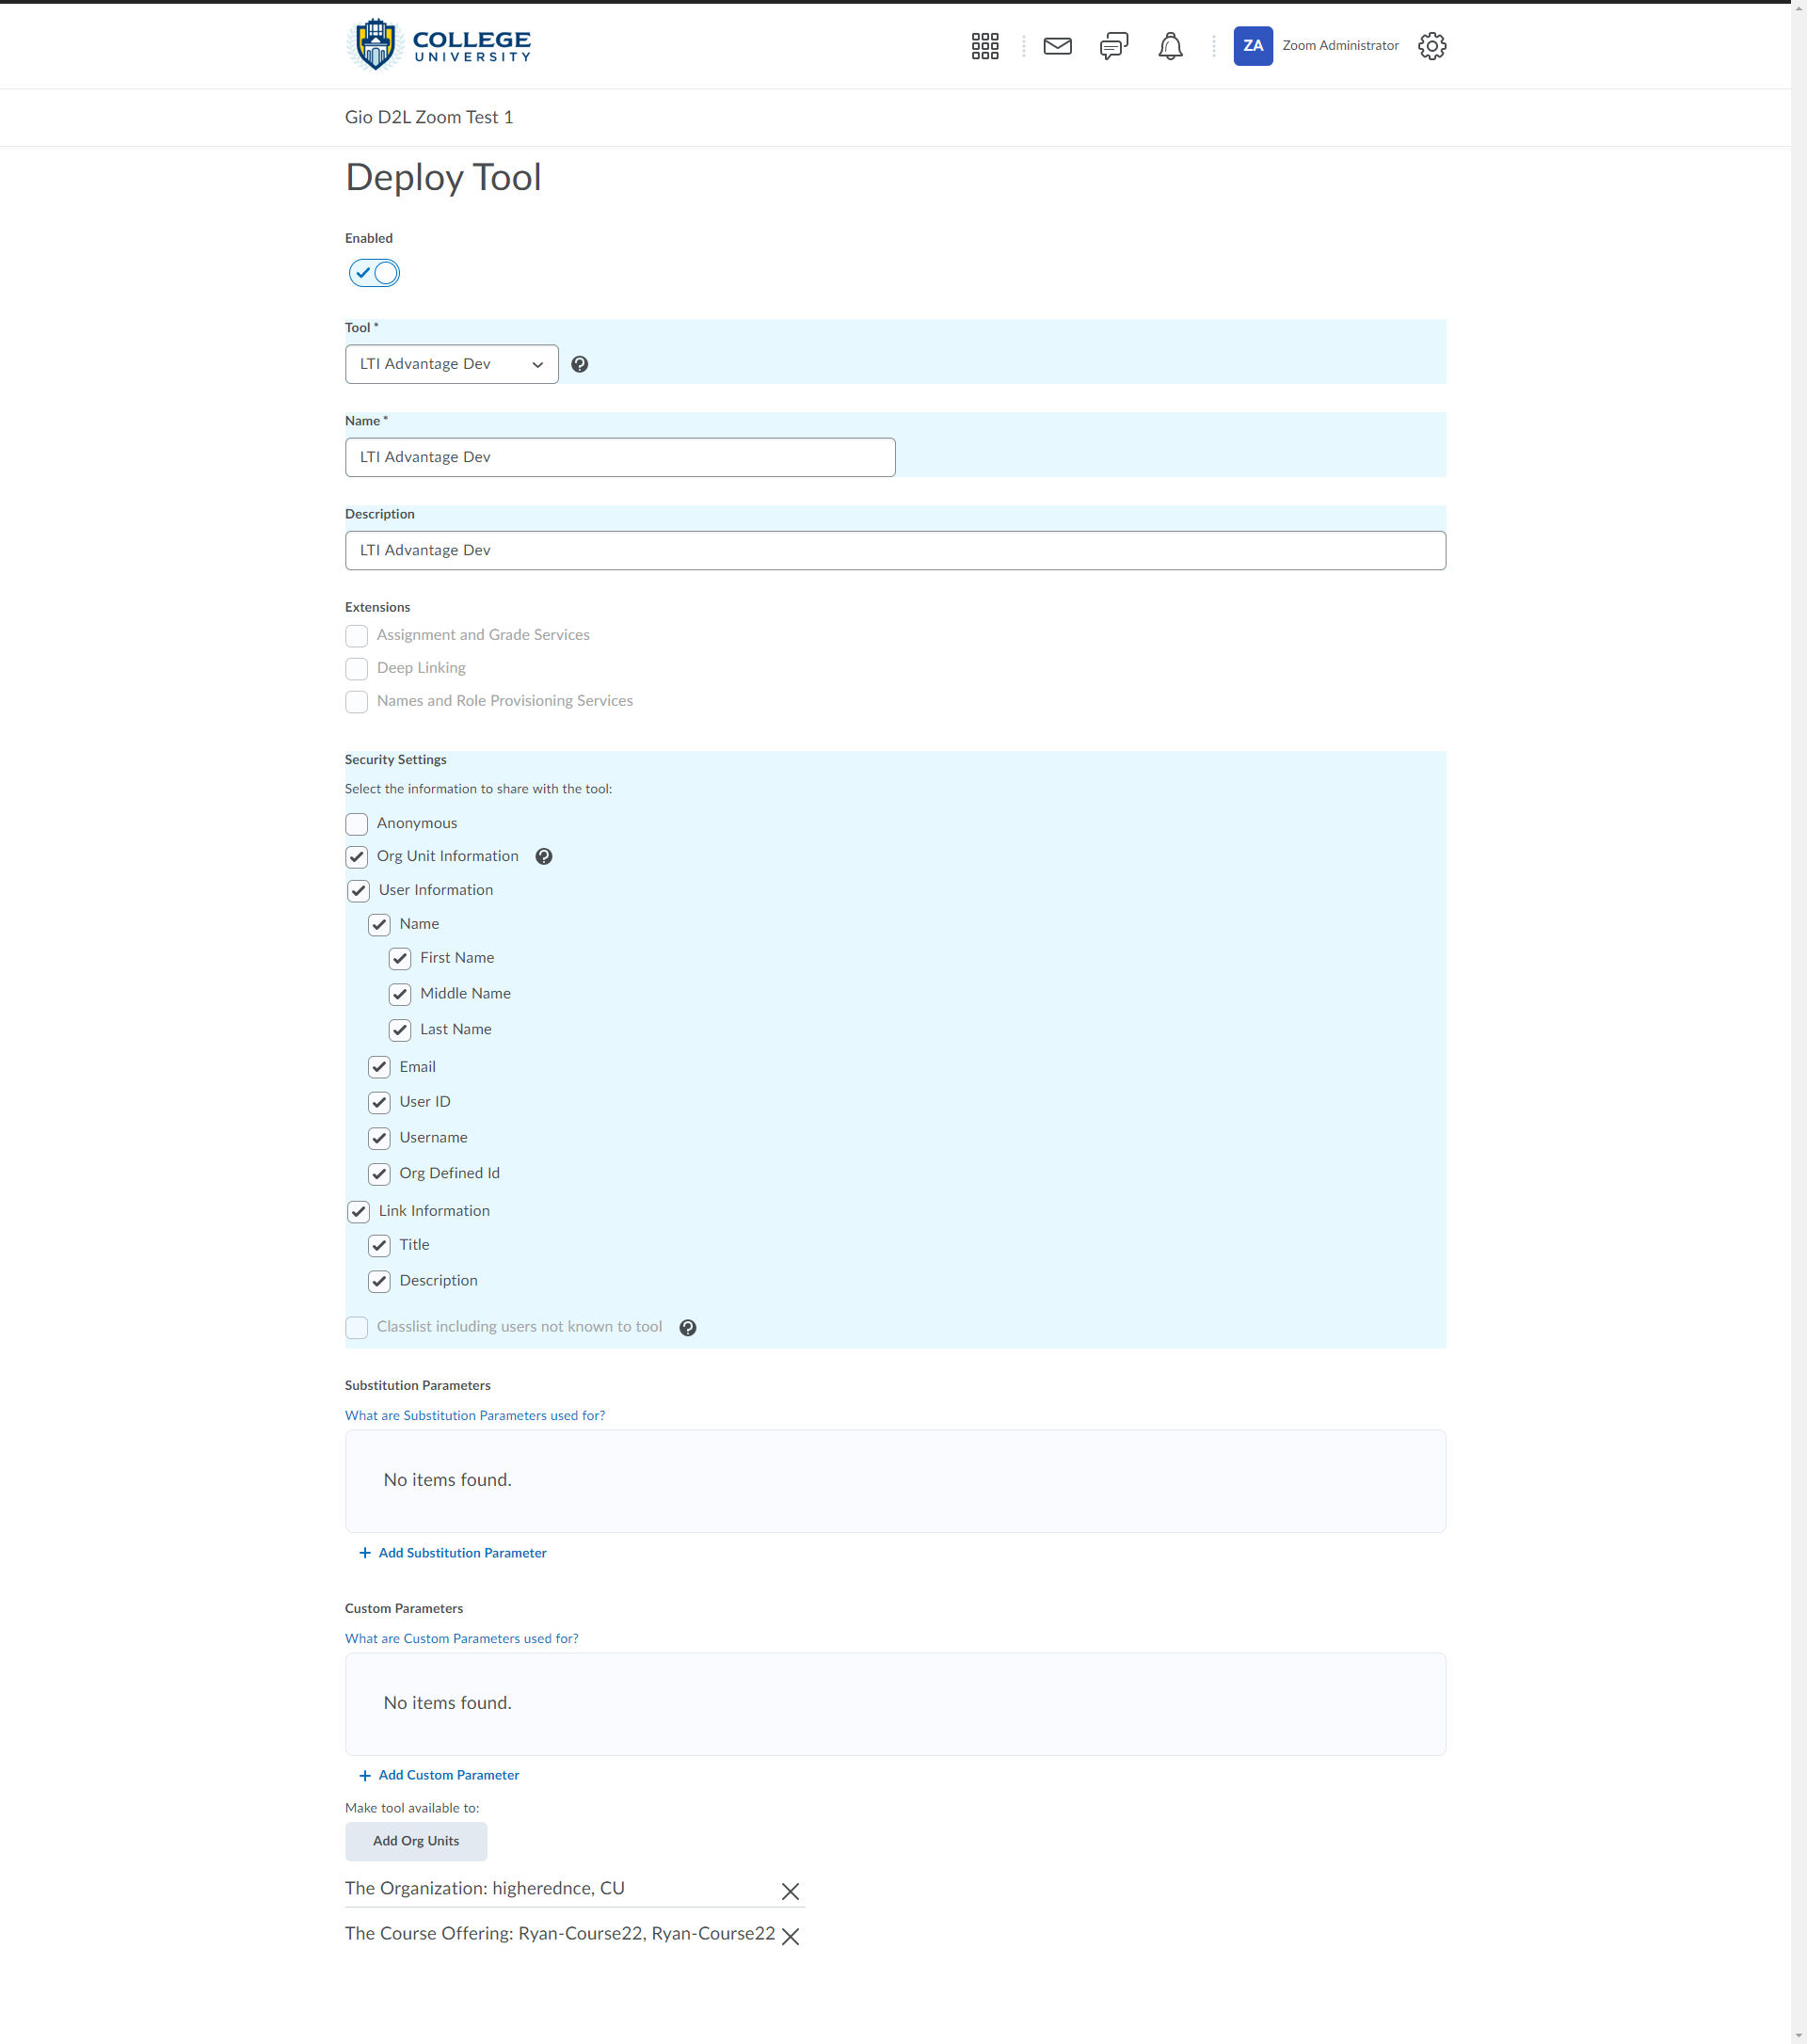
Adding the tool to a D2L course
-
- In D2L, click the Gear Icon.
- Click External Learning Tools, LTI Advantage, then New Deployment.
- Under Tool choose the tool at step 2.
- Enter a name in the Name field.
- In Security Setting, enable the following:
- Org Unit Information
- User Information
- Link Information
- Click Add Org Units and choose which course to assign the tool to.
- Click Add.
- Click Create Deployment.
- Create the links by clicking View Links, then clicking New Link.
- Enter a name in the Name field.
- Copy the Target Link URL in LTI Pro configuration page, and paste it in the URL field.
- Click Save and Close.


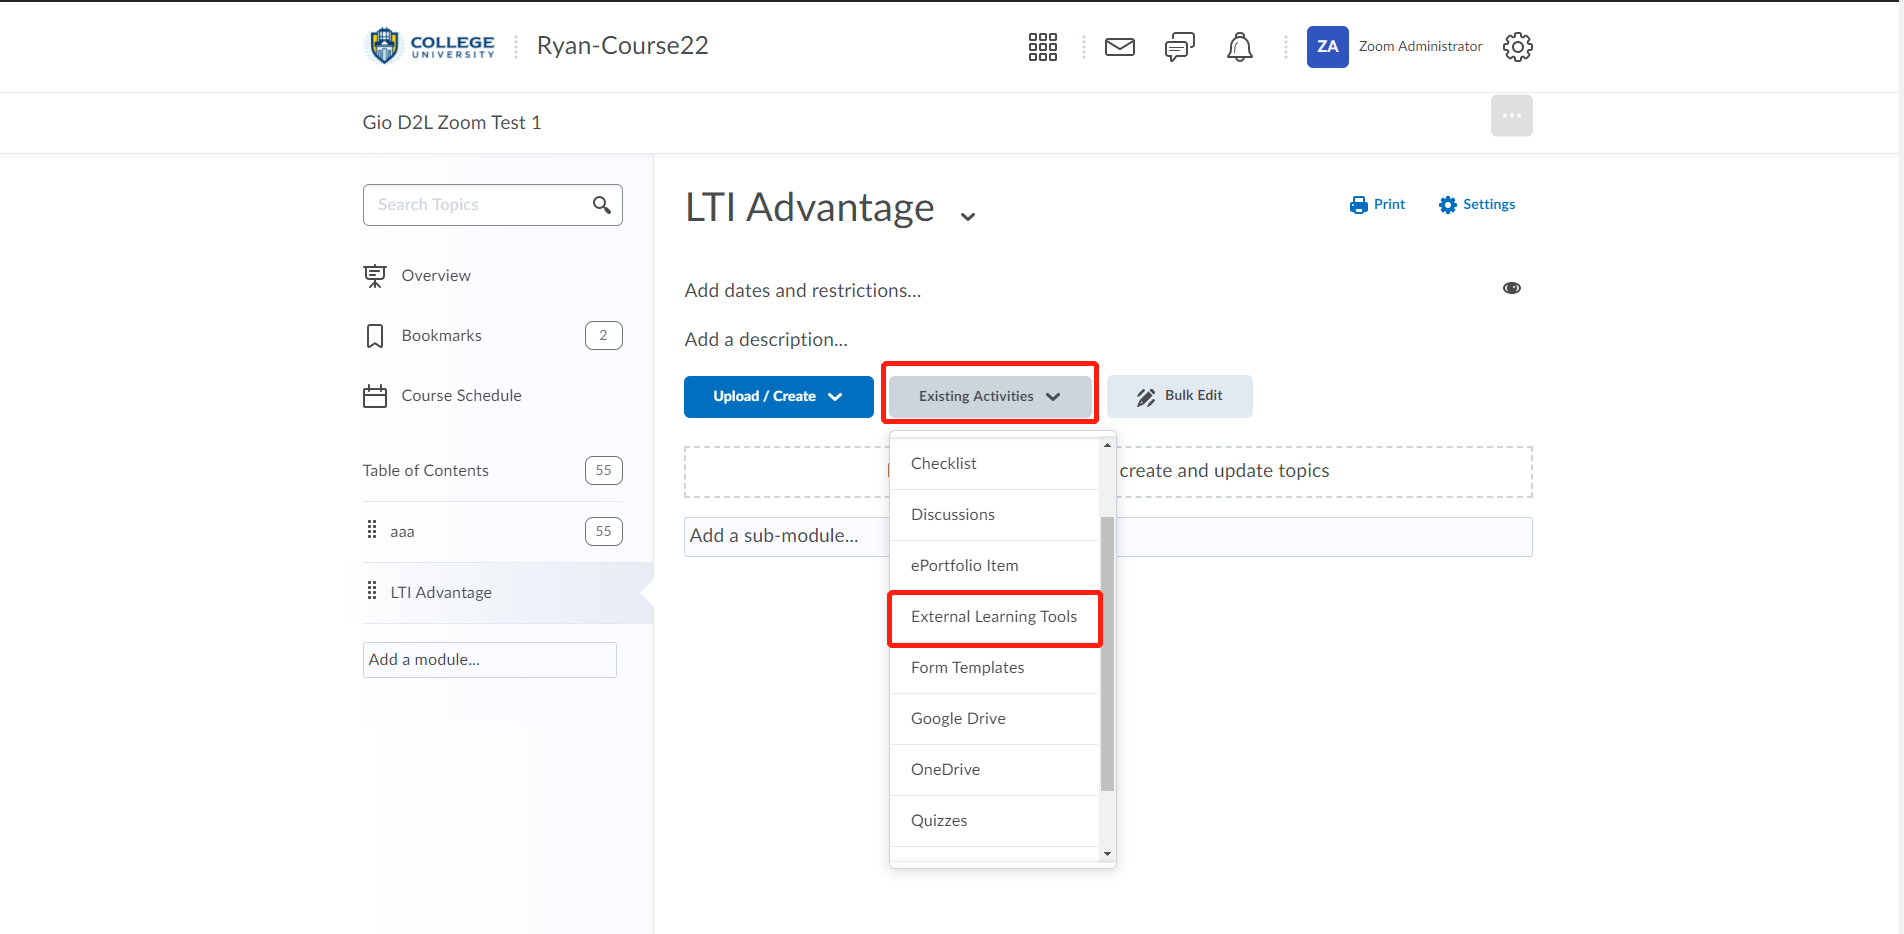
- Go to Course that you want to add the tool to.
- In the top navigation of the course, click Content.
- Under Table of Contents click the module that you want to add the tool too (you may need to Add a module).
- Click Existing Activities, then External Learning Tools.
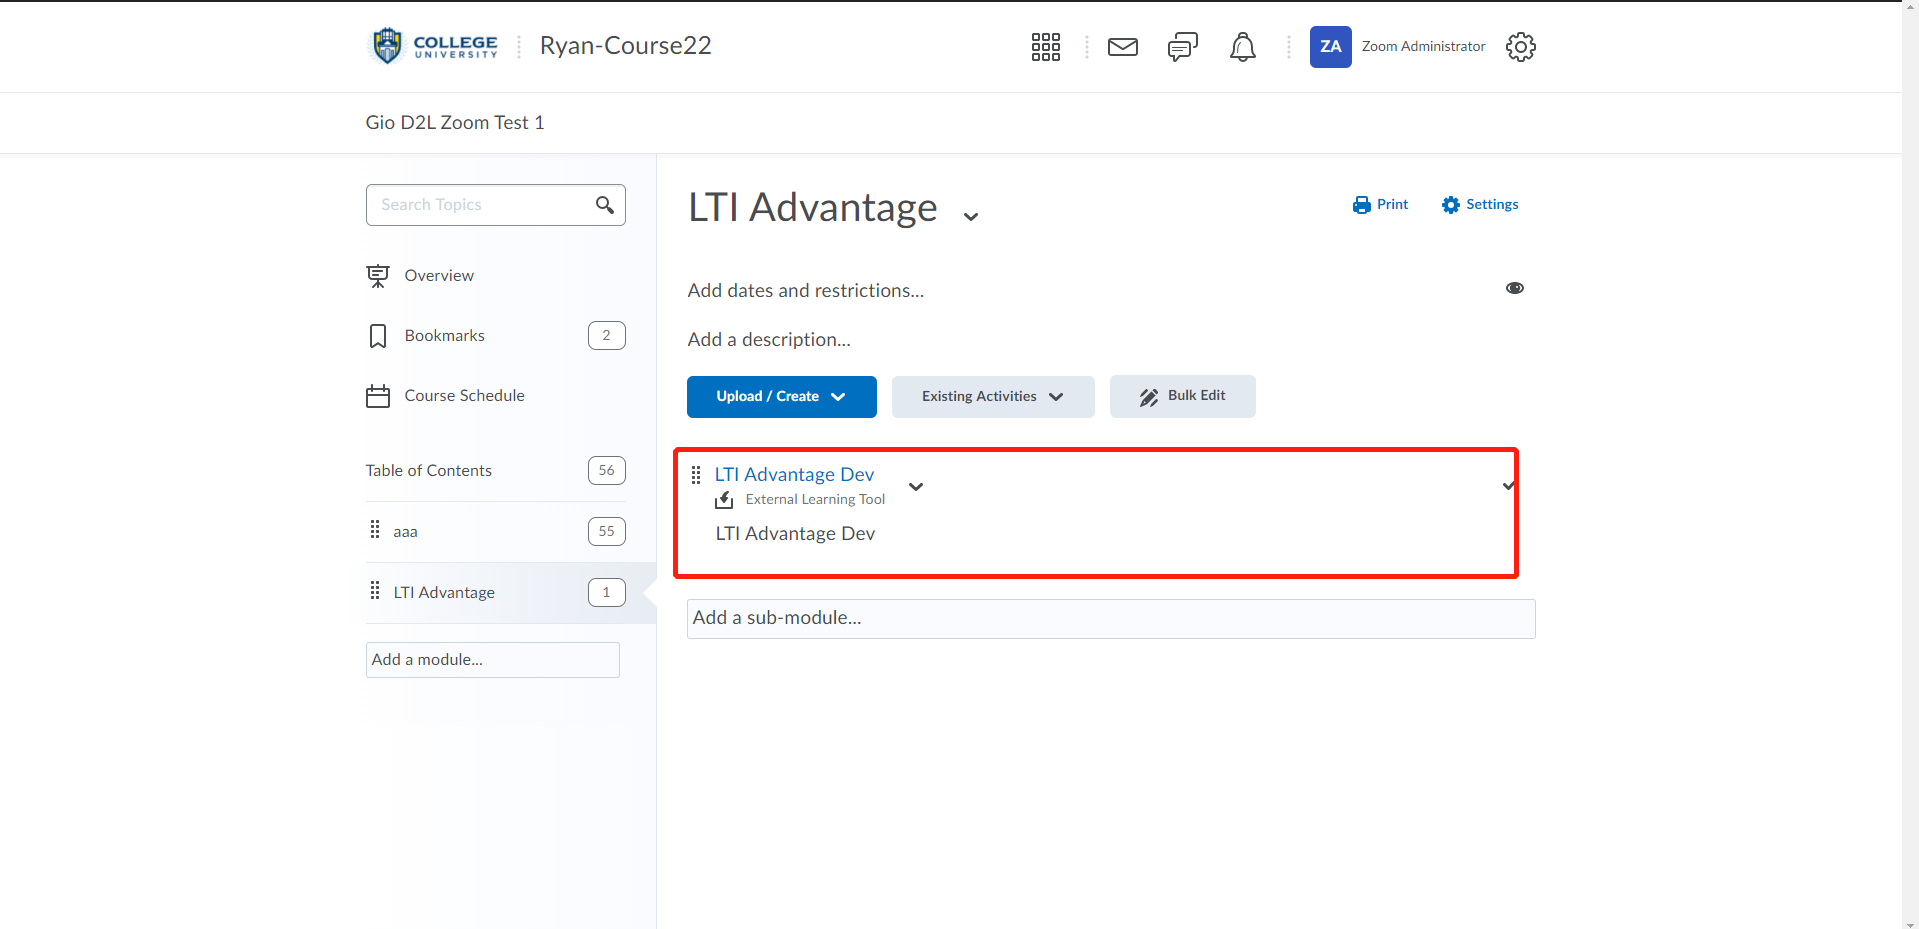
- Choose the Link you created in step 9.

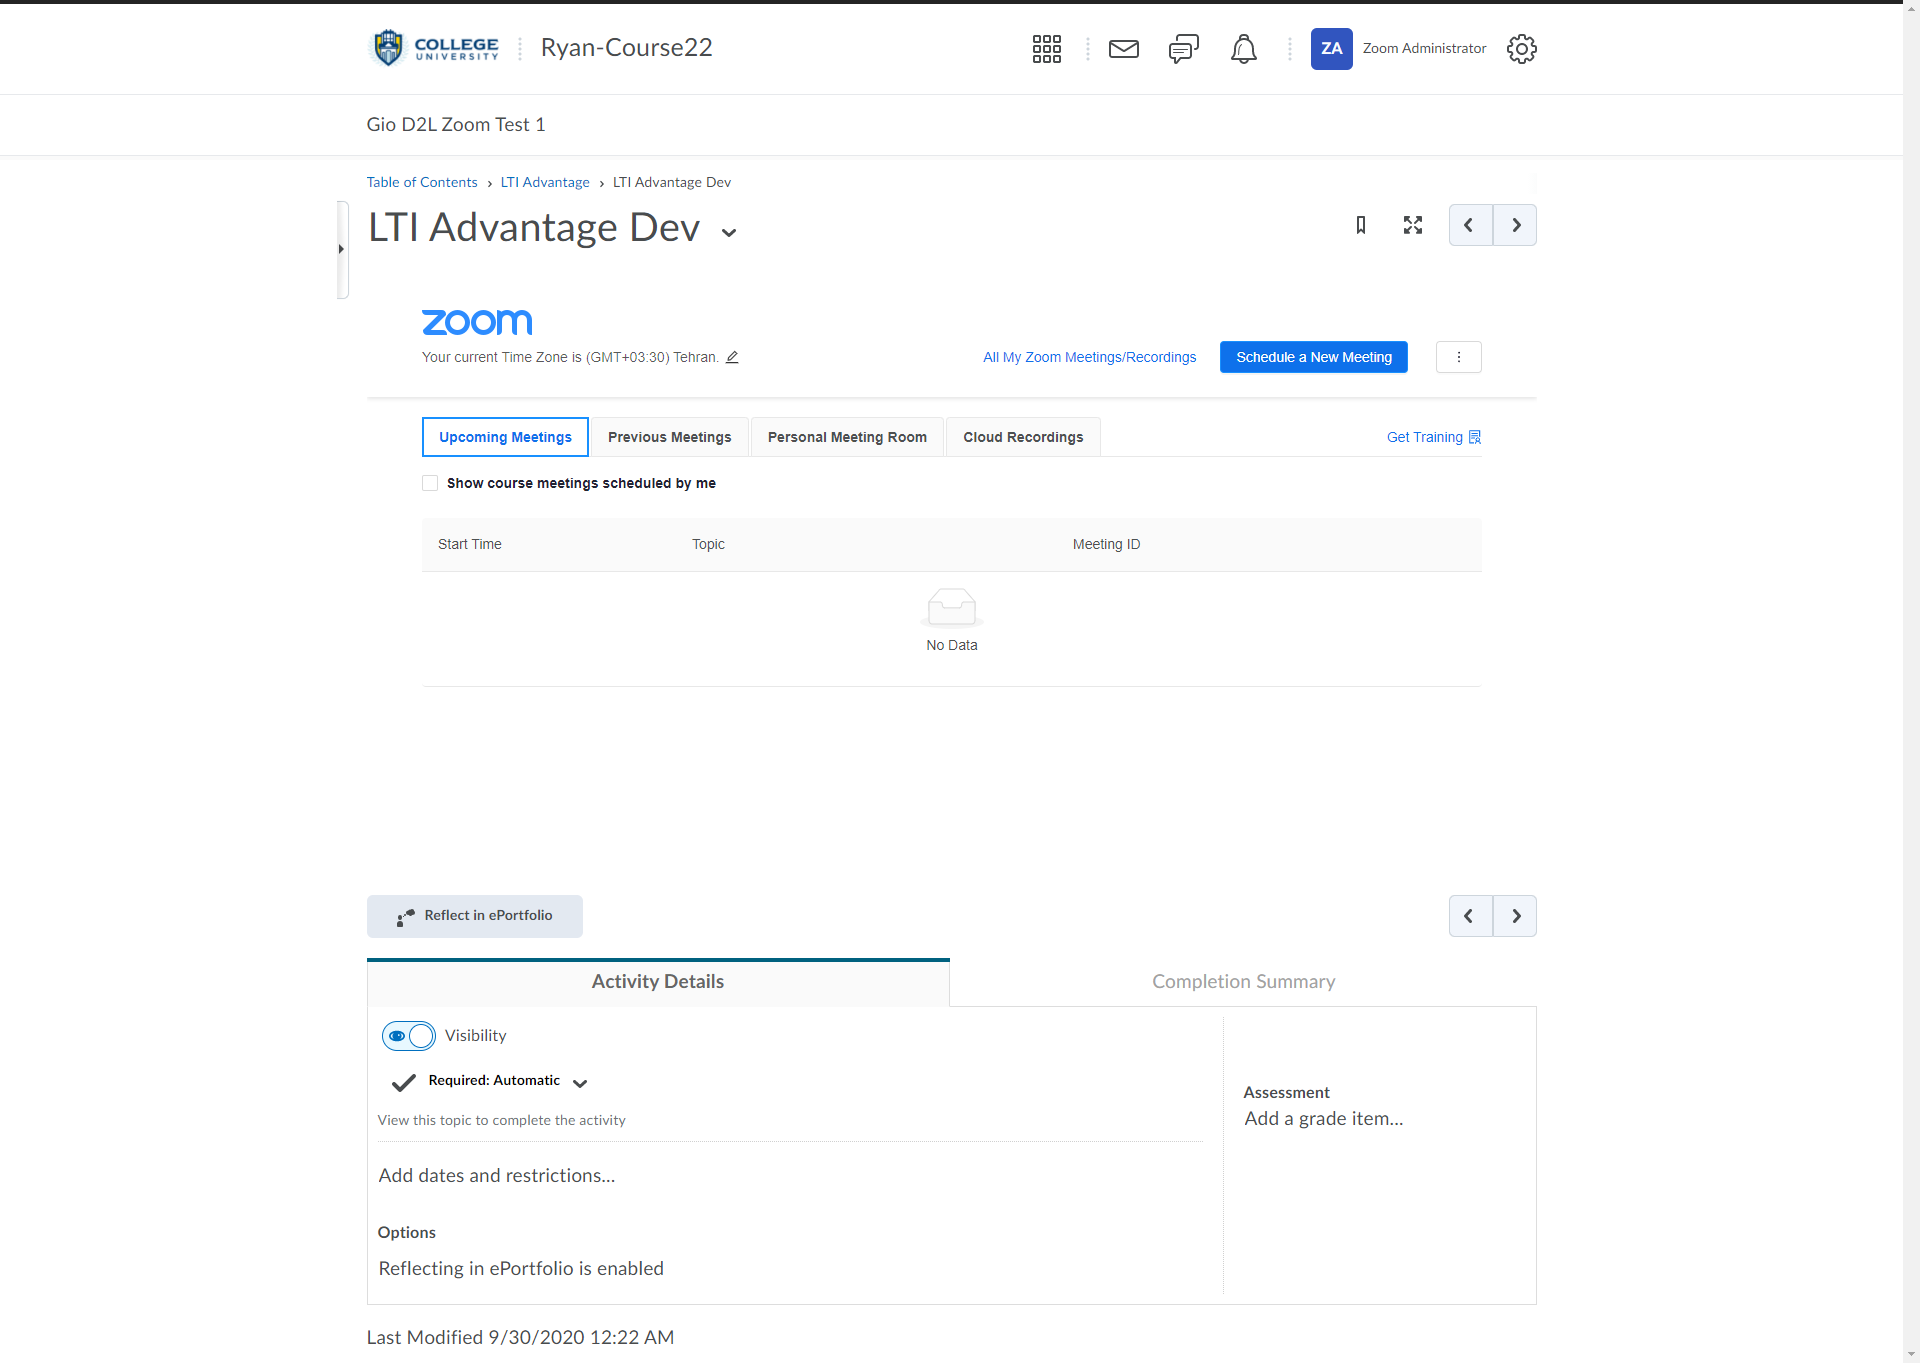
Launching LTI 1.3
-
- Click the link to the tool that was added earlier.
- After launching LTI 1.3. you should see something like this: