Zoom unifies cloud video conferencing and simple online meetings into one easy-to-use platform. Our solution offers the best video, audio, and wireless screen-sharing experience across multiple platforms. The Zoom Web App allows you to use some of the same features available on the desktop app or mobile app within the Chrome web browser.
Note: Admins can instead deploy the Zoom Web App through the Google Admin console, rather than allowing their users access to the Google Play store. Refer to the admin configuration guide for more information.
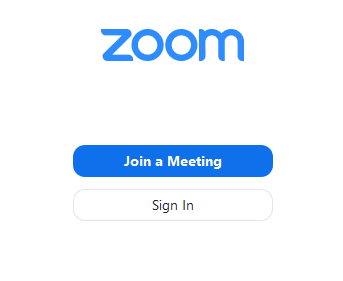
After installing and launching the Zoom Web App (or navigating to https://app.zoom.us/wc in your Chrome Browser), click Join Meeting to join a meeting without signing in. If you want to sign in and start or schedule your own meeting, click Sign In.

To sign in, use your Zoom, Apple, Google, Facebook, or SSO credentials. If you have a Zoom account but cannot remember your password, reset your password.
After signing in, you will see the Home ![]() tab, where you will see these options centered around meetings:
tab, where you will see these options centered around meetings:
 New Meeting: Start an instant meeting.
 Join: Join a meeting that is in progress.
 Schedule: Opens a new tab to schedule a meeting.
 If you have a Zoom Contact Center license, use this tab to access contact center features like voice, video, messaging, inbox, address book, and analytics.
Note: The Zoom Contact Center Zoom Web App supports all major features, such as voice, video, messaging, inbox, analytics, engagement details, disposition, and consumer profile. You can use the Zoom Contact Center Zoom Web App on all supported web browsers.
This tab contains your chats and channels. Here you can chat with contacts, share files and screenshots, set and check message reminders, and more.
Note: To enable users to access the Team Chat tab on the Zoom Web App, administrators must configure the following settings:
If you have a Zoom Phone license, this tab allows users to make phone calls with Zoom Phone, as well as view their call and voicemail history, access shared lines, and send SMS messages.
Note: If you do not have Zoom Phone set up on your account, this tab will not be visible.
This tab lists your upcoming meetings and webinars. Clicking on an upcoming meeting provides more information and options, such as starting the selected meeting.
This tab provides users with the ability to draft, organize, and share working materials and documents.
Select the Contacts ![]() tab to view and manage your contacts. A directory of all your contacts and user groups are displayed, and, if your organization has Zoom Rooms, you will also see a list of Zoom Rooms.
tab to view and manage your contacts. A directory of all your contacts and user groups are displayed, and, if your organization has Zoom Rooms, you will also see a list of Zoom Rooms.
Click on a contact to see more profile information, as well as the option to meet with a video meeting.
This tab provides users a set of easy-to-use tools to collaborate together to capture ideas, processes, and concepts.
Once you have started or joined a meeting, you can access the meeting controls located at the bottom of the meeting window (move your mouse in the Zoom window to display meeting controls).
Learn more about meeting controls for hosts, co-hosts, and attendees. You can also join a test meeting to familiarize yourself with meeting controls before joining a scheduled meeting.
From any tab of the Zoom Web App, click your profile picture, then click Settings.
Alternatively, while in a meeting or webinar, you can click More ![]() in the meeting controls, then click Settings.
in the meeting controls, then click Settings.
There, you can adjust audio, video, chat, and virtual background settings, further customizing your meeting experience to suit your devices and needs.
Learn more about the settings available in the Zoom Web App.
Note: Recording is also available for meetings joined through the web browser and only supports cloud recordings.