Customizing branding for your vanity URL
Once you have an approved vanity URL, you can customize it with your organization's branding. Review our branding guidelines before customizing your page with the Zoom logo or other marketing materials.
Any changes made to branding will only apply when accessing the Zoom web portal from your vanity URL (for example, yourorganization.zoom.us). Branding will not apply when accessing the web portal from zoom.us.
Notes:
- We strongly recommend you have experience with web design (HTML and CSS) before customizing branding settings. Consult a web developer if you are having issues with your HTML/CSS.
- Javascript is not currently supported for custom branding.
- Account owners and admins can force sub accounts to use the same branding settings as the parent account. These sub accounts will not be able to change branding settings in their own account.
Requirements for customizing branding settings for your vanity URL
- Business, Education, Enterprise, or API plan
- Approved vanity URL that is compliant with our guidelines (for example: success.zoom.us)
- Admin that is familiar with HTML/CSS
How to access all branding settings
- Sign in to the Zoom web portal.
- In the navigation menu, click Advanced then Branding.
How to upload images
Before customizing branding, upload images you will use like the background image and your organization's logo.
- Sign in to the Zoom web portal.
- In the navigation menu, click Advanced then Branding.
- Click the Images tab.
- Browse your computer and select the image you would like to upload.
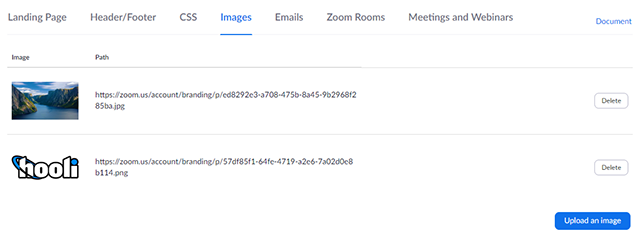
- Once uploaded, the files will be displayed in the list. The image URL is displayed in the Path column.
How to customize the landing page
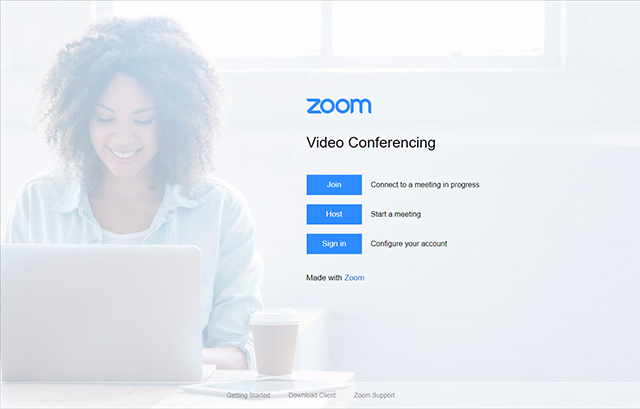
The landing page is the main page for your organization's vanity URL. By default, the landing page looks like this:
To customize the landing page's HTML and inline CSS:
- Sign in to the Zoom web portal.
- In the navigation menu, click Advanced then Branding.
- Select the vanity URL you want to edit.
Note: If you have only one vanity URL, you will not see additional options. Learn about multiple vanity URLs. - Click the Landing Page tab.
- Follow the sections below make basic changes to the landing page so that it matches your organization's branding.
Note: To find the below attributes faster, press Ctrl + F and type in the attribute name. Then follow the instructions to update the attribute.
Background image
Attribute name: background-image
To change the background image, update the URL between the quotation marks with the URL of the uploaded background image. To find the URL of the background image, go to the Images tab and copy the link in the Path column.
Sample:
background-image: url("https://yourorganization.zoom.us/account/branding/p/backgroundimage.jpg");
Content text color
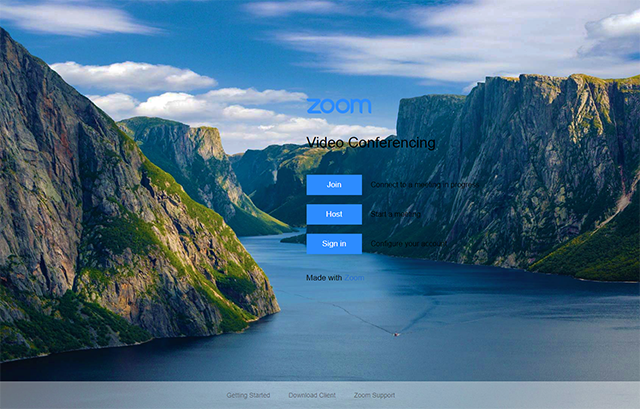
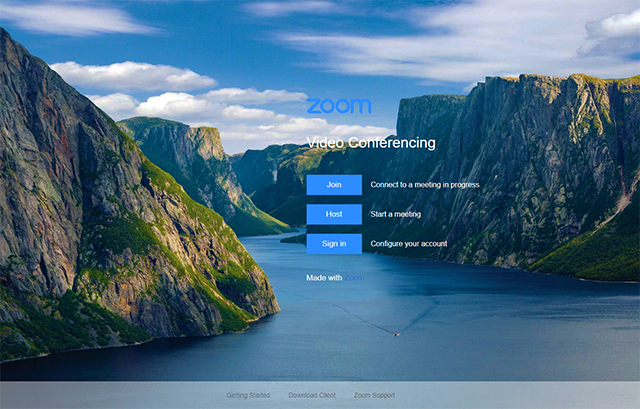
To change the text color of the landing page content (not including the buttons), add the color attribute within .content-body { }. Use a lighter color if your background is dark.
Sample:
.content-body {
 display: table-cell;
 vertical-align: middle;
 color: white;
}
Page title
Attribute name: title
The page title will change what will be seen in a browser tab for the page name. Enter your own page title between <title> and </title>.
Sample:
<title>Video Conferencing, Web Conferencing, Online Meetings, Screen Sharing</title> <!--customize landing page title-->

Button background color
Attribute name: background-color (look for the background-color attribute that is nested under .button)
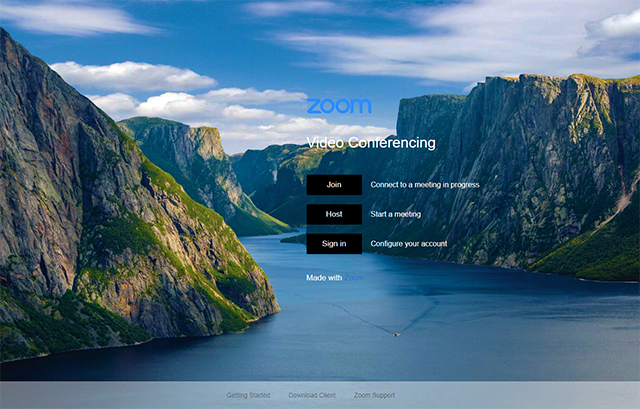
To change the background color of the three buttons (Join, Host, and Sign In), you need to specify colors using color hex values, for example, #FFFFFF is white. Use Colorpicker for identifying and selecting colors by hex value.
.button {
 width: 80px;
 background-color: #000000; /*customize button color */
 border-color: #2D8CFF;
 padding: 12px 20px;
 display: inline-block;
 text-align: center;
 margin: 10px 0;
 transition: .3s ease;
}
Button background hover color
Attribute name: background-color (nested under .button.hover)
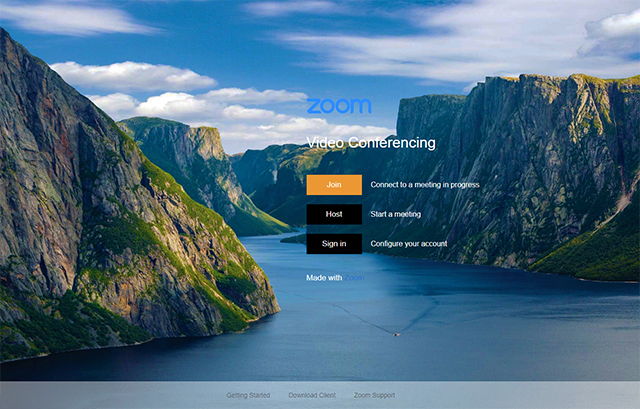
To change the button color when you hover your mouse pointer over it, specify colors using color hex values, for example, #FFFFFF is white. Use Colorpicker for identifying and selecting colors by hex value.
Sample:
.button:hover {
  background-color: #eb9834; /*customize button color */
 }
Button text color
Attribute: color (nested under .btn-text)
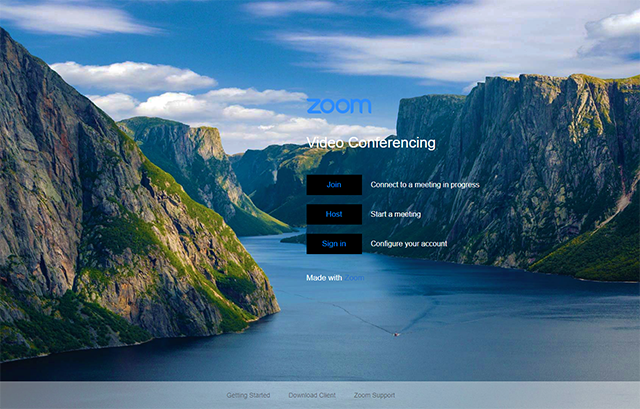
Change the color of the text inside the button. If you used a darker color as your button background, set the attribute to white. If you have a lighter background color, set the attribute to black. You can also specify a custom hex value. Use Colorpicker for identifying and selecting colors by hex value.
Sample:
.btn-text {
 color: #008BFF; /*customize button font color */
 font-size: 17px;
}
Logo
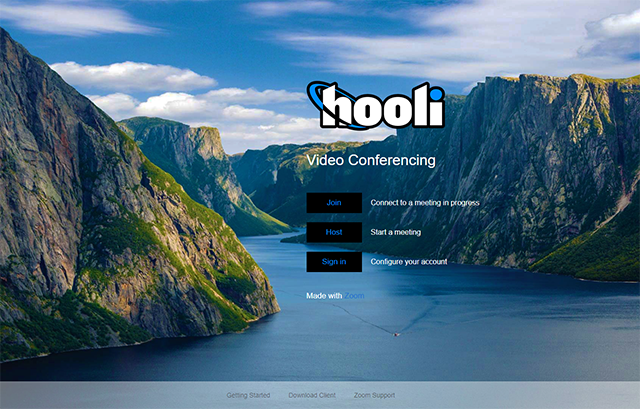
Change the logo that appears above the three buttons. To find the URL of the logo, go to the Images tab and copy the link in the Path column.
Note: By default, the logo is resized to 140px by 31.5px. This will most likely distort your custom logo. To remove this, remove class="zoom-logo" after the image URL in the landing page HTML.
Sample:
<div class="row">
  <img src="https://zoom.us/account/branding/p/1c7dfaf5-2646-4224-92e0-5abef82036b1.png" alt="Zoom Logo"> <!--customize company logo-->
<div class="row">
How to customize the header, footer, and sidebar of the web portal
You can customize the header and footer that appears throughout the web portal when accessed from your vanity URL.
Note: These settings don't affect your landing page.
- Sign in to the Zoom web portal.
- In the navigation menu, click Advanced then Branding.
- Click the Header/Footer/Sidebar tab.
- Follow the sections below:
- Logo URL: Customize the header logo. Paste the URL of an image you uploaded. You can paste an external image URL if you want to store you image externally.
- Header Html: Customize the floating header bar.
- Footer Html: You can remove the footer with Zoom information and links from your vanity URL. To remove the footer, remove all of the code from the footer section and replace it with the following.
<div id="footer" class="container">
</div>
- Show frequently used links on the left sidebar: Change what links are displaying in the left-side navigation menu.
How to use custom CSS
You can use customize the CSS used for the web portal.
Note: Custom CSS doesn't apply to the landing page. You can customize the inline CSS for your landing page.
- Sign in to the Zoom web portal.
- In the navigation menu, click Advanced then Branding.
- Click the Custom CSS tab.
- Click Edit to the CSS select you want to customize.
- Use the Custom CSS to define other CSS selectors.
How to customize email templates
You can customize email templates for general administrative emails.
- Sign in to the Zoom web portal.
- In the navigation menu, click Advanced then Branding.
- Click the Emails tab.
- Click Edit next to the template you want to edit.
List of customizable email templates:
- User
- Reset Password Notification Email: Refers to a confirmation email a user receives after resetting their password.
- Zoom Account Sign In Assistant: This e-mail provides guidance for users experiencing issues while attempting to sign in.
- Zoom Account Sign Up Assistant: Refers to a confirmation email sent if the account is already registered and activated.
- Admin Change Email: If sign-in email is changed by admin, an email will be sent to confirm the change.
- Meeting
- Meeting Invite Email: Hosts can copy the plain text invitation from meetings in progress
- Meeting Schedule Email: Hosts copy this email from the scheduled meeting detail page. The HTML version can be used for the Outlook plugin when they schedule a meeting through Outlook.
- Meeting Cancelled Email: When a meeting is cancelled, a cancellation email will be sent to the host.
- Registrants Confirmation Email: Registrants receive a confirmation email if the registration is auto approved or approved by the host
- Meeting Updated Notification Email: When the meeting details are updated, the alternative host(s), and the registrants will receive the updated invitation.
- Meeting Rescheduled Notification Email: Send a rescheduling email to meeting invitees
- Personal Audio Conference Schedule Email: Send Personal Audio Conference Schedule Email to invitees
- JBH Reminder Email: If meeting participants join before the host, the host will receive a notification email.
- Alternative Host Invitation Email: After the meeting is scheduled, the alternative host will receive this email.
- Alternative Host Cancellation Email: If the host removed the alternative host from a meeting, the alternative host will receive this email.
- Schedule Meeting for a Host: After scheduling a meeting for the host, a notification email will be sent.
- Update Meeting for a Host: After rescheduling a meeting for the host, send a notification email.
- Cancel Meeting for a Host: After canceling the host meeting, a notification email will be sent.
- Recording
- Cloud Recording Available Notification Email: When the cloud record is ready for watch, a notification email is sent to host.
- Auto Delete Cloud Recording Notification Email: A notification email will be sent to host 7 days before the cloud recording is permanently deleted from trash.
Note: You can use custom email variables in the template.
How to customize meeting invite email templates
You can also customize the meeting invite email templates at the account or group level.
- Sign in to the Zoom web portal.
- In the navigation menu, access account or group settings:
- Click the Meeting tab.
- In the Invitation Email Branding section, click Edit on the email template you want to update. Learn more about the schedule meeting email template.
- Click Apply Changes then Done.


