With a Zoom Node server, deploying and managing hybrid services can all be done from within the Zoom web portal. Unlike previous on-prem solutions, Zoom Node allows admins to deploy a server to handle multiple services.
How to prepare for Zoom Node and module deployment
Before deploying a Zoom Node management server and modules, ensure that the virtual machine can be deployed based on the system requirements for the desired modules below:
In the navigation menu, click Node Management then click Modules.
Click the drop-down button , and click the desired module type.
Click the Nodes tab.
Click Add Nodes.
Next to the desired image, click Download. Note: If deploying via VMWare, then utilize the OVA image. If deploying via KVM then utilize the qcow2 image.
(Optional) Set the time for the Code Expiration in minutes.
Click Generate Code.
Click Copy to copy the registration code and save it for use later.
Deploy the image within your environment.
How to deploy a Zoom Node virtual machine image
How to configure the Zoom Node virtual machine
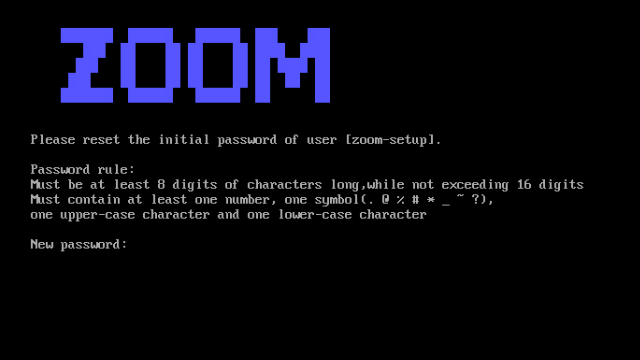
Creating a password for the setup user
Note: While the account used for configuration, named zoom-setup, is not required for the initial configuration, it is necessary for logging in during future use of the TUI (Text user interface) console.
Start up the Zoom Node VM in vCenter.
In the Zoom Node VM, create a new password for the zoom-setup user and save the password for future use in the TUI console. Note: Currently exclamation marks (!) and hyphens (-) are not supported for the password.
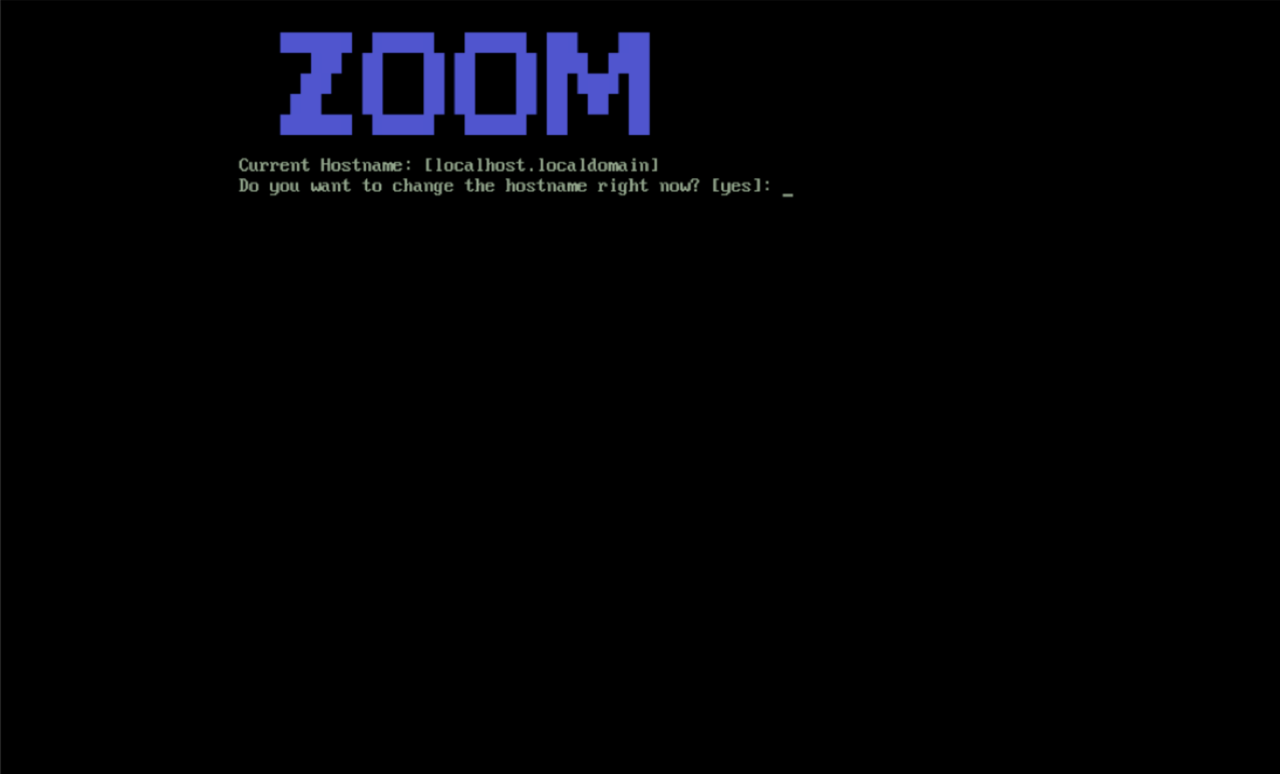
Once the password has been set, you will be prompted to modify the hostname for the server.
Type Yes and press the Enter key.
Enter the desired hostname and domain and press the Enter key.
Press the ESC key to continue the configuration.
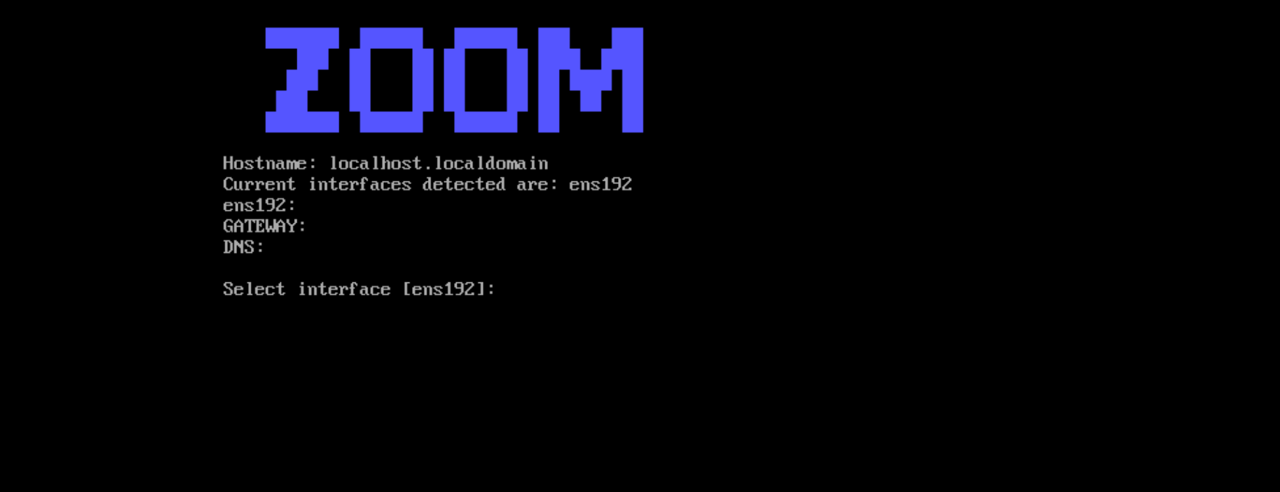
Configuring the network interfaces
In the network interface menu, press 1 to add a new IP address. The following menu will be displayed. Note: If using DHCP for the subnet that the Node management server is deployed on, Zoom Node will automatically acquire an address. This address will be listed directly below the network interface name, as well as the Gateway and DNS addresses.
Press 1 to add a Primary IP address.
Press the Enter key (or manually type the name of the network interface) to choose the network interface for configuration.
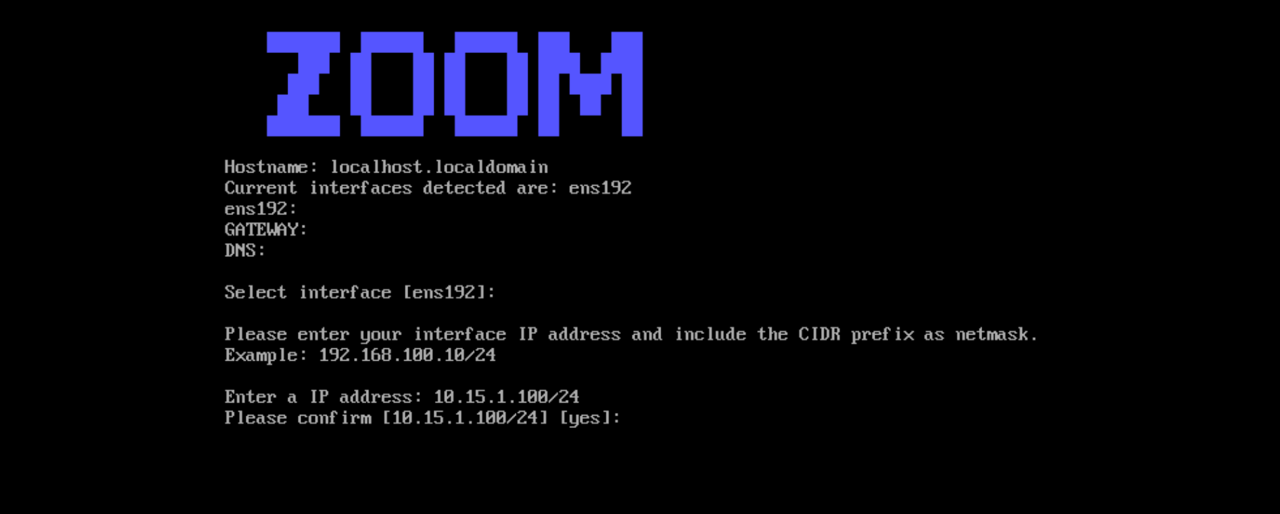
Enter the IP address and subnet mask using CDIR notation without spacing (ex. 192.168.1.100/24). Note: For more information on using CIDR notation, please refer to this table.
Press Enter to accept the new address.
When prompted for confirmation, type Yes and press Enter.
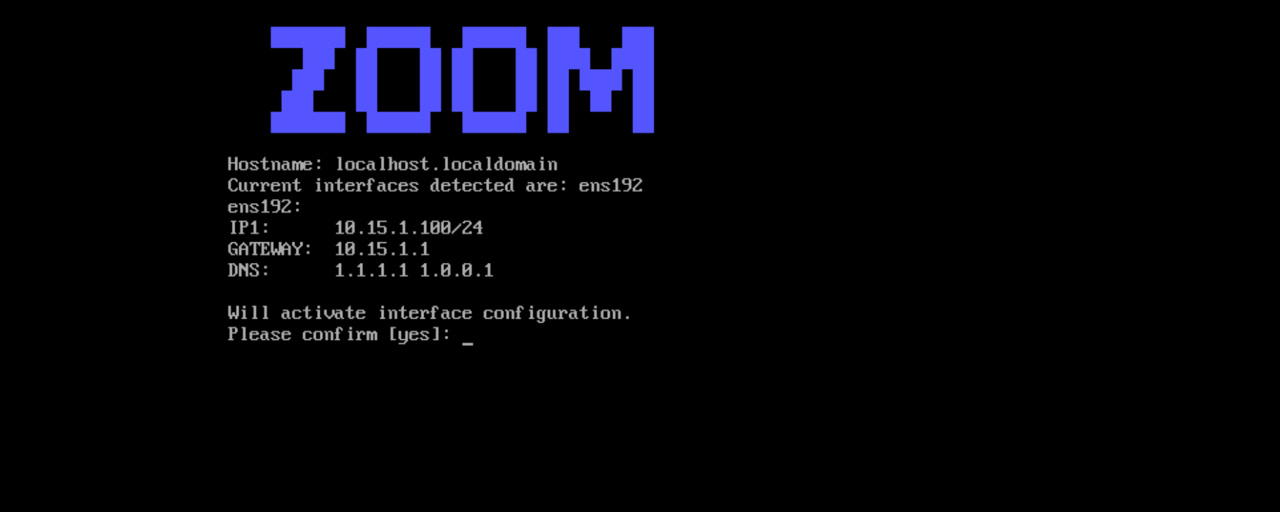
The new IP addresses will be listed with the rest of the network information.
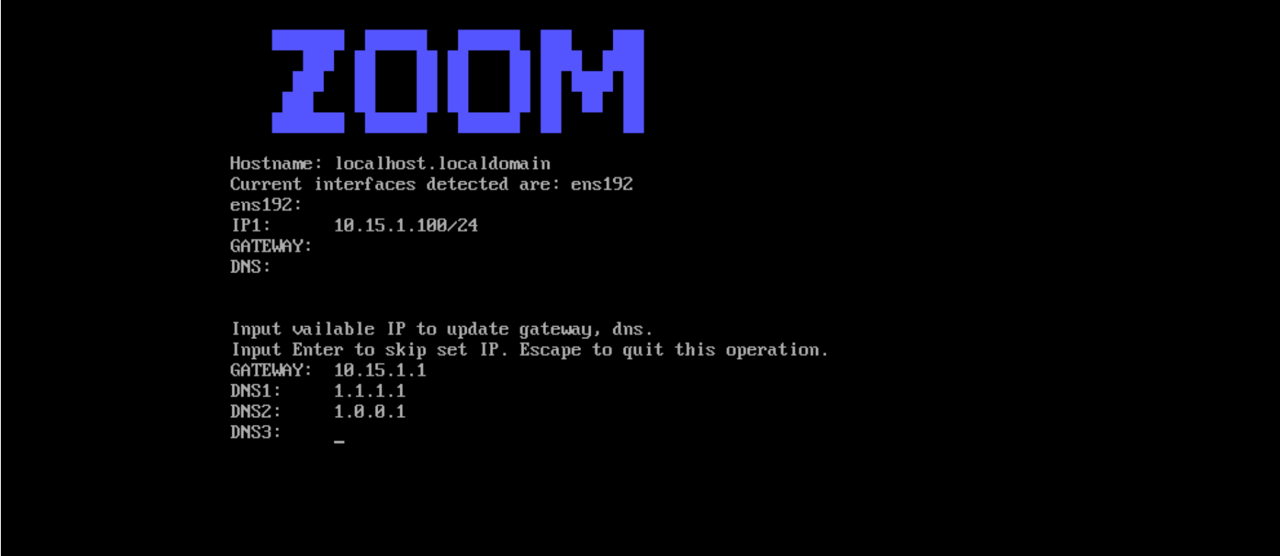
(Optional) Press 3 to update the DNS and gateway information. Note: This step is only optional if utilizing DHCP for the subnet the server is deployed on.
Enter the Gateway address and press Enter.
For DNS1, enter the primary DNS address and press Enter.
For DNS2, enter the secondary DNS address and press Enter.
(Optional) For DNS3, enter a third DNS address and press Enter. Note: If you don't have an additional DNS IP address, press Enter to skip adding additional
To activate the network interface, type Yes and press Enter.
Removing addresses set via DHCP
While this is not necessary for configuration, it is recommended to remove any addresses that were automatically assigned if DHCP was utilized and utilize static addresses only.
Under the network interface configuration menu, press 2.
Press the Enter key to modify the suggested interface, or type the name of the desired network interface and press Enter to modify it.
Type the IP address (in CDIR format), and press Enter.
Type YES to confirm you want to remove the address.
How to verify Node network connectivity
Once the network interfaces have been configured for the Zoom Node instance, network connectivity for the Node server should be tested to ensure proper function.
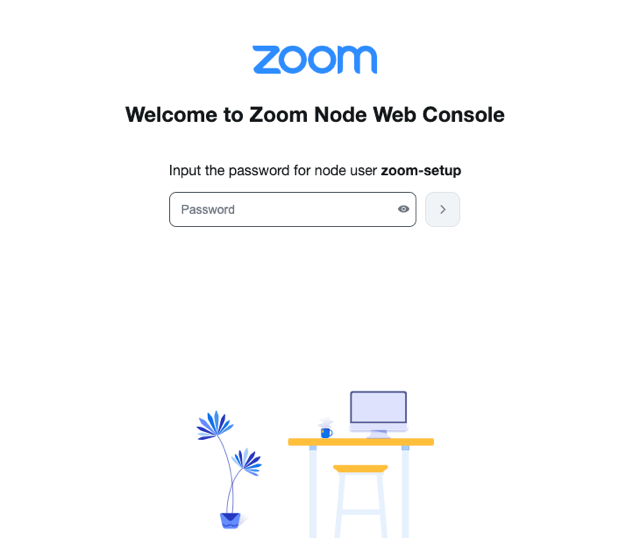
In your browser, navigate to the Zoom node web console at https://[IPaddress]:8443, with the IP address being the address configured in the previous steps. Note: If you receive a security warning, accept the warning and continue to the site.
Log in with the password created during the initial setup.
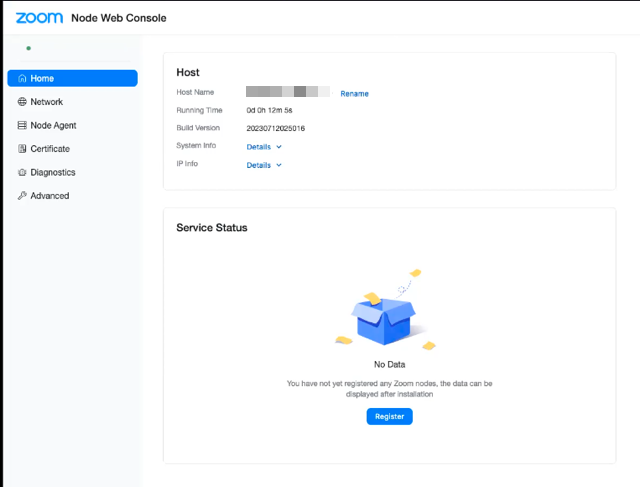
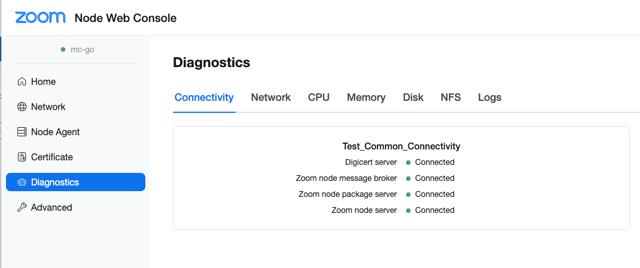
In the Node Web Console, click Diagnostics.
On the Connectivity tab, verify all connections are listed as Connected.
How to register a Zoom Node server
Once connectivity to the Zoom Cloud has been established and verified, the Zoom Node server is ready to be registered within the Zoom web portal.
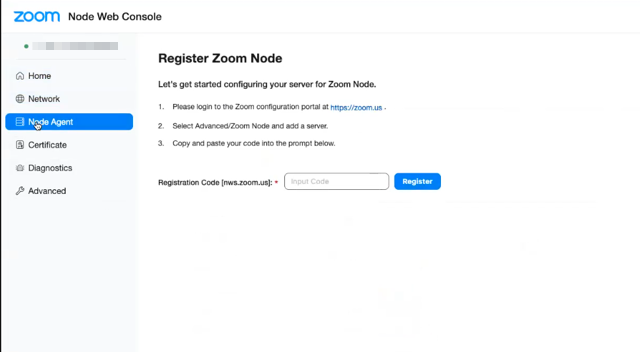
In the navigation panel, click Node Agent.
Enter the registration code saved in the previous steps, and click Register. Note: If the configuration of the Zoom Node server takes longer than the expiration time, then click Generate Code to create a new registration code. Once the agents have installed and registered, there will be a message that the installation was successful.
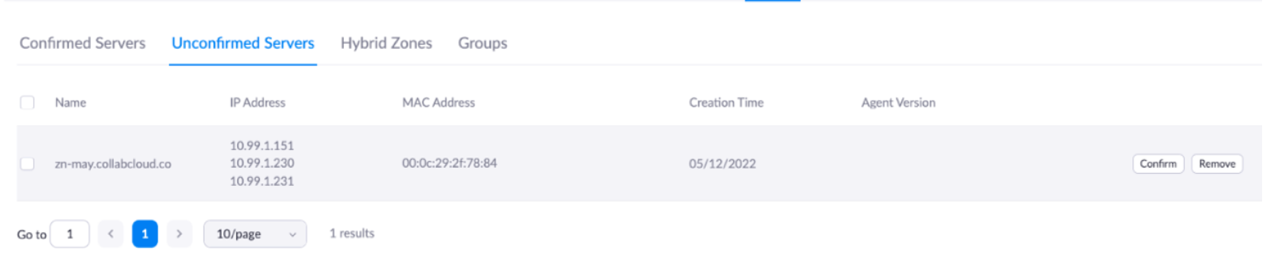
Return to the Zoom web portal, and under the Nodes tab, click Unconfirmed Nodes.
The newly added server will be listed under Unconfirmed Nodes.
Click Confirm to authorize and complete the server registration.
In the next window enter the following information:
Description: Description of the Node.
Location: The location of the server, which should be listed in a way to easily filter in the Nodes tab.
Click Confirm.
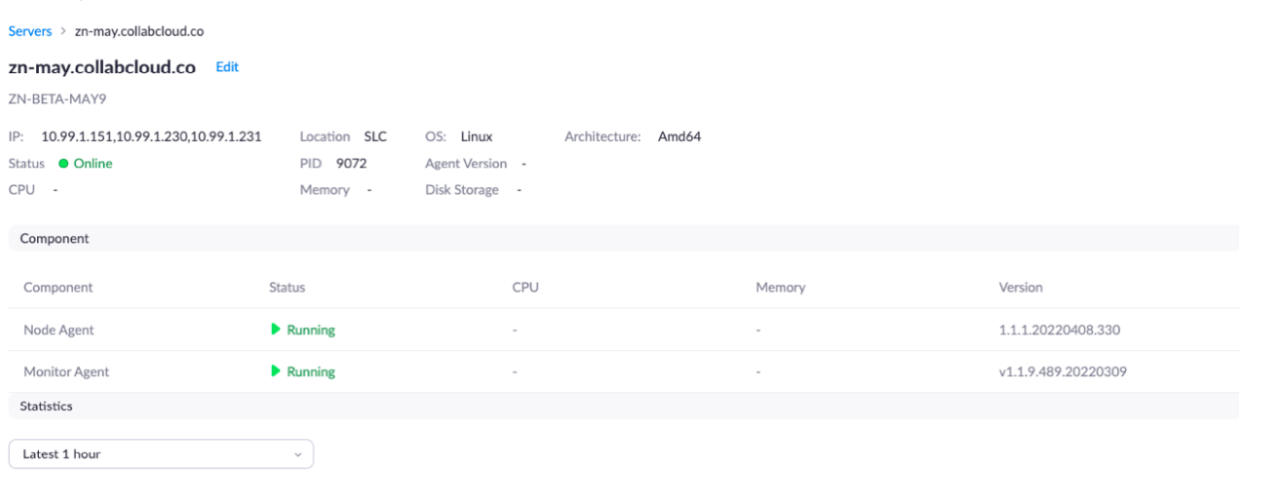
Click the Confirmed Nodes tab to view the registered server.
Click the name of the server to view the server’s properties. After 1-2 minutes, refresh the page to verify both the node and monitor agent are running. The Zoom Node server is now ready to deploy services and modules.
How to disable Zoom Node
If your organization decides to disable Zoom Node, any related settings for the Meeting Connector, the Zoom Hybrid Meeting Service, or Zoom Phone Local Survivability will need to be disabled at the account level, as well as any groups or users it was enabled for. Once the service(s) have been disabled, the VMs can be decommissioned and removed from the Zoom Web Portal.
In the navigation menu, click Node Management then click Modules.
Click the drop-down button , and click the desired module type.
Click Nodes, then click Confirmed Nodes.
Next to the desired Node, click Delete.
Verify the correct Node has been selected.
(Optional) Enable Delete nodeimmediately, if you want the Node VM to be dissociated from your account. Note: If this option is not enabled, then the Node will be deleted once the VM has gone into an idle state.
Click Delete. The Node server and associated modules will now be dissociated from your account.