Setting up Cisco Unified Communications Manager (CUCM) with Zoom
Configuring a SIP profile and trunk within your Cisco Unified Communications Manager (CUCM or CallManager) is recommended for H.323 or SIP devices connecting to Zoom meetings through the CUCM. This configuration allows for dual stream of content and optimizes meeting quality.
How to set up CISCO Unified Communications Manager with Zoom
SIP Trunk Security Profile Setup
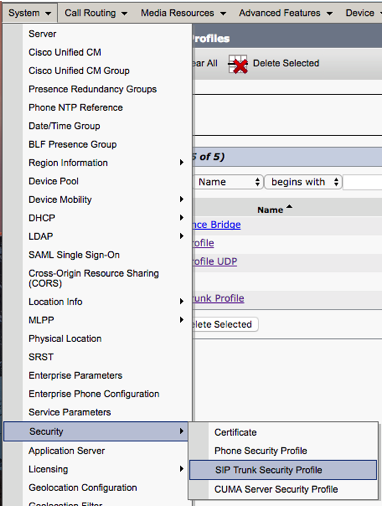
- In your Cisco Unified Communications Manager Administration, navigate to System > Security > SIP Trunk Security Profile.
- Click Add New.

- Configure the SIP Trunk Security Profile.
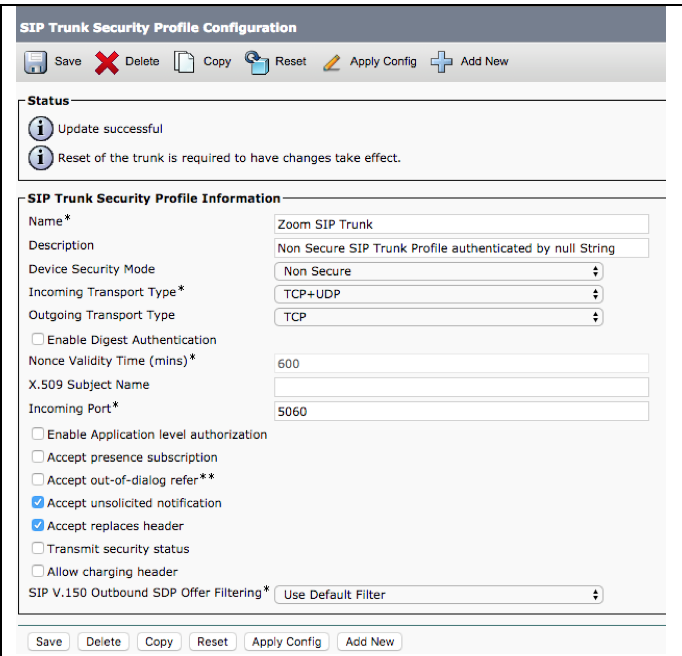
- Name: Zoom SIP Trunk
- Description: Zoom SIP Trunk
- Device Security Mode: None Secure
- Incoming Transport Type: TCP+UDP
- Outgoing Transport Type: TCP
- Incoming Port: 5060
- Check Accept unsolicited notification
- Check Accept replaces header
- Click Save.
Configuring SIP Profile
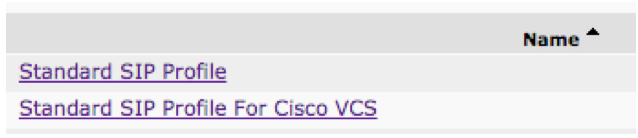
- In your Cisco Unified Communications Manager Administration, navigate to Device > Device Settings > SIP Profile.
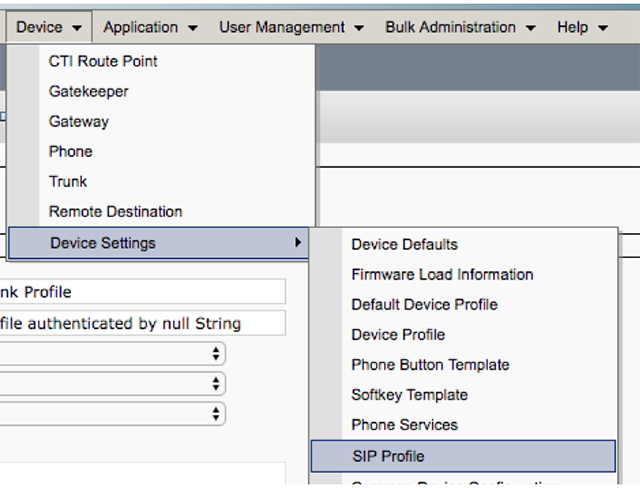
- Click Standard SIP Profile for Cisco VCS.
- Click Copy.
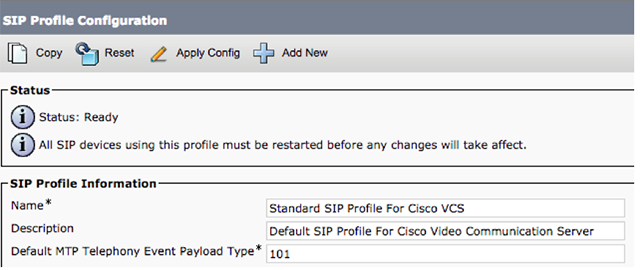
- Change the name to Zoom SIP Profile.
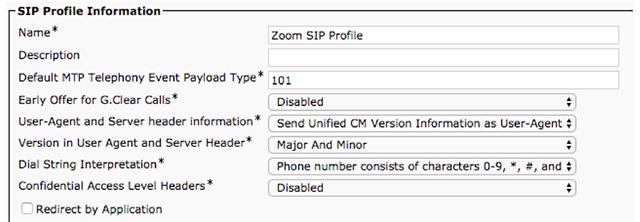
- For Early Offer support for voice and video calls, select Best Effort.

- Under SDP Information, check
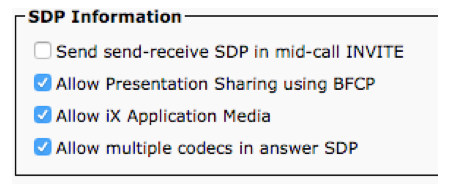
- Allow Presentation Sharing using BFCP
- Allow iX Application Media
- Allow multiple codecs in answer SDP
Creating SIP Trunk to VCS
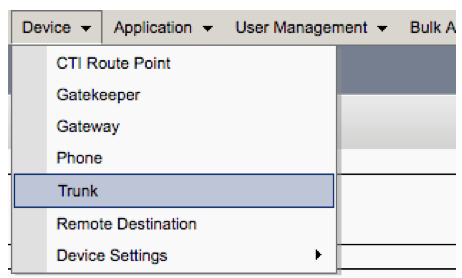
- In your Cisco Unified Communications Manager Administration, navigate to Device > Trunk.
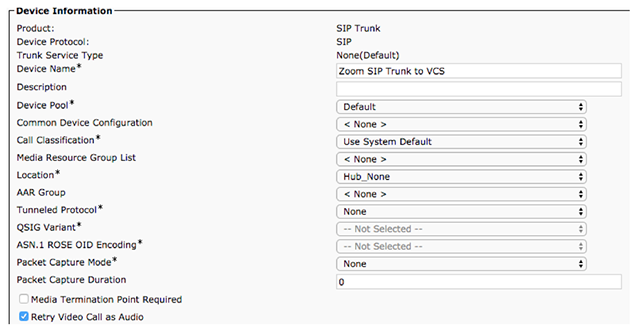
- Enter the Device Information and Device Pool based on your needs and configuration.
- For SIP Information, add the VCS Control or VCS Expressway C IP address and port.
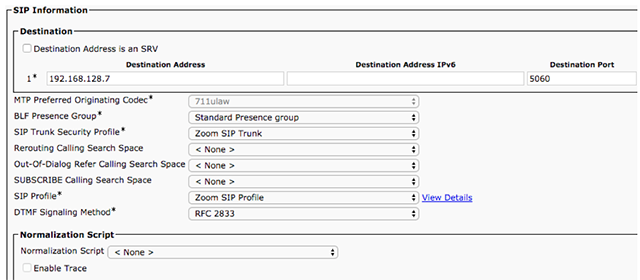
- For SIP Trunk Security Profile, enter the name that you entered in step 3 of the SIP Trunk Security Profile Setup above, Zoom SIP Trunk.
- For SIP Profile, enter the name that you entered in step 4 of Configuring SIP Profile, Zoom SIP Profile.
- Save and reset the trunk.
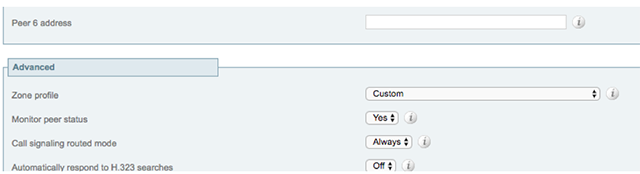
Neighbor Zone to CUCM Advanced Setting Verification
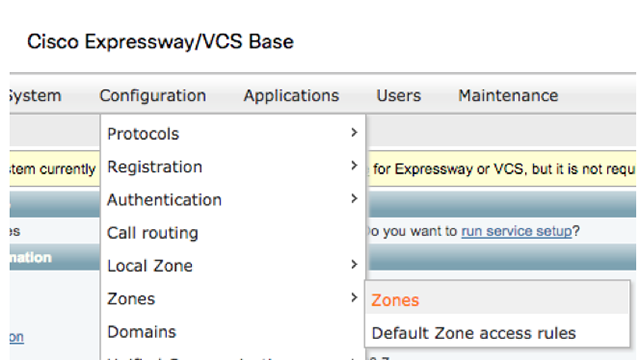
- In your Cisco Unified Communications Manager Administration, navigate to Configuration > Zones > Zones.
- Click CUCM Neighbor Zone.
- Confirm that ICE support is set to On.
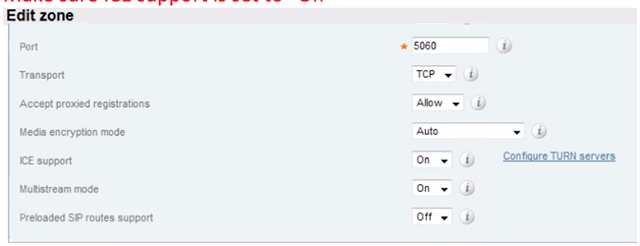
- Change Zone profile to Custom.
- Confirm that Call signaling routed mode is set to Always.