Enabling auto sign-in with a third party MDM
Devices that are enrolled in a third party MDM, or Zoom's Mobile Device Management service (ZDM), or can be assigned to a specific Zoom Room. After being assigned, the Zoom Rooms app will be installed and signed into automatically.
Requirements for enabling auto sign-in with a third party MDM
- Device enrolled in a Mobile Device Management program
- Zoom Rooms Controller for iOS global minimum version or higher
How to retrieve the activation code
- Sign in to the Zoom web portal.
- In the navigation panel, click Room Management then Zoom Rooms.
- Click + Add Room or locate the existing room in the rooms list.
- (Optional) If it is an existing room, click Edit.
- Find the Activation Code heading, then click Regenerate.
- Copy and save the Activation Code.
How to configure MDM
General configuration instructions
- Retrieve the Zoom Room Activation code.
- Copy the Activation Code.
- Push the the configuration through your Mobile Device Management program, including the following keys
- For Zoom Rooms Controllers or Scheduling Displays, push the following information:
- key "ActivationCode" and the activation code you generated as the value
- key "WorkMode" and the value “controller”, "scheduling display" or "zoom rooms" depending on what this device is used for
- For the Zoom Rooms computer, push the following information:
- key "ActivationCode" and the activation code you generated as the value
Configuring Auto-Sign in with AirWatch
- Retrieve the Zoom Room Activation code.
- Copy the Activation Code.
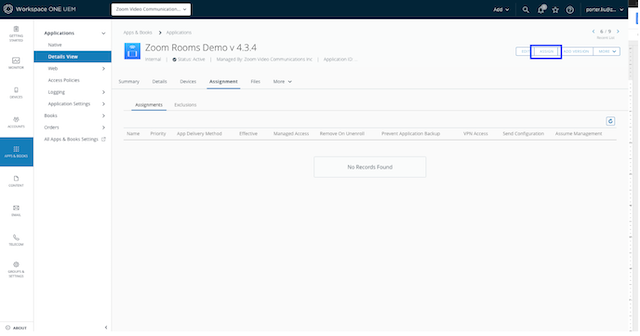
- In AirWatch, navigate to Apps & Books and choose Zoom Rooms.
- Open the Details View.
- Click Assign.
- Click Add Assignment.
- Select Assignment Groups.
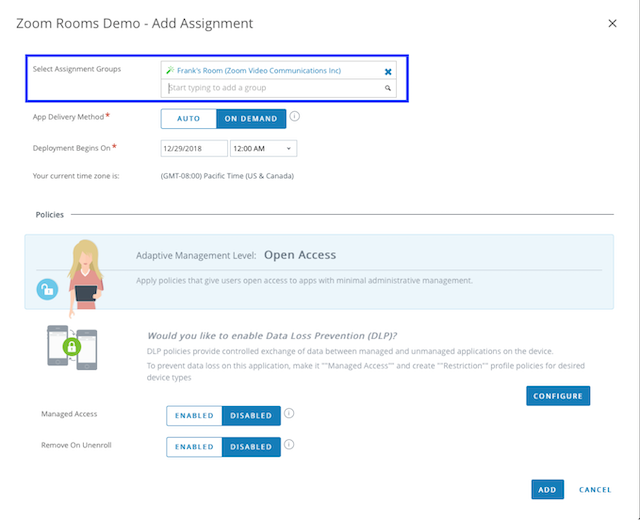
Note: Because AirWatch will push the configuration to all devices in the group and each iPad requires a unique Activation Code, each group should contain only one iPad. - Enable Application Configuration and enter the values as follows:
| Configuration Key | Value Type | Configuration Value |
| ActivationCode | String | Zoom Room Activation Code |
| WorkMode | String | "controller", "scheduling display" or "zoom rooms" |
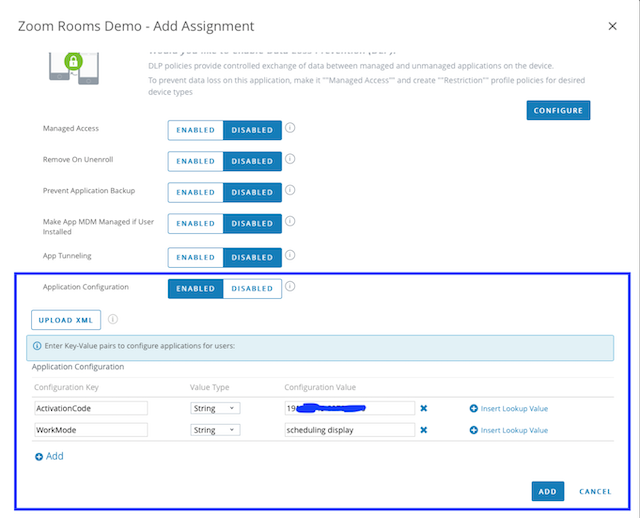
- Click Add.
- Click Save and Publish.
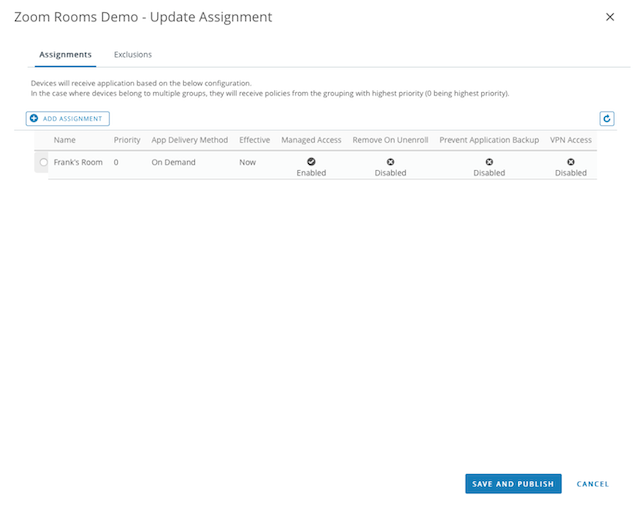
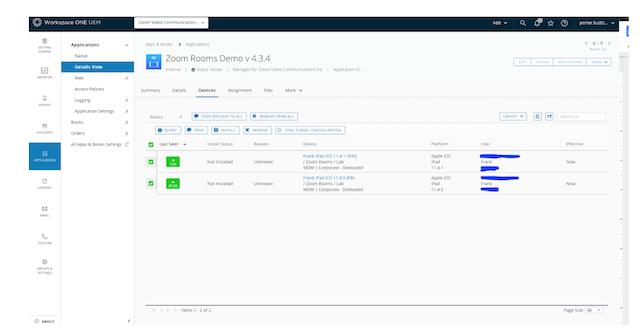
- On the App's Details View page, select the devices and click Install.
Configuring Auto Sign-in with Jamf
- Retrieve the Zoom Room Activation code.
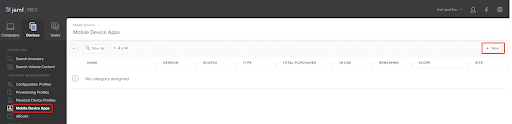
- Open Jamf, click Mobile Device Apps, then click New.
- Click App Store app or apps purchased in volume, then click Next.
- Enter zoom rooms in the Search field and click Next.
- Click Add. Locate the Distribution Method heading and select Install Automatically/Prompt Users to Install.
- Click Scope, select Specific Mobile Devices and Specific Users, then click Add.
- Select an iPad and click Add. Click Done.
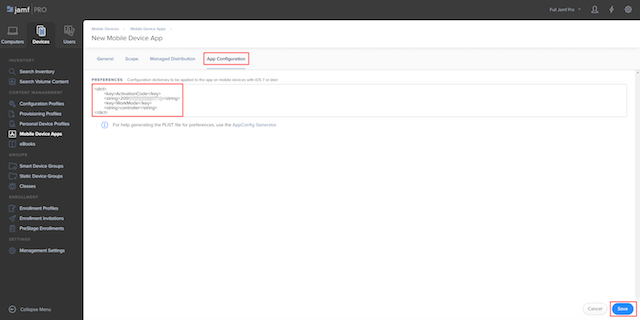
- Enter the information below on the App Configuration page:
 <dict>
       <key>ActivationCode</key>
       <string>xxxxxxxxxxxxxxxx</string>
       <key>WorkMode</key>
       <string>xxxxxx</string>
 </dict>
| Configuration Key | Configuration Value |
| ActivationCode | Zoom Room Activation Code |
| WorkMode | "controller", "scheduling display" or "zoom rooms" |
- Click Save, then click Done.
- Click Mobile Device Apps, observe that zoom rooms are listed.
Configuring in Intune
- Retrieve the Zoom Room Activation code.
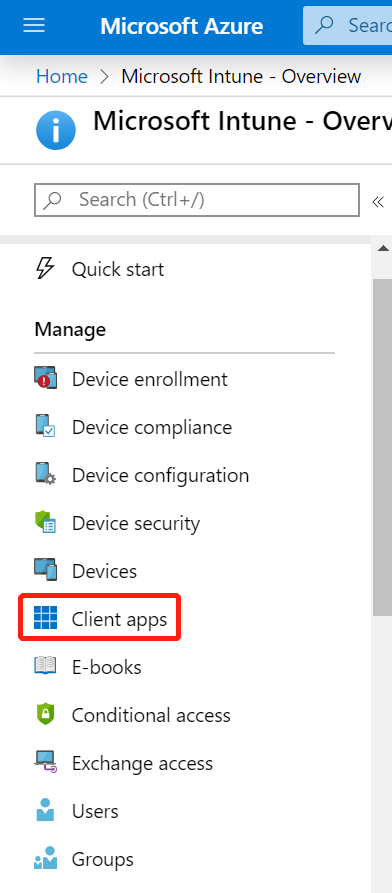
- Log in to Intune.
- Click Client apps.
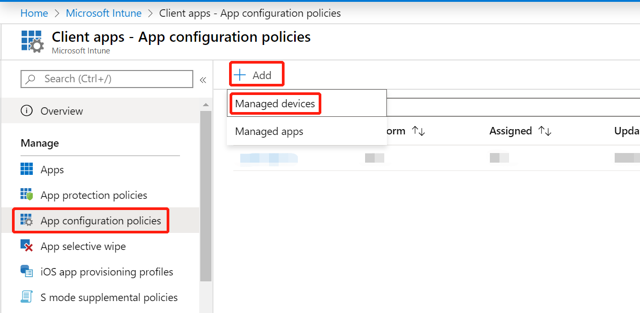
- In the navigation panel, click App configuration policies.
- Click Add and choose Managed Devices.
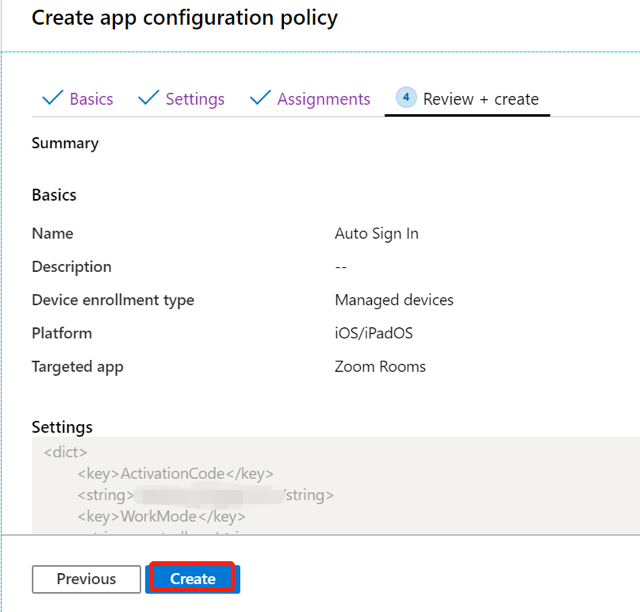
- In the Basics tab of the policy, fill out the following:
- Name- Enter the description of the policy
- Platform- iOS/iPadOS
- Targeted app- Zoom Rooms
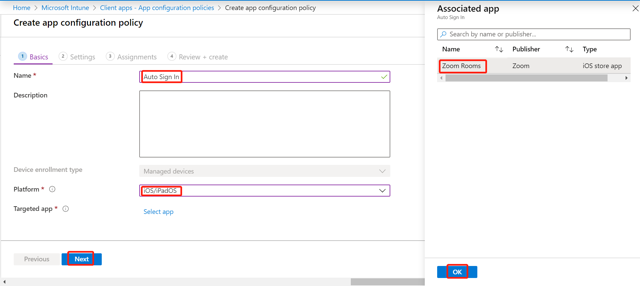
- Click Next.
- In the Settings tab, for Configuration settings format, select Enter XML data.
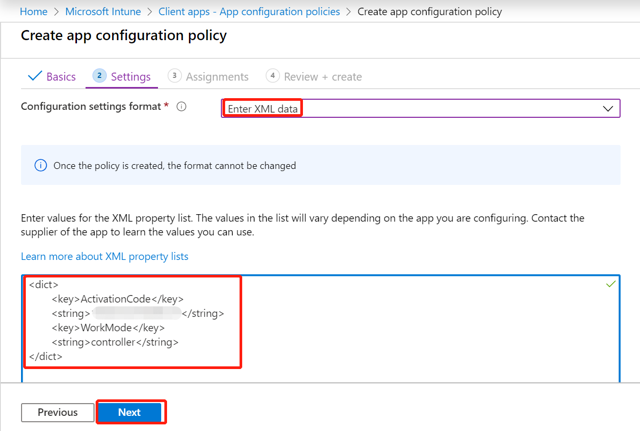
- In the XML property list box, enter the following:
<dict>
      <key>ActivationCode</key>
      <string>xxxxxxxxxxxxxxxx</string>
      <key>WorkMode</key>
      <string>xxxxxxx</string>
</dict>
| Configuration Key | Configuration Value |
| ActivationCode | Zoom Room Activation Code |
| WorkMode | "controller", "scheduling display" or "zoom rooms" |
- Click Next.
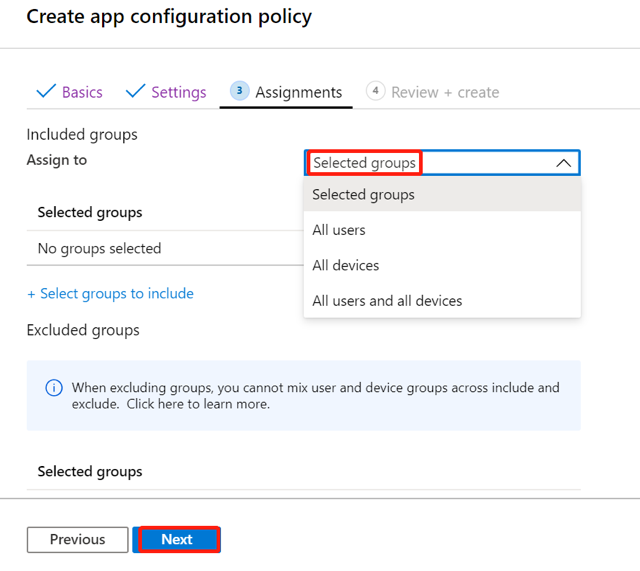
- In the Assignments tab, for Assign to, select the scope of the deployment.
- In the Review + create tab, click Create.