Using the new groups and settings management experience
In the
new groups and settings management experience, Zoom is introducing a better way to manage Groups and Settings by allowing admins to choose which products and settings to associate with a group or deciding to create a group with no setting association at all. In addition, groups can now be ranked in priority order so that admins can easily understand which settings will be applied to users in multiple groups. This priority assignment method replaces the previous method based on a combination of using locked settings, primary groups, and group assignment order used to determine how settings were applied to end-users. Primary groups will still be used for Info Barriers, but no longer for settings prioritization.
Notes:
- New accounts ( signed up after January 10, 2026 ) will default to the new groups and settings management experience.
- Existing accounts with 0 or 1 group are automatically updated to the new groups management experience.
- For existing accounts with 2 or more groups, learn more about how to migrate to the new groups and settings management experience by referring to the steps below.
Requirements for using the new groups and settings management experience
How to migrate to the new groups and settings management experience
To start migrating to the new Groups and Settings experience, account owners and admins are provided with a 4 step migration process.
Note: During the migration steps, you can quit and stay on the original experience at any time by selecting Quit migration. If you're satisfied with the migration test results and select Confirm and update in the final step, the update to new groups is permanent and you cannot revert to the original experience.
- Sign in to the Zoom web portal as an admin with the privilege to edit account settings.
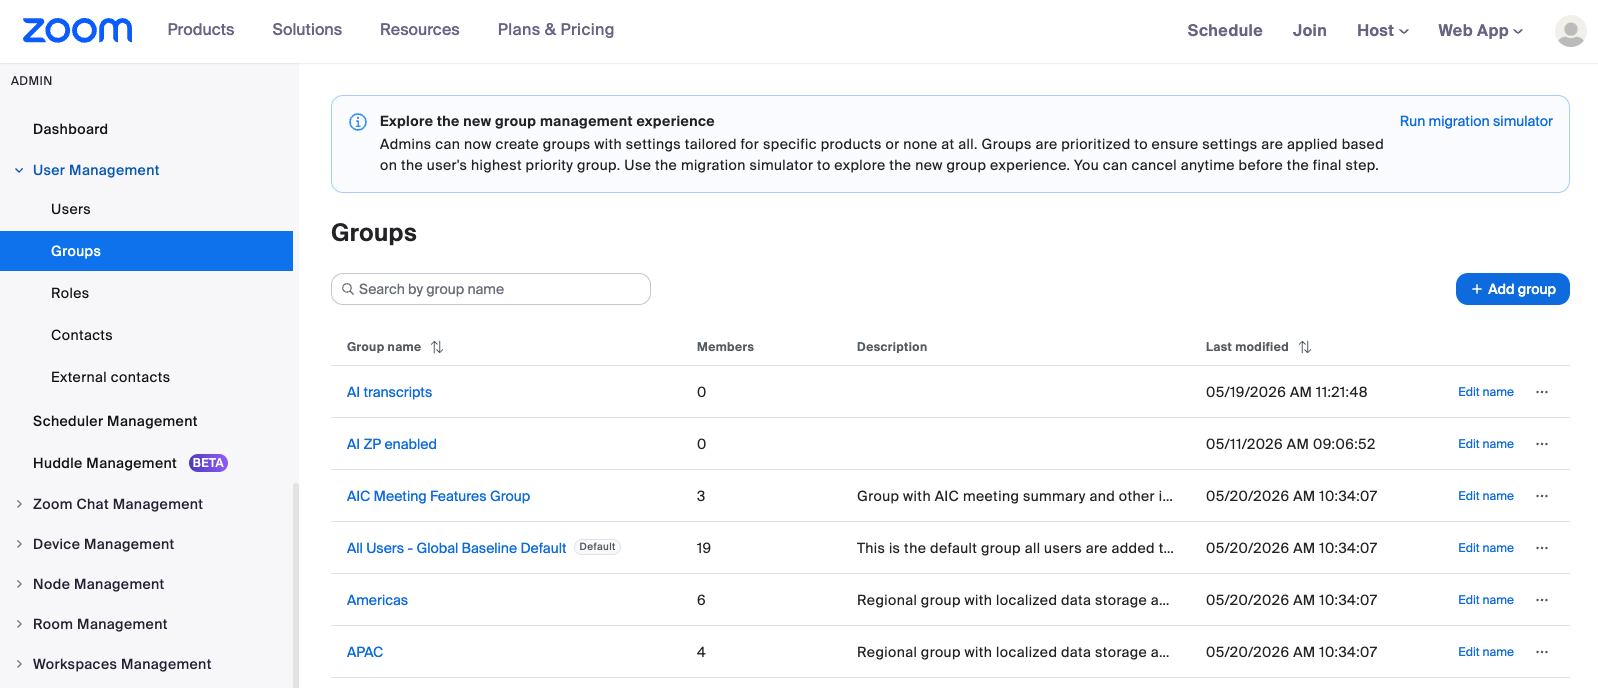
- In the navigation menu, click User Management then Groups.
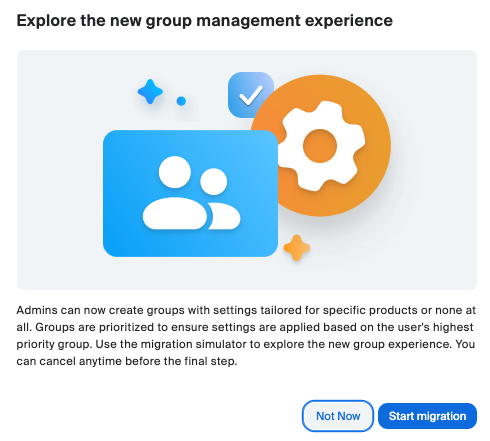
A pop-up window will appear prompting you to start migration to the new groups and settings management or you may see the welcome banner on the Group List page.
Click on Start migration in the pop-up or Run migration simulator in the banner.
-
Follow the 4-step wizard to complete the migration.
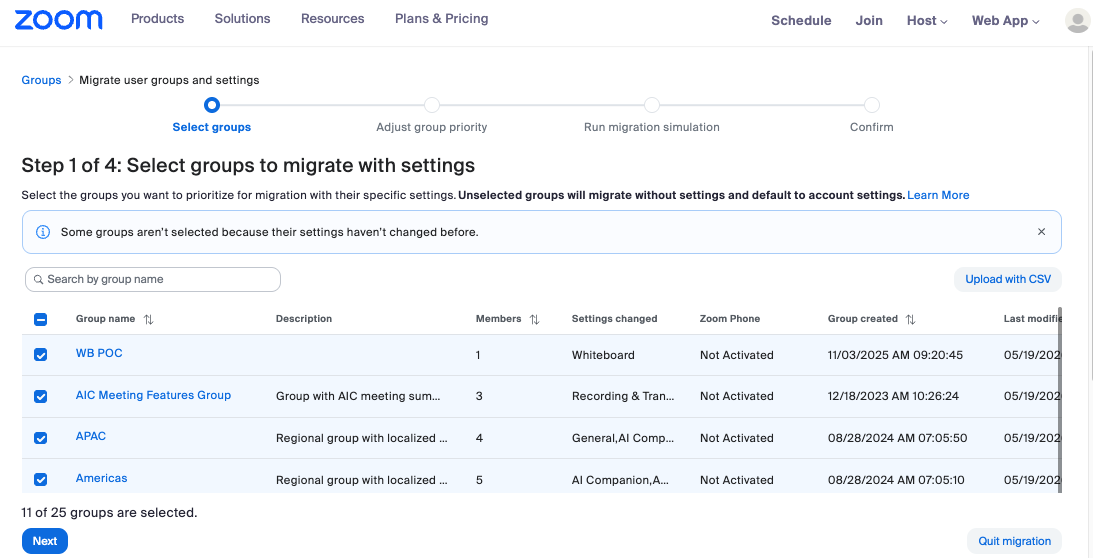
- Select group to migrate with settings: Select the checkboxes of the groups you wish to migrate along with their specific settings.
- (Optional) Click Upload with CSV to use a CSV file for the group migration. This is the advanced option for more complex scenarios.
- Click Next.
Notes:
- By default, a group with the fewest members will have higher priority than others, groups that have no settings changed compared to account settings won't be selected.
- All unselected groups will be migrated without settings and will default to the account settings once the migration is complete.
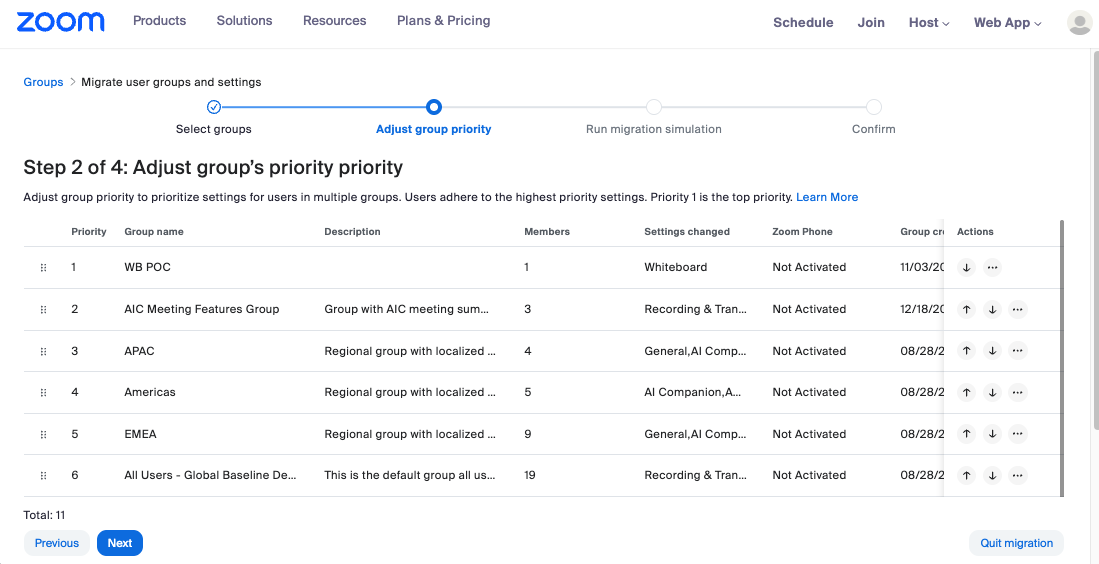
- Adjust group's priority order: To adjust the group's priority order, click the arrow up
 , arrow down
 , or the ellipsis icon
  .
.
Notes:
- This step allows you to change the order of groups to determine their setting’s priority for users across multiple groups.
- Admins do not need to worry about the order if no user is in multiple groups, as there will be no conflicts in this scenario.
- The priority is set at the group level and it is applied at a product level. It is applicable only when the same user is in multiple groups with conflicting settings. For example, group A is for managing Meeting settings and group B is for managing Chat settings. If group A is set as order 1 (P1) and group B as order 2 (P2), there is no conflict to manage.
- By default, groups are prioritized based on member count, with the least users at the top. Assign a lower number, such as 1, to signify the highest priority group for settings application.
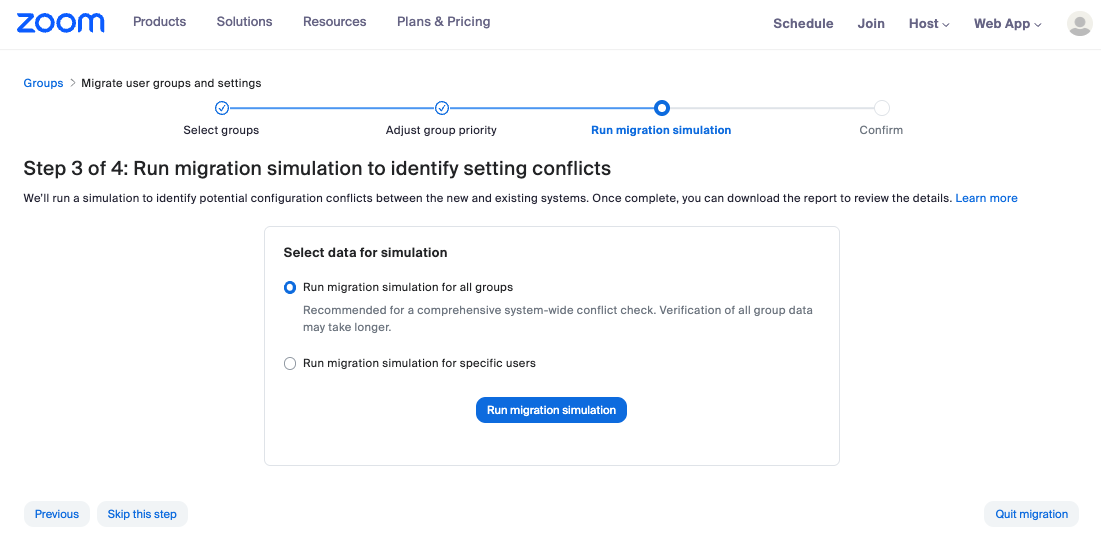
- Run migration simulation to identify setting conflicts: Running migration simulation allows you to identify potential configuration conflicts between the new and existing configurations.
- Choose between Run migration simulation for all groups or Run migration simulation for specific users then click Run migration simulation.
- (Optional) Click Skip this step.
- Click Continue.
Notes:
- Depending on the size of your organization, this report may take a few minutes or several hours to complete.
- If conflicts are found, you will be prompted to download the group settings’ CSV files and make the necessary adjustments before you can proceed. There are 2 files available. The primary file is the conflict report. The secondary file captures your group priority order used for the migration simulation for reference.
- The conflict report contains details to help you identify changes to help you decide whether any adjustments should be made to your existing groups, the priority order defined, or to make any post migration adjustments such as removal/decoupling of product settings from groups that do not need to continue to include those settings (this is a very common post migration task to take advantage of the new group settings experience). Using spreadsheets or pivot tables may help with analysis of large conflict reports to summarize results by Group or Settings. Often, a discovered conflict in one group or setting may generate 100's or 1000's of rows if it impacts lots of users, but can be resolved with a single change.
- Visit our Zoom Technical Library for more details on migration in the New Groups explainer document.
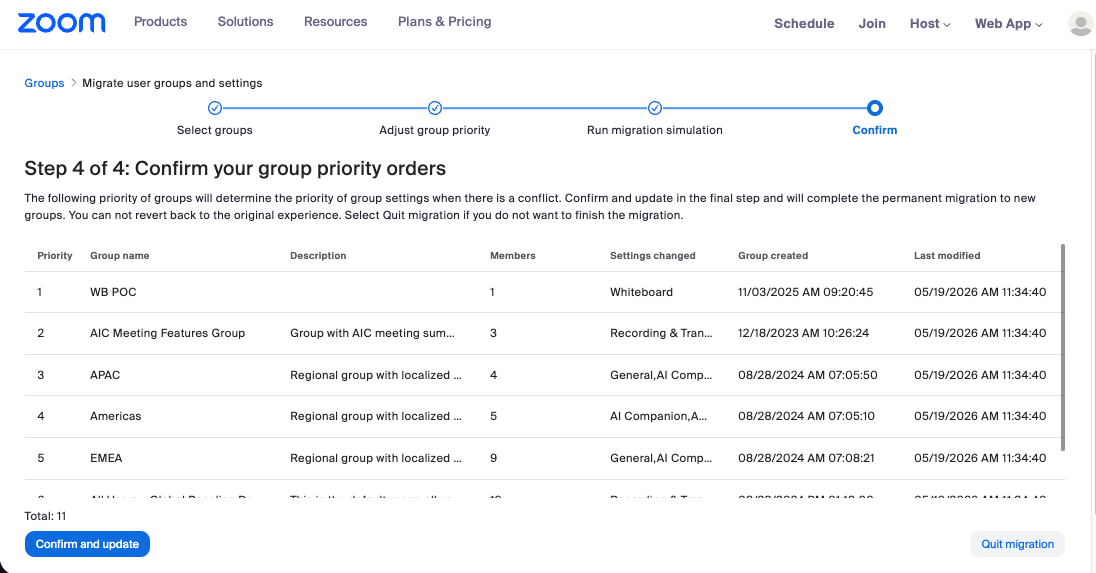
- Confirm your group priority orders: You will be able to do one final review of the group priority order that will be used for settings prioritization.
Notes:
- You cannot revert your account back to the old experience once it is switched to the new version.
- Once switched, the user's primary group will remain unchanged. However, the user's primary group will not be used for deciding the user's feature setting value. Instead, the user's setting value will be determined by the priority value of the groups in which the user belongs and to which any product settings are assigned.
- Locking/unlocking settings are still supported. However, it won't impact the setting calculation when determining which group will take precedence. Instead, the user's setting will be purely decided by the priority of the groups if a user is in multiple groups.
How to manage user groups and settings
Adding a new group
Groups allow you to turn settings on or off for a group of users in your account. You can also use groups to organize users in the Contacts tab in the Zoom desktop app and mobile app.
- Sign in to the Zoom web portal.
- In the navigation menu, click User Management then Groups.
- Click Add Group.
- Enter a name and description for the new group.
- (Optional) Select the Enable product settings checkbox.
Note: After enabling this option, you can choose to apply some specific products to the group and configure settings for group members. - Click Add.
This group will now show up in your groups list. - In the Choose group settings window, select the products or settings you want customized for this group. Some product settings areas support additional granularity controls. Those are listed in the following optional steps.
- Click Save.
- To apply granular setting controls, click Edit product settings or Edit product list from the group detail page.
- (Optional) Click AI Companion to expand and configure the individual settings for AI Companion such as:
- General
- Data sources
- Meeting
- Recording
- Clips
- Chat
- Whiteboard
- Mail & Calendar
- Hub
- Docs
- Tasks
- Custom AI Companion
- (Optional) Click General to expand and configure the individual settings that cover the following:
- Security
- System Updates
- Profile and Contacts
- Smart recognition
- Data & Storage
- Other
- (Optional) Click Meeting to expand and configure the individual settings for Zoom meetings such as:
- General
- Security
- Schedule Meeting
- In Meeting (Basic)
- In Meeting (Advanced)
- Invitation Email Branding
- Email Notification
- Other
- (Optional) Click Recording & Transcript to expand and configure the individual settings for recording and transcripts such as:
- General
- Share
- Access
- Notification
- Data retention
- Integration
- (Optional) Click Webinars to expand and configure the individual settings for webinar such as:
- Security
- Schedule Webinar
- In Webinar
- Branding
- Emails
- Registrations
- (Optional) Click Audio Conferencing to expand and configure the individual settings audio conferencing such as:
- Toll call
- Choose where most of the participants call into or call from the meeting
- 3rd Party Audio
- Mask phone number in the participant list
- Global Dial-in Countries/Regions
- Click Save.
Adding a group admin
You can set group admins to manage the members and settings for that group. The group admin can also see if the group they manage is set as the primary group for users within the group. The group admin does not need to be an account admin or have role permissions to edit user groups.
To a new group
- After adding a new group, click Add admins.
A pop-up window will appear. - Enter one or more names or email addresses of users that you would like to set as group admins.
- Click Add.
To an existing group
- Sign in to the Zoom web portal.
- In the navigation menu, click User Management then Groups.
- Click the name of the group you would like to set admins for.
- Click Add admins.
- Enter one or more names or email addresses of users that you would like to set as group admins.
- Click Add.
Adding members to a group
To a new group
- After adding a new group, click Add Members.
- Enter one or more names or email addresses of users that you would like to add to the group
- Click Add.
To an existing group
- Sign in to the Zoom web portal.
- In the navigation menu, click User Management then Groups.
- Click the name of the group you would like to add members to.
- Click + Add Members.
- Enter one or more names or email addresses of users that you would like to set as group admins.
- Click Add.
Removing members from a group
- Sign in to the Zoom web portal.
- In the navigation menu, click User Management then Groups.
- Click the name of the group you would like to remove members from.
- Select the check box next to the user you wish to remove then click Remove or click the trash bin icon
 corresponding to that user.
 - (Optional) Alternatively, click Move to Another Group to instead send them to another existing group.
Setting a user's primary group
Once switched to the new groups and settings experience, the user's primary group will remain unchanged. However, the user's primary group will not be used for deciding the user's feature setting value. Instead, the user's setting value will be determined by the order priority value of the groups in which the user belongs and to which any product settings are assigned.
Primary group is still applicable to Information Barriers policies.
- Sign in to the Zoom web portal.
- In the navigation menu, click User Management then Groups.
- Click the name of the group the user is a member of.
- Click the three dots that correspond to the user you wish to set the primary group for.
- Click Set as Primary Group.
Note: The Primary Group defines the user's default settings. - Click Save.