Configuring occupied status for a specific Zoom Contact Center agent
Occupied rules determine when an agent becomes unavailable to receive new engagements. Admins can define custom logic that combines one or more channels to trigger the
Occupied status. This allows admins to manage agent workloads and ensure capacity reflects actual activity across channels.
By configuring occupied rules, admins can create channel combinations that align with business needs and allow agents to handle messaging or email while on voice calls, or become occupied only when multiple channels reach specific thresholds.
Requirements for configuring occupied status for a specific Zoom Contact Center agent
- Account owner or admin privileges
- Pro, Business, or Education account
- Zoom Contact Center license
How to configure occupied status for a specific Zoom Contact Center agent
- Sign in to the Zoom web portal.
- In the navigation menu, click Contact Center Management then Users.
- Click the display name of the user you want to edit.
- In the Channel Settings section, under Occupied rule, set the rules that trigger the Occupied status.
- When triggered, this status overrides all capacity settings above.
- The agent will not be routed new engagements from any channel due to lack of capacity.
Configure occupied status for a single channel
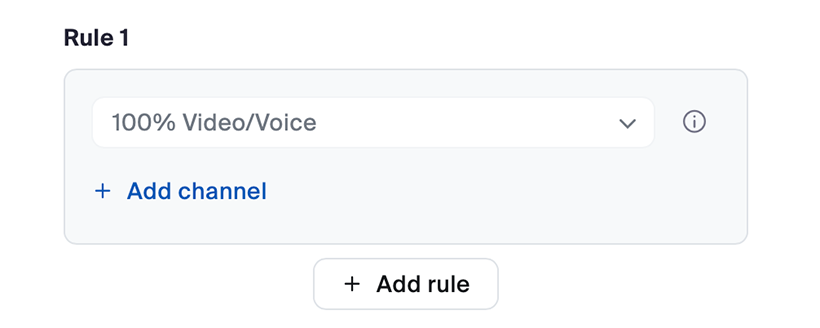
For Rule 1:
- Use the channel dropdown to pick a channel (for example, Video/Voice).
- Set the percent threshold for that channel (for example, 100% Video/Voice).
This means the agent becomes
Occupied when handling one voice/video call.
By default all accounts have voice/video as single channel occupied rule.
Configure occupied status for multiple channels independently
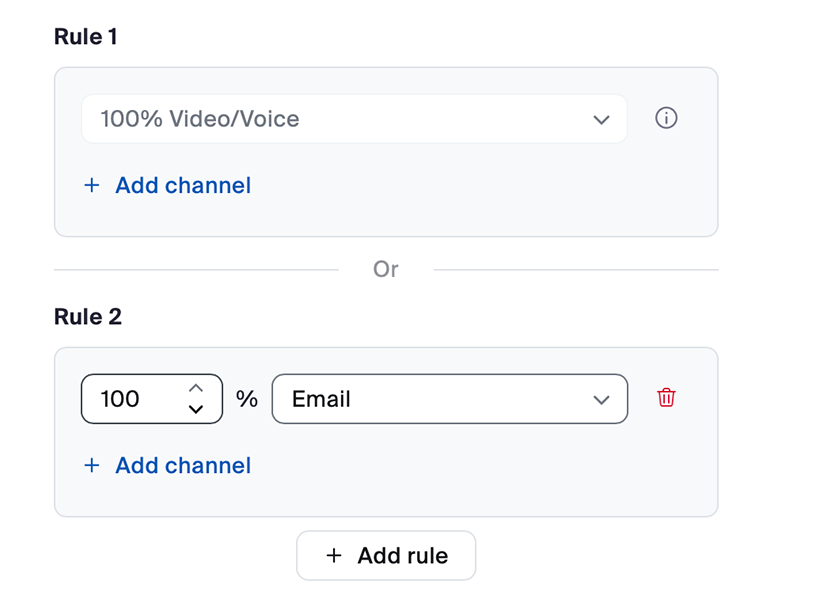
- Under Rule 1, click Add rule to add your second Occupied rule (this creates Rule 2).
- Use the channel dropdown to pick a channel (for example, Email).
- Set the percent threshold for that channel (for example, 100% Email).
- Click Add rule again to create additional rules for other channels as needed.
This means:
Rule 1: Agent becomes
Occupied when handling one voice/video call; or
Rule 2: Agent becomes
Occupied when the email channel load reaches 100%.
Configure occupied status for a combination of multiple channels
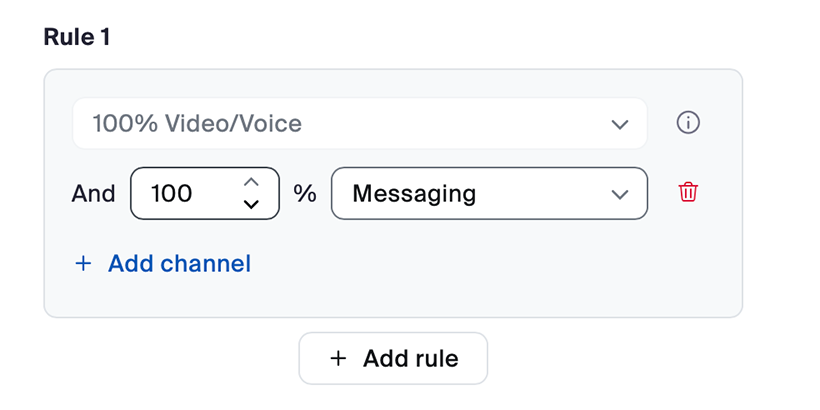
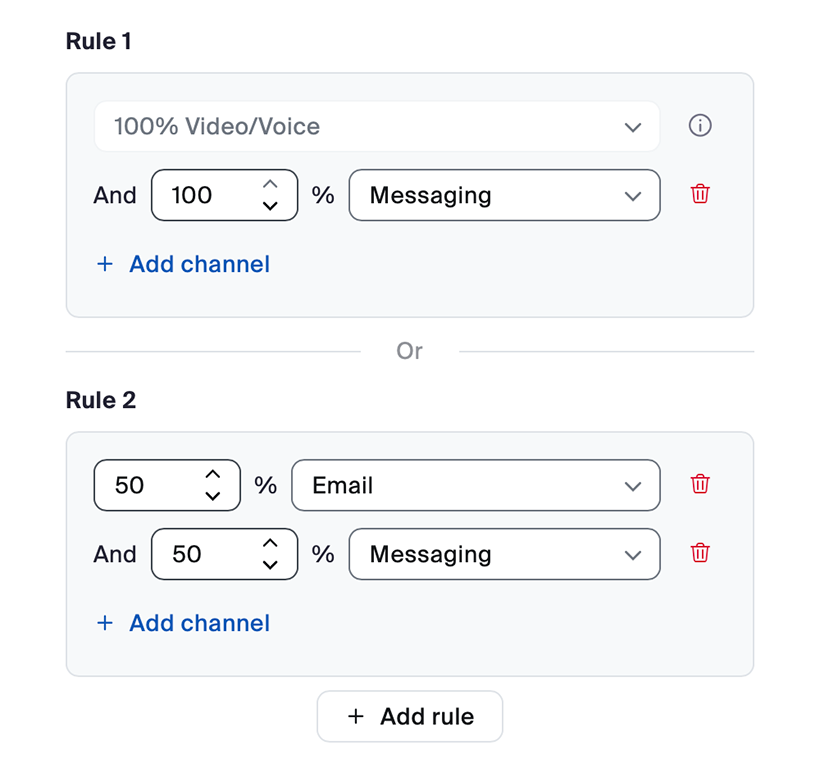
- Within Rule 1, click Add channel to include another channel to the same rule (for example, Messaging).
- Set the threshold for that channel (for example, 100% Messaging).
- Click Add rule to add your second Occupied rule (this creates Rule 2).
- Use the channel dropdown to pick a channel (for example, Email).
- Set the threshold for that channel (for example, 50% Email).
- Click Add channel to include another channel to the same rule(for example, Messaging).
- Set the threshold for that channel to the same rule (for example, 50% Messaging).
This means the agent becomes
Occupied when handling:
- One voice/video call and 100% messaging channel load, or
- 50% email and 100% messaging channel load.
Example
If an agent needs to be able to accept messaging engagements while on voice/video,
the admin can set up a user-specific occupied rule that includes both voice/video and messaging channels.
- When the agent accepts a messaging engagement first, they will remain in READY status until they accept a voice/video engagement.
- Once they accept the voice/video engagement, their status will automatically switch to Occupied.
- When the agent accepts a voice/video engagement first, they will also remain in READY status until they accept one or more messaging engagements.
- Once they reach the maximum limit of messaging engagements, their status will automatically switch to Occupied.