| Field | Description |
|---|---|
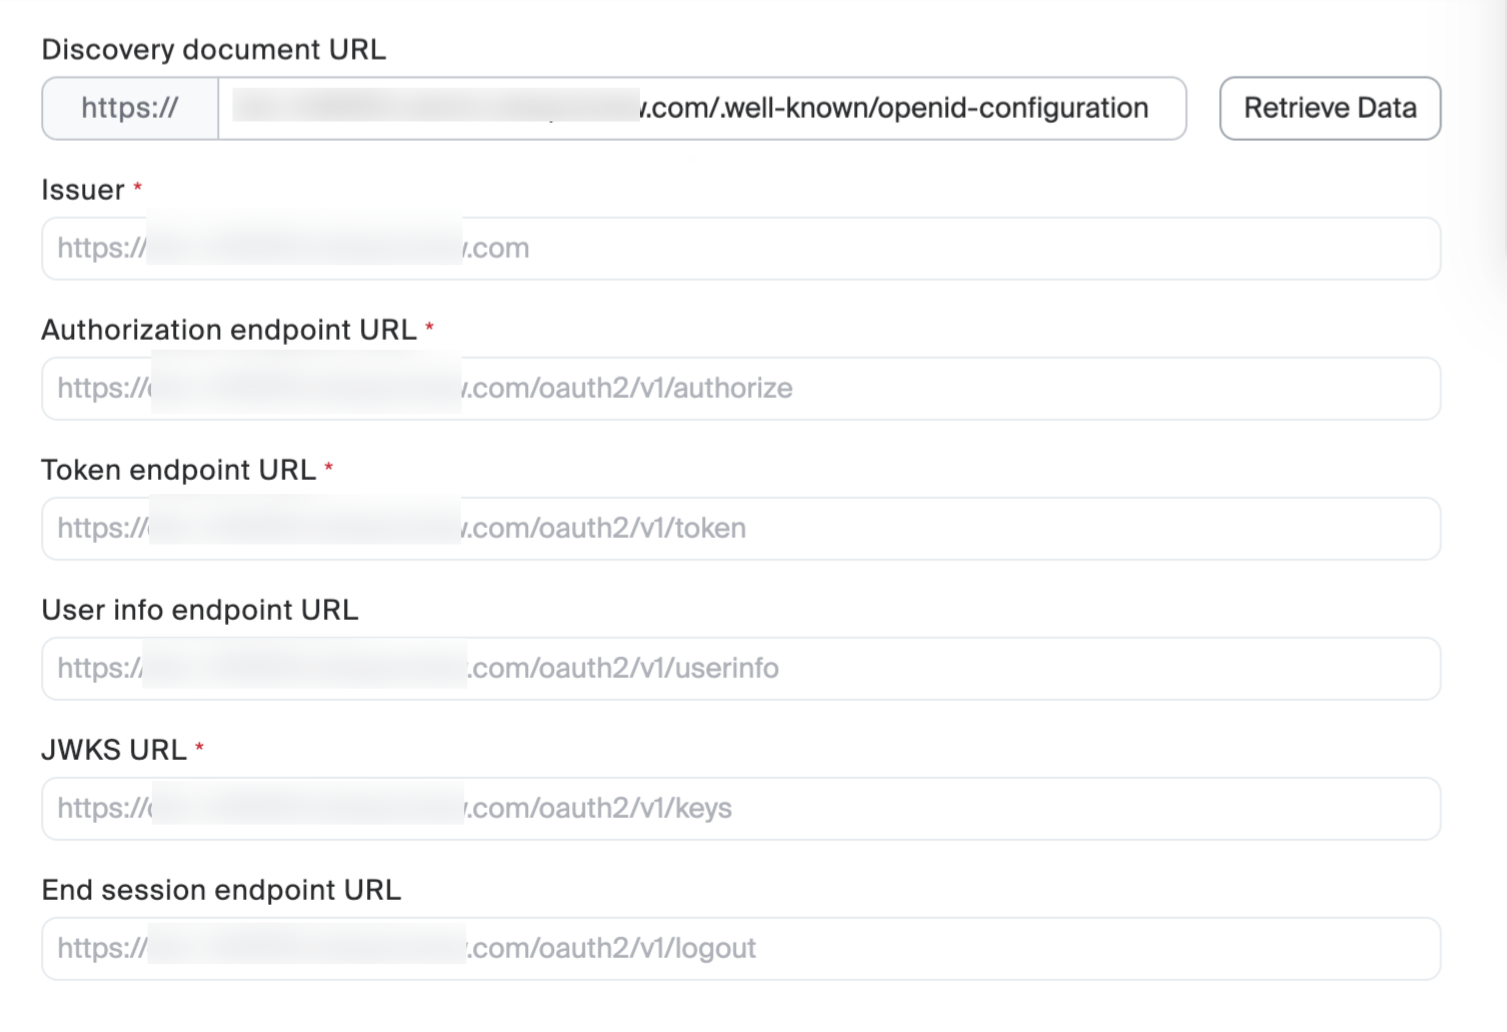
| Issuer * | The issuer identifier of your Identity Provider |
| Authorization endpoint URL * |
The authorization endpoint URL |
| Token endpoint URL * | The token endpoint URL |
| User info endpoint URL | The user info endpoint URL (optional) |
| JWKS URL * | The JSON Web Key Set URL |
| End session endpoint URL | The logout endpoint URL (optional) |
Obtain OIDC Configuration Information
You can configure OIDC endpoints using one of the following methods:
-
Auto-Discovery (Recommended)
- Enter your OIDC discovery document URL in the Discovery document URL field.
(e.g., https://your-idp.com/.well-known/openid-configuration ) - Click the Retrieve Data button.
The system will automatically populate the endpoint information
-
Manual Configuration
Manually fill in the following required fields (marked with *):
- Enter your OIDC discovery document URL in the Discovery document URL field.
Configure Client Credentials
- Enter the Client ID obtained from your Identity Provider.
- Enter the corresponding Client secret.
Configure OAuth Scopes
Register Callback URLs with Your Identity Provider
Copy the following URLs and add them to your Identity Provider configuration:- Callback URL: Used for SSO login callback
- Post-logout redirect URL: Used for post-logout redirection
Tip: Click the Copy button next to each field to quickly copy the URL.
Configure User Provisioning
Select the user creation method from the Provision User dropdown.| Option | Description |
|---|---|
|
At Sign-In (Default)
|
User accounts are automatically created when users first sign in via SSO
|
|
Pre-provision
|
User accounts must be created in Zoom before SSO sign-in
|
Save Configuration
After completing all the configurations, click the Save button at the bottom of the page.